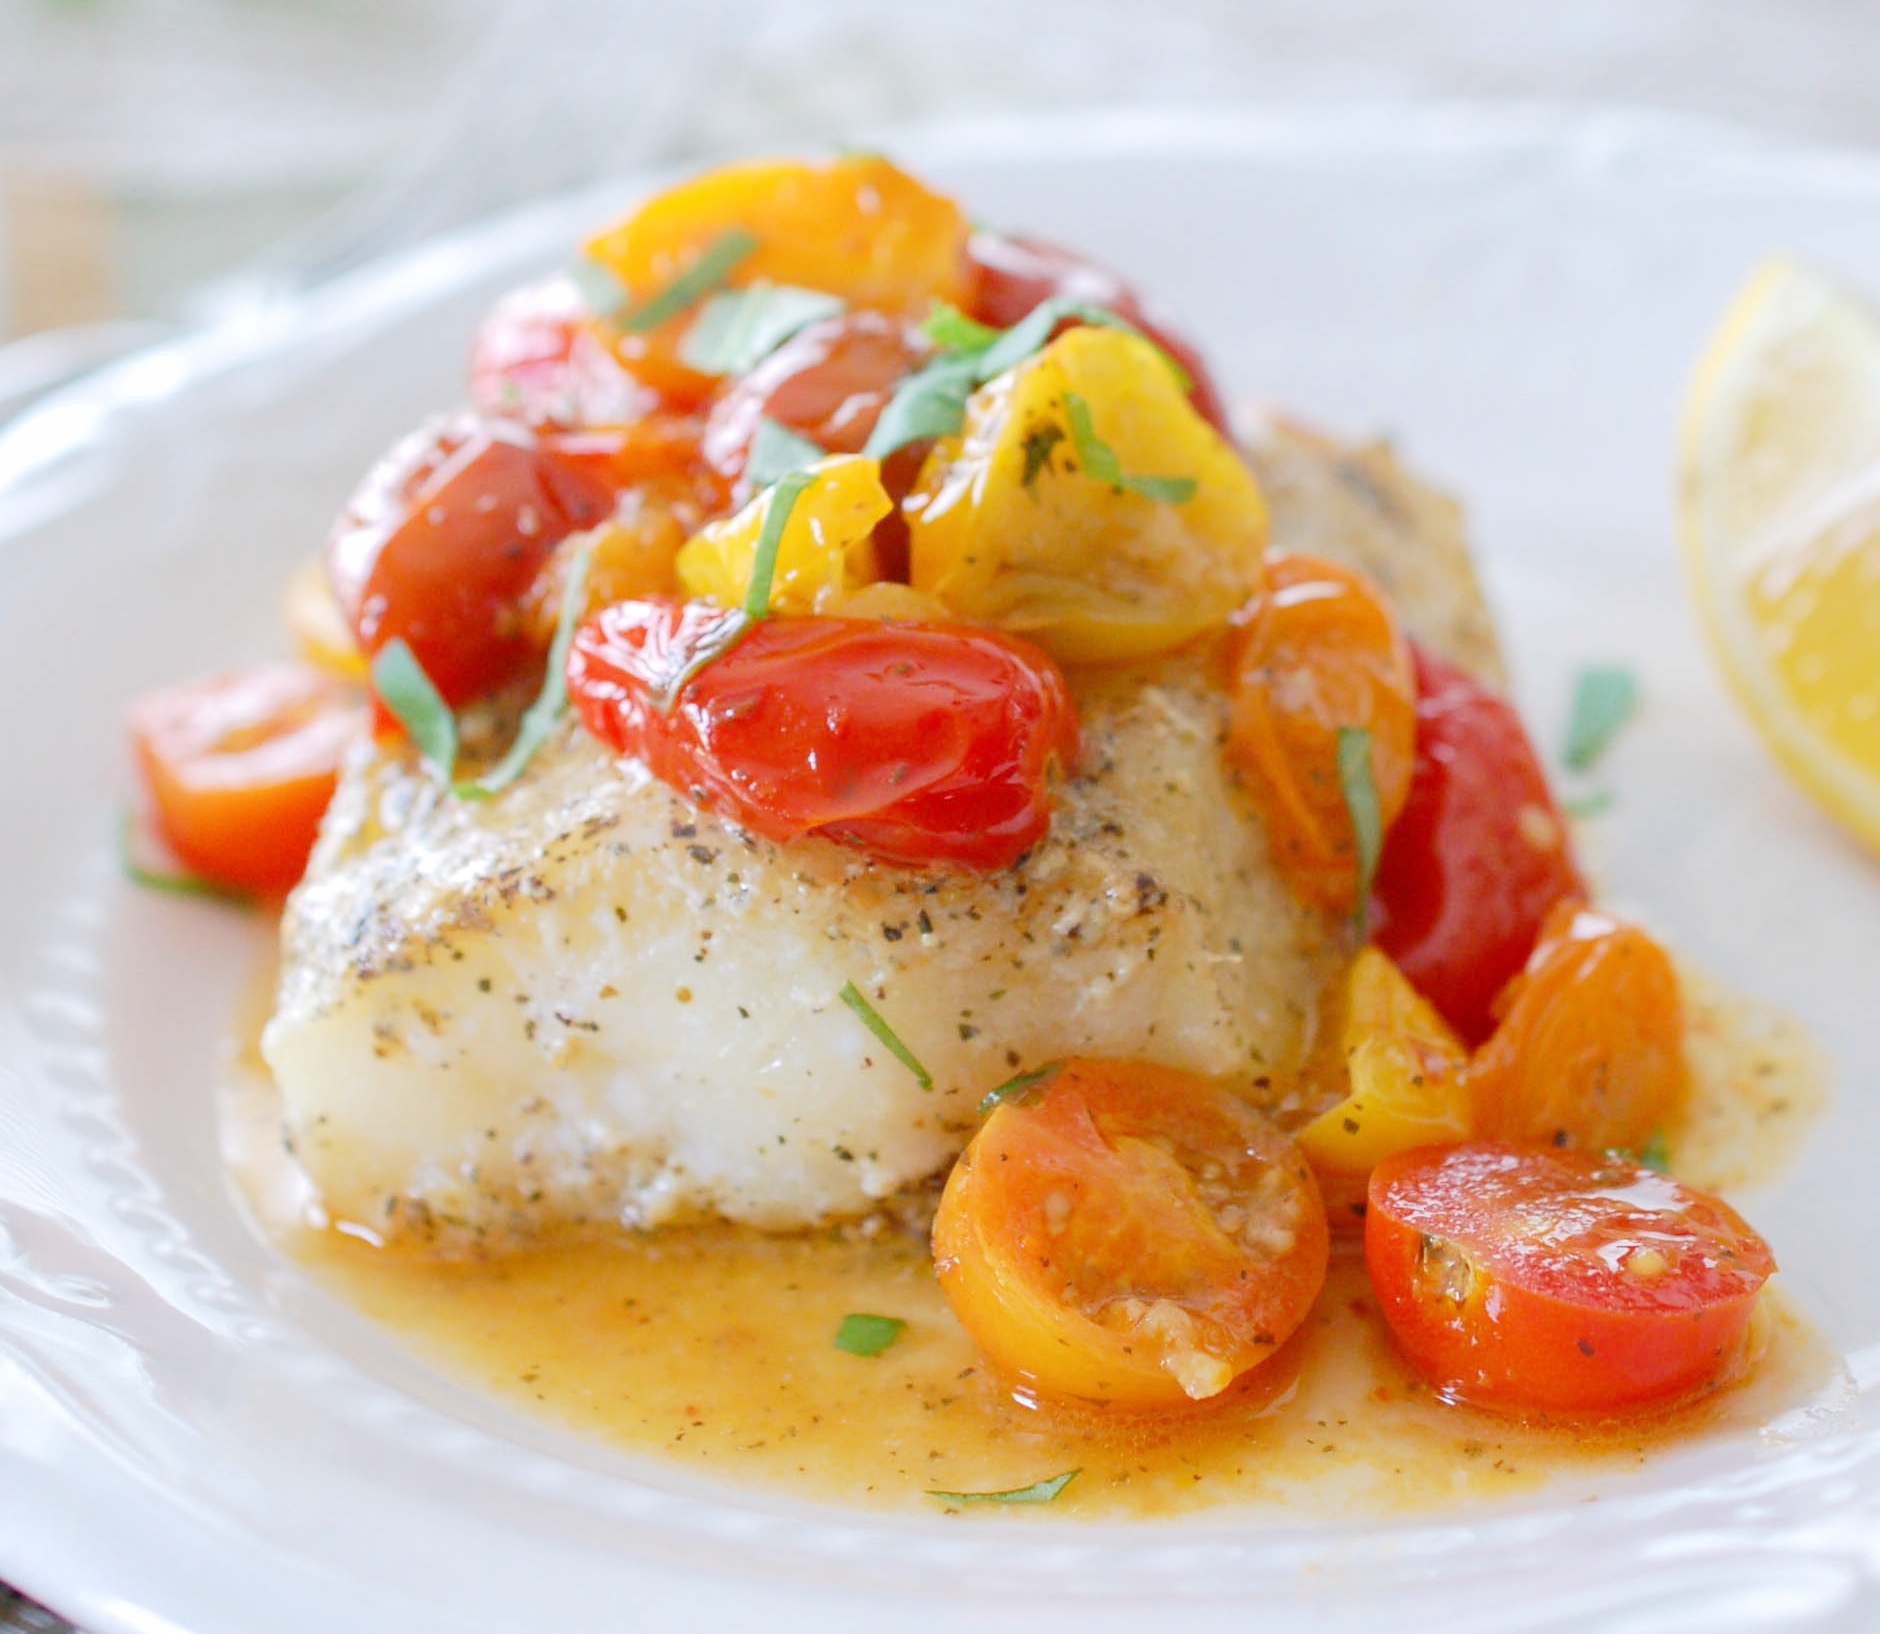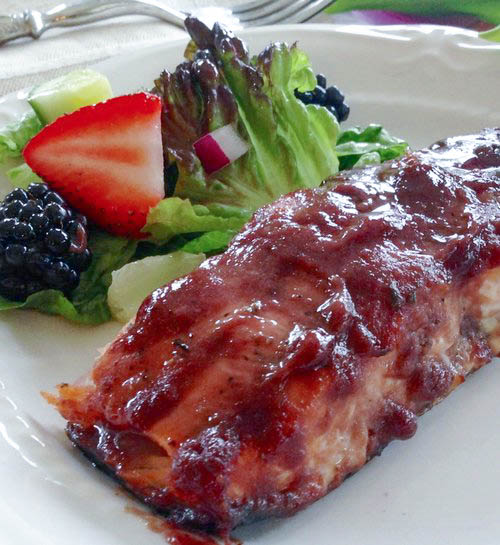
Lemon Tomato Basil Cod Recipe
Cooking Time: 25 Minutes
Difficulty: Easy
Happy Summer everyone! For those who grow vegetables in the Summer, your tomatoes may be about ready for harvest! If so, why not make the best of Summer's bounty with this easy, flavorful cod recipe, bursting with juicy, ripe tomatoes, fresh basil, and smothered in a delicate, lemony basil sauce. Delicious!
Summer calls for lazier days and easier menus with fresh, flavorful ingredients. This recipe (adapted from bakerbynature.com) featuring Cherchies® Garlic Seasoning and Cherchies® Basil Pizzazz, is a recipe we're sure your entire family will love. It is also perfect for summer entertaining!
Share a photo of your finished product on Instagram or Facebook, and let us know your thoughts below! Thank you for stopping by!
Ingredients
Adapted from Baker by Nature
For the White Wine Sauce
- 2 Tablespoons (Tbsp) olive oil
- 1/2 teaspoon (tsp) crushed red pepper flakes
- 2 large cloves garlic, finely minced
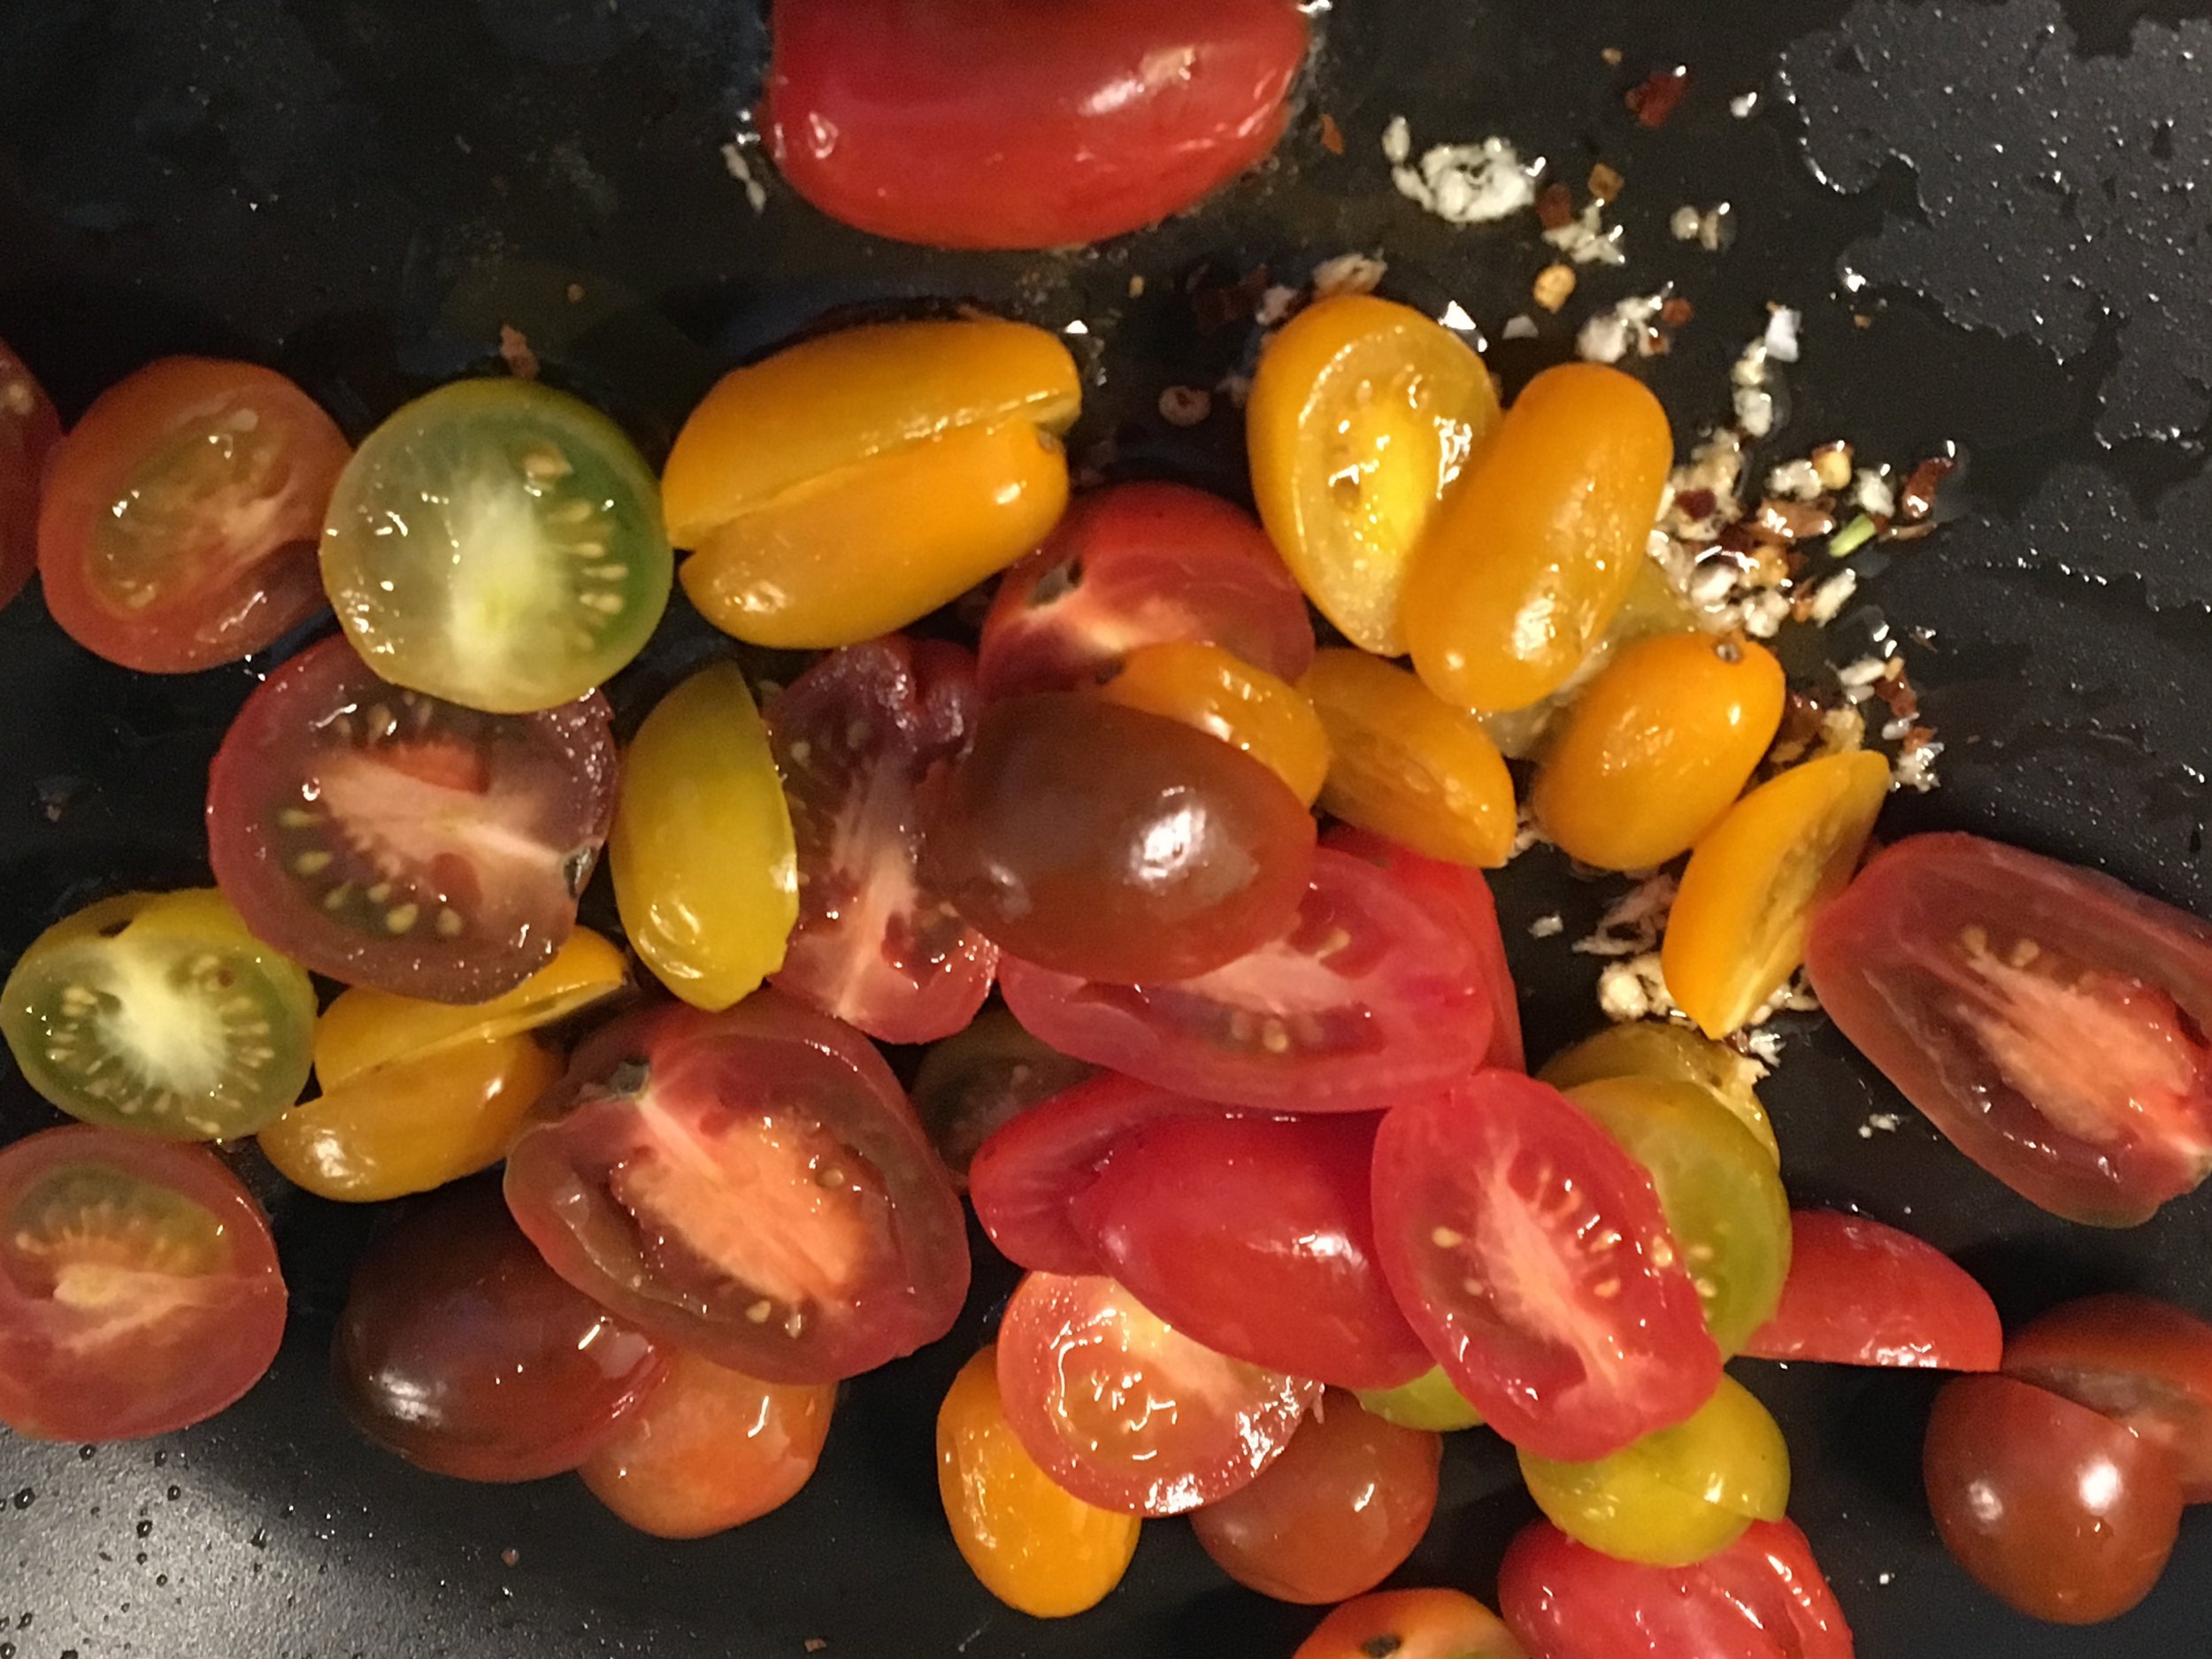
- 1 pint multi-colored (red, yellow, orange) cherry tomatoes (red cherry tomatoes perfectly fine if can't find), sliced in half
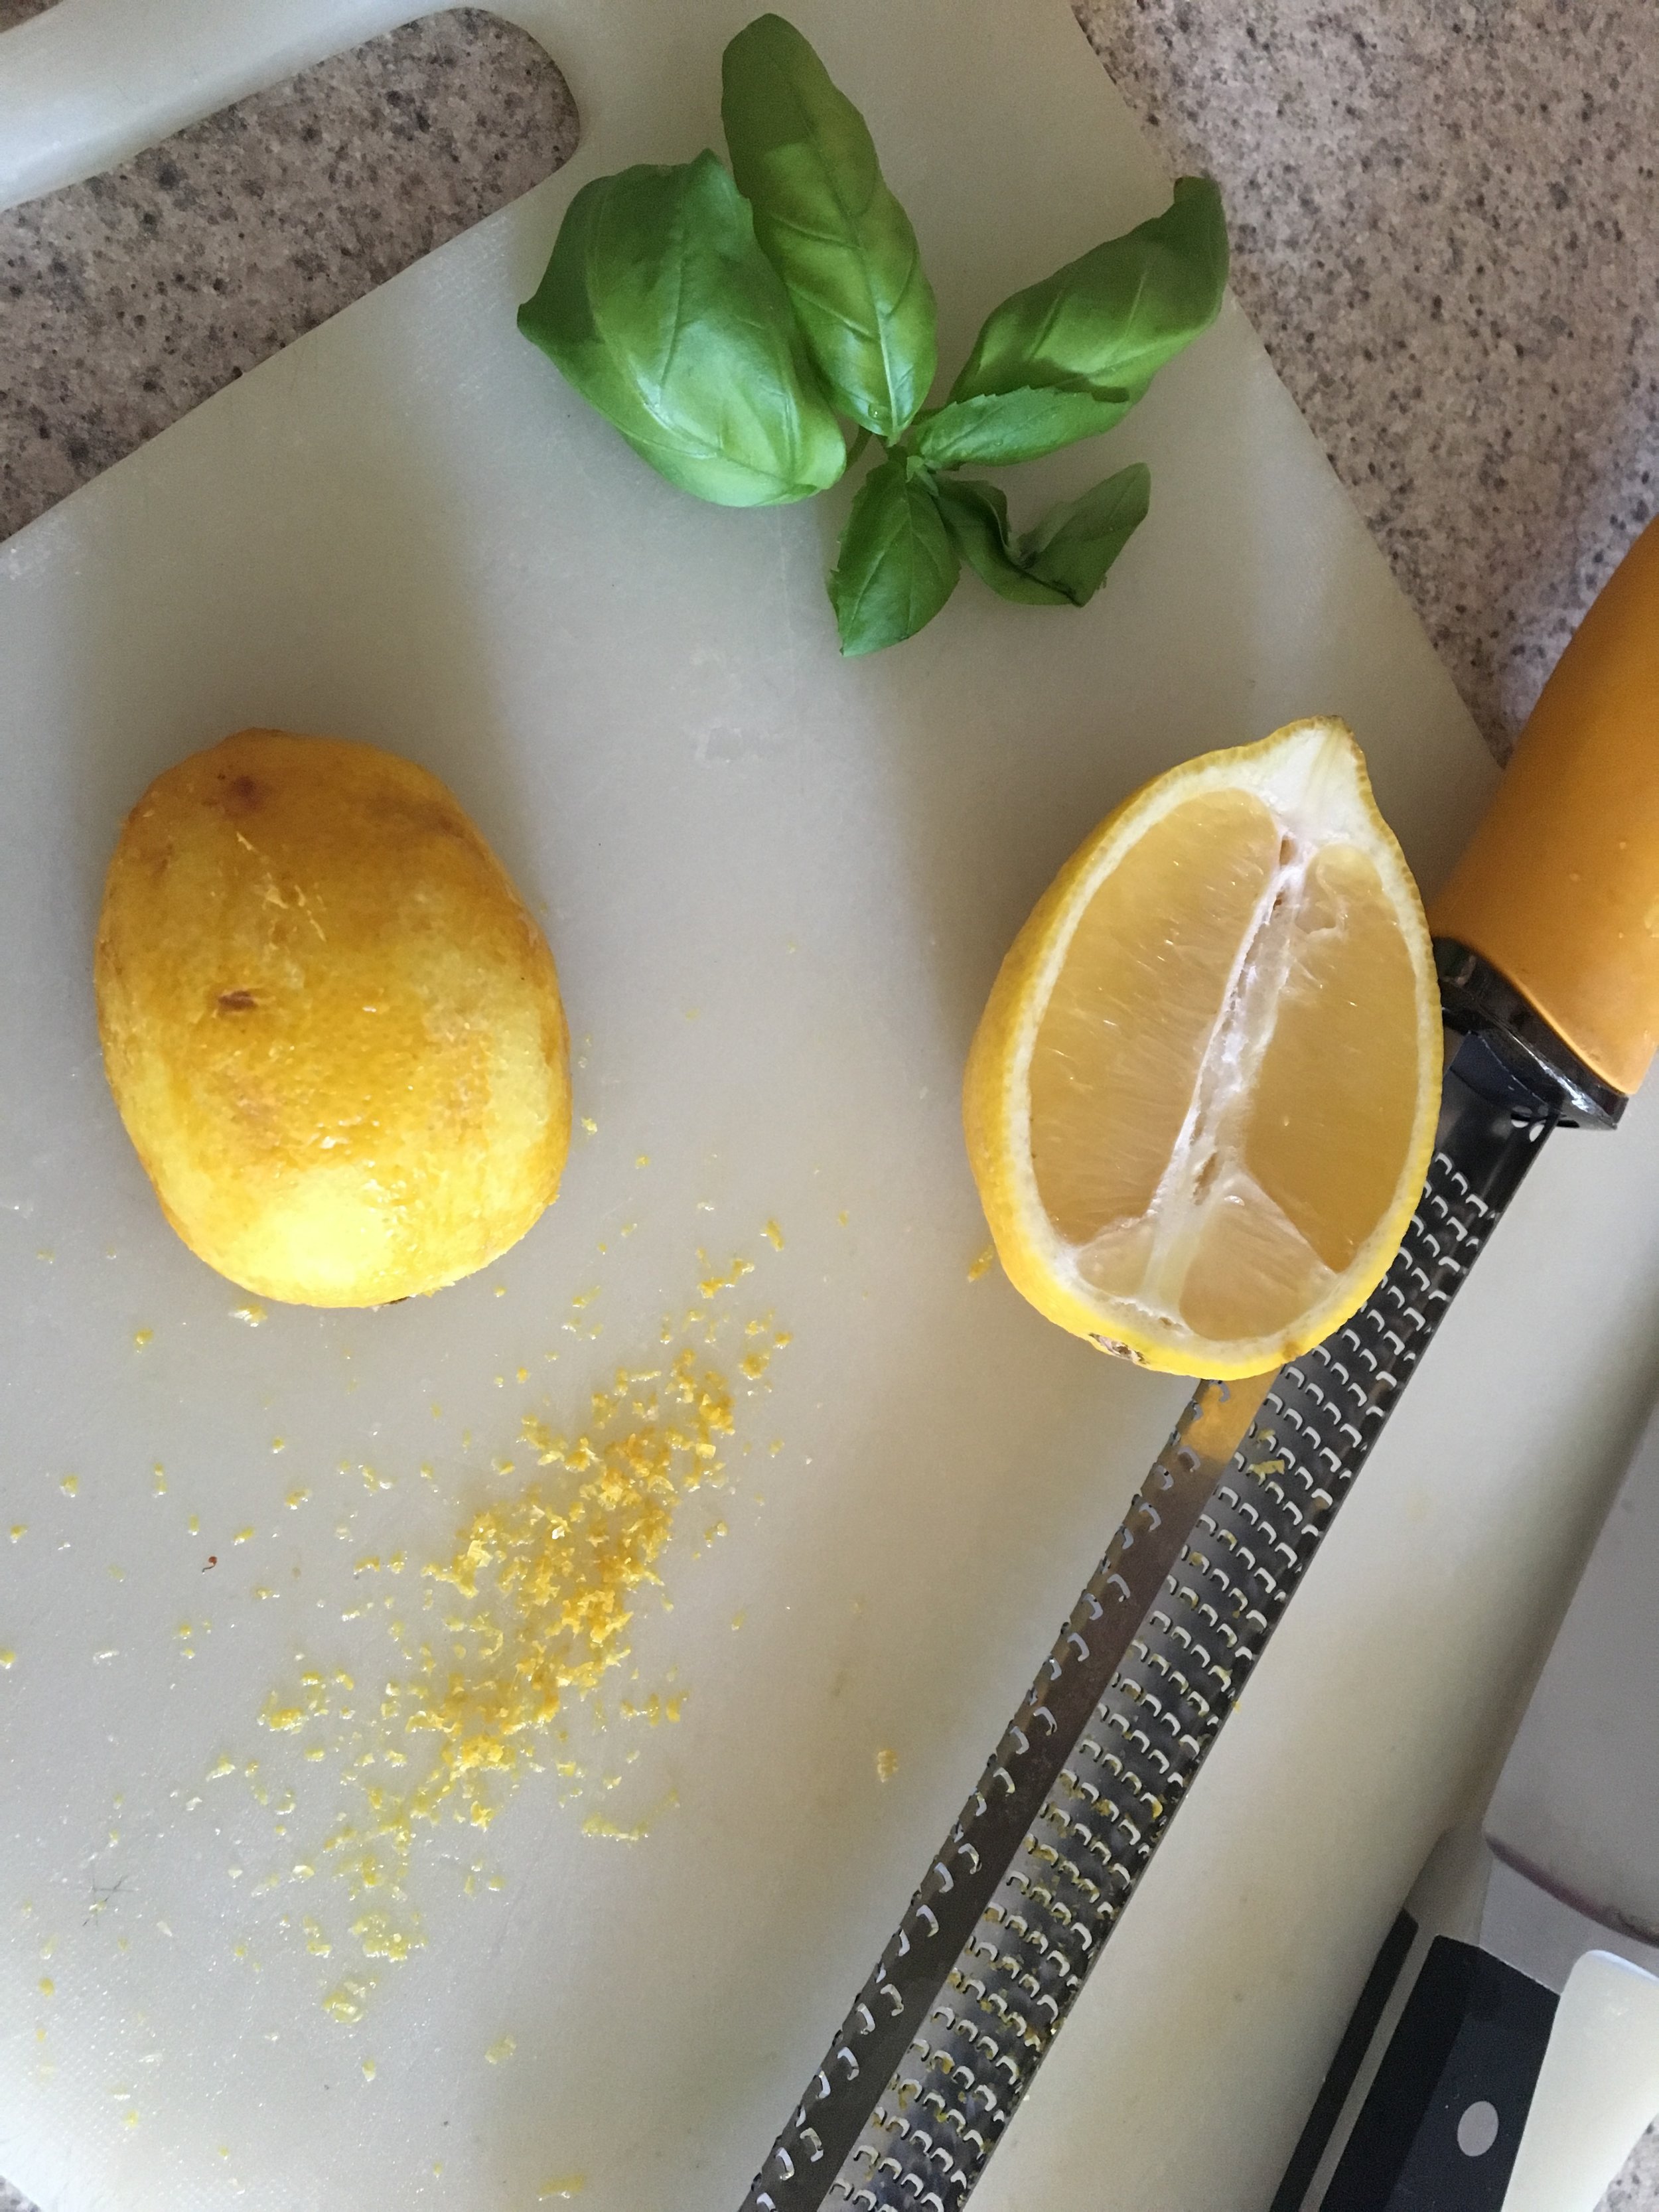
- 2 Tablespoons (Tbsp) fresh lemon juice
- 1/2 teaspoon (tsp) fresh lemon zest
- 1/4 teaspoon (tsp) Cherchies Basil Pizzazz
- 1/4 cup white wine
- 2 Tablespoons (tbsp) butter
For the fish
- 2 Tablespoons (Tbsp) olive oil
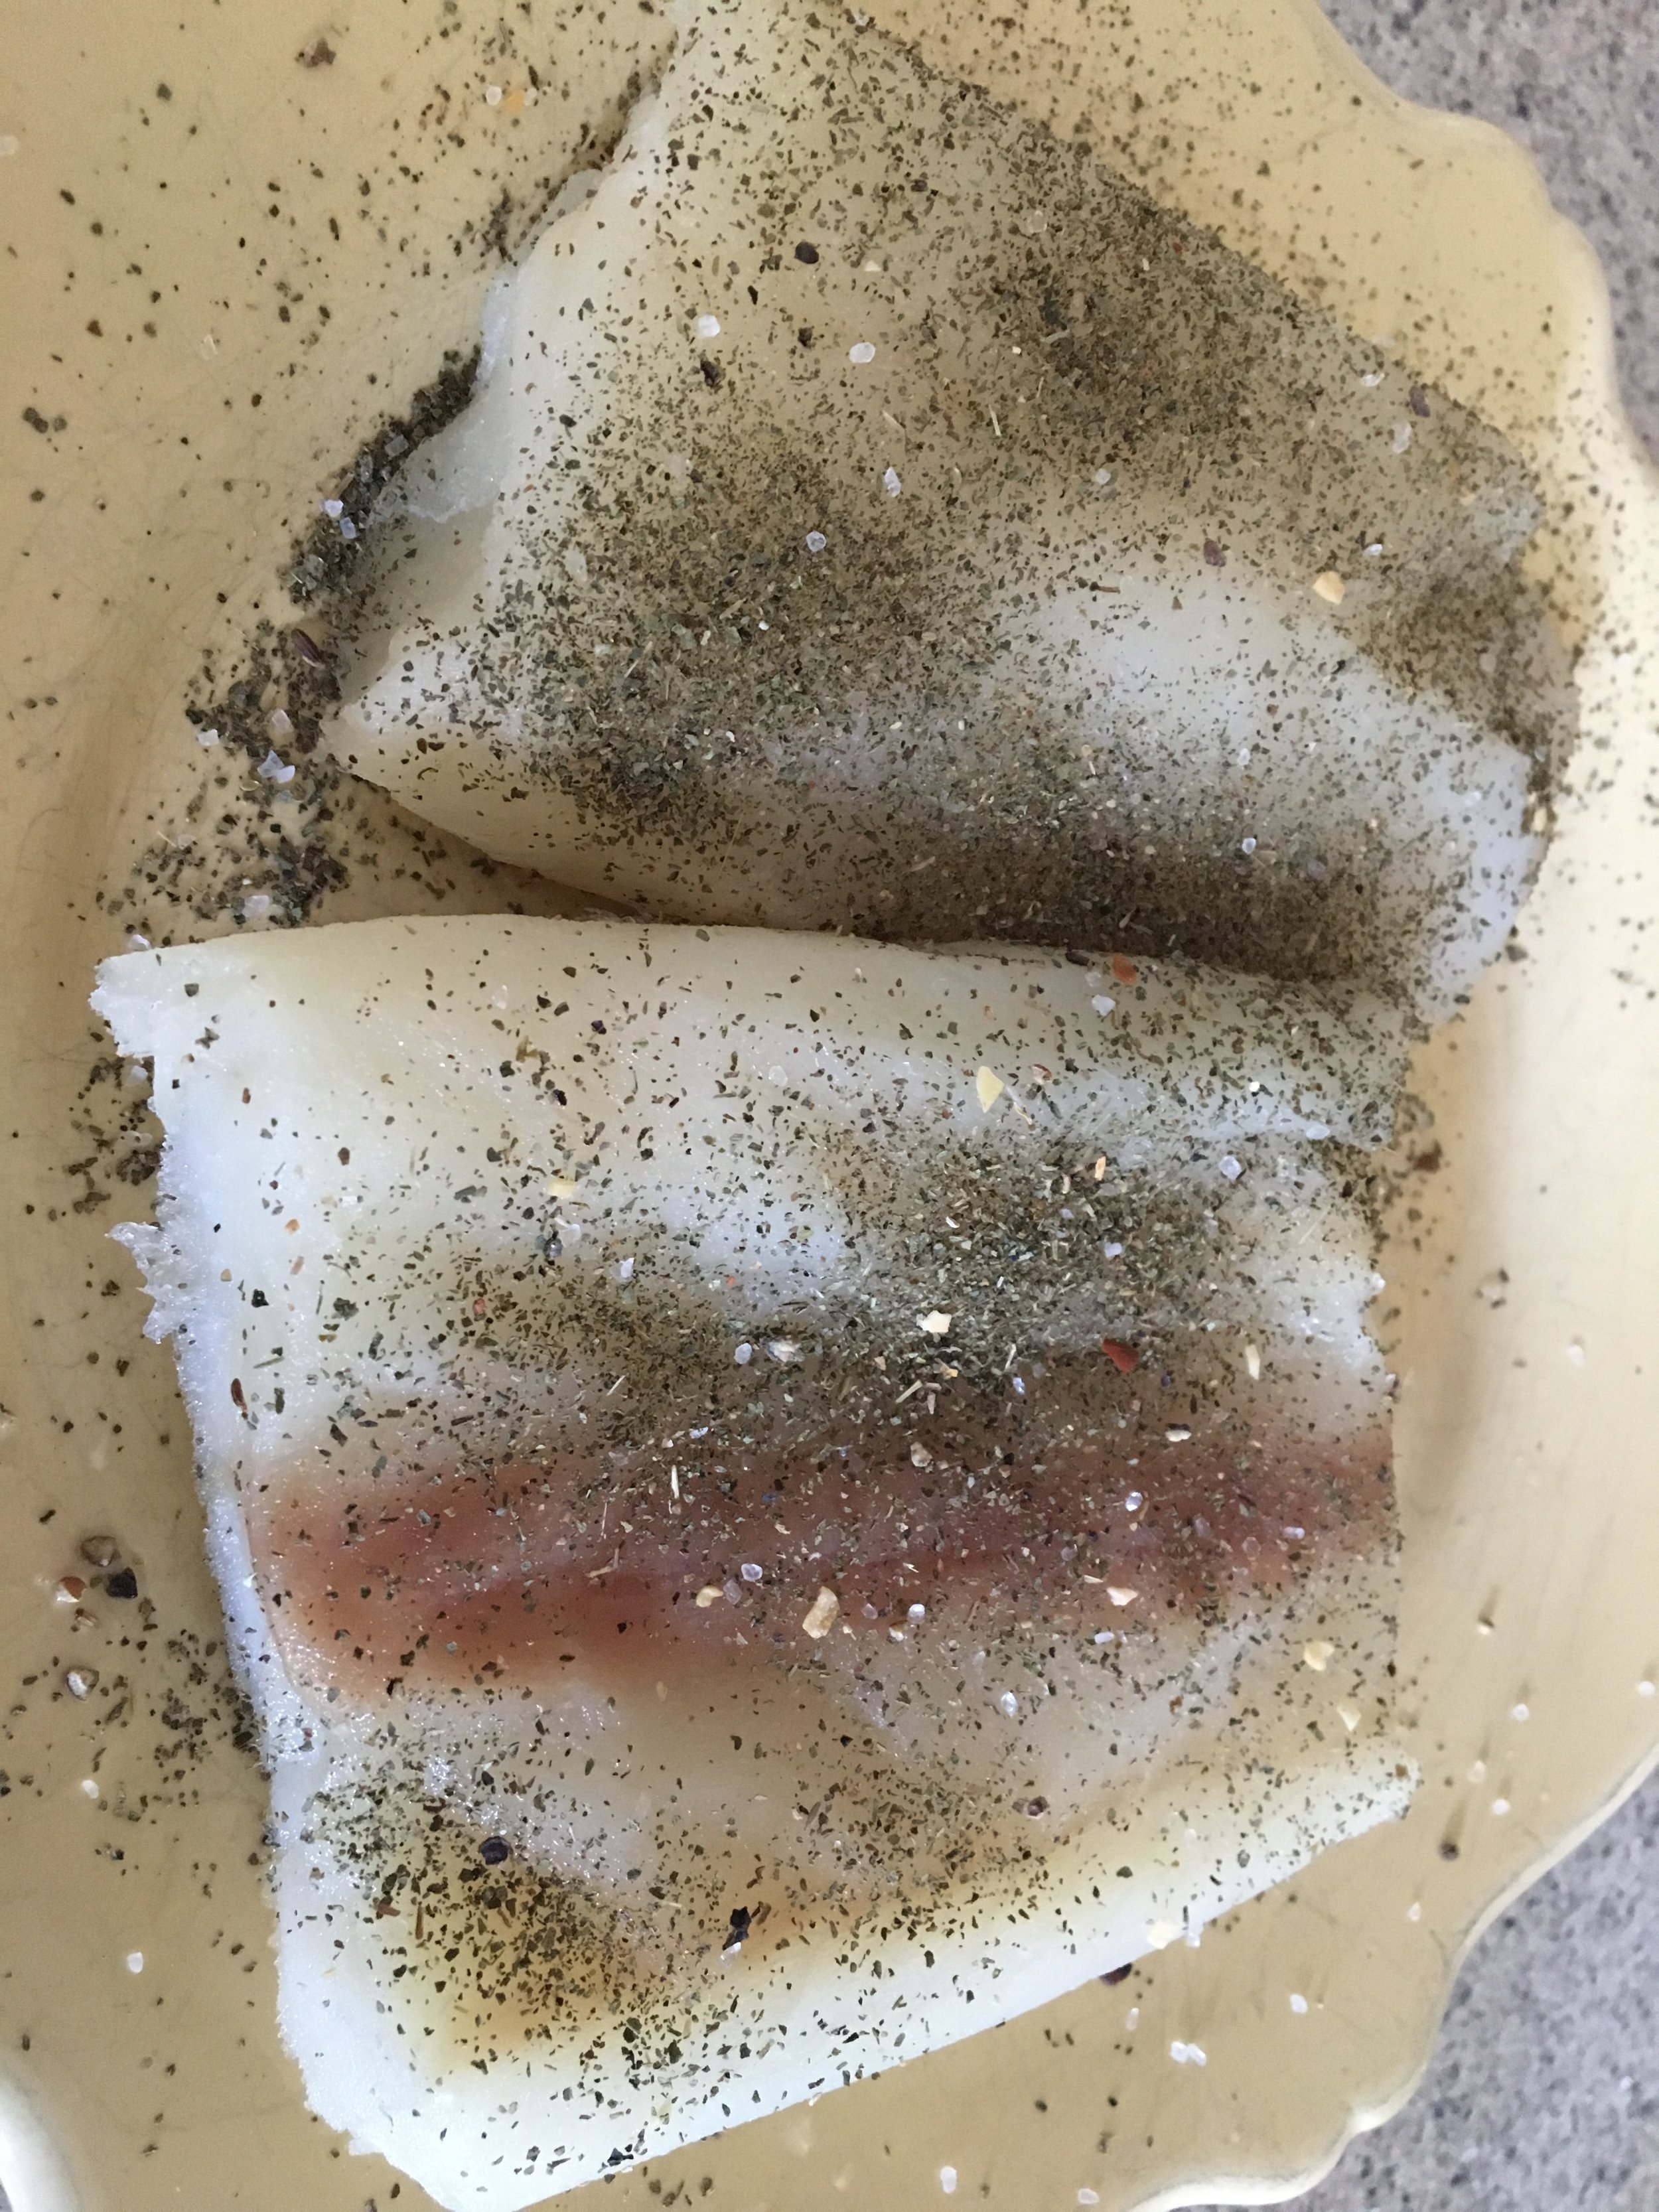
- 1 and a 1/2 pounds fresh cod, cut into 4 fillets
- Cherchies Garlic Seasoning and pepper to taste
- 1/4 cup fresh basil, finely chopped (for garnish)
Preparation
For the Sauce:
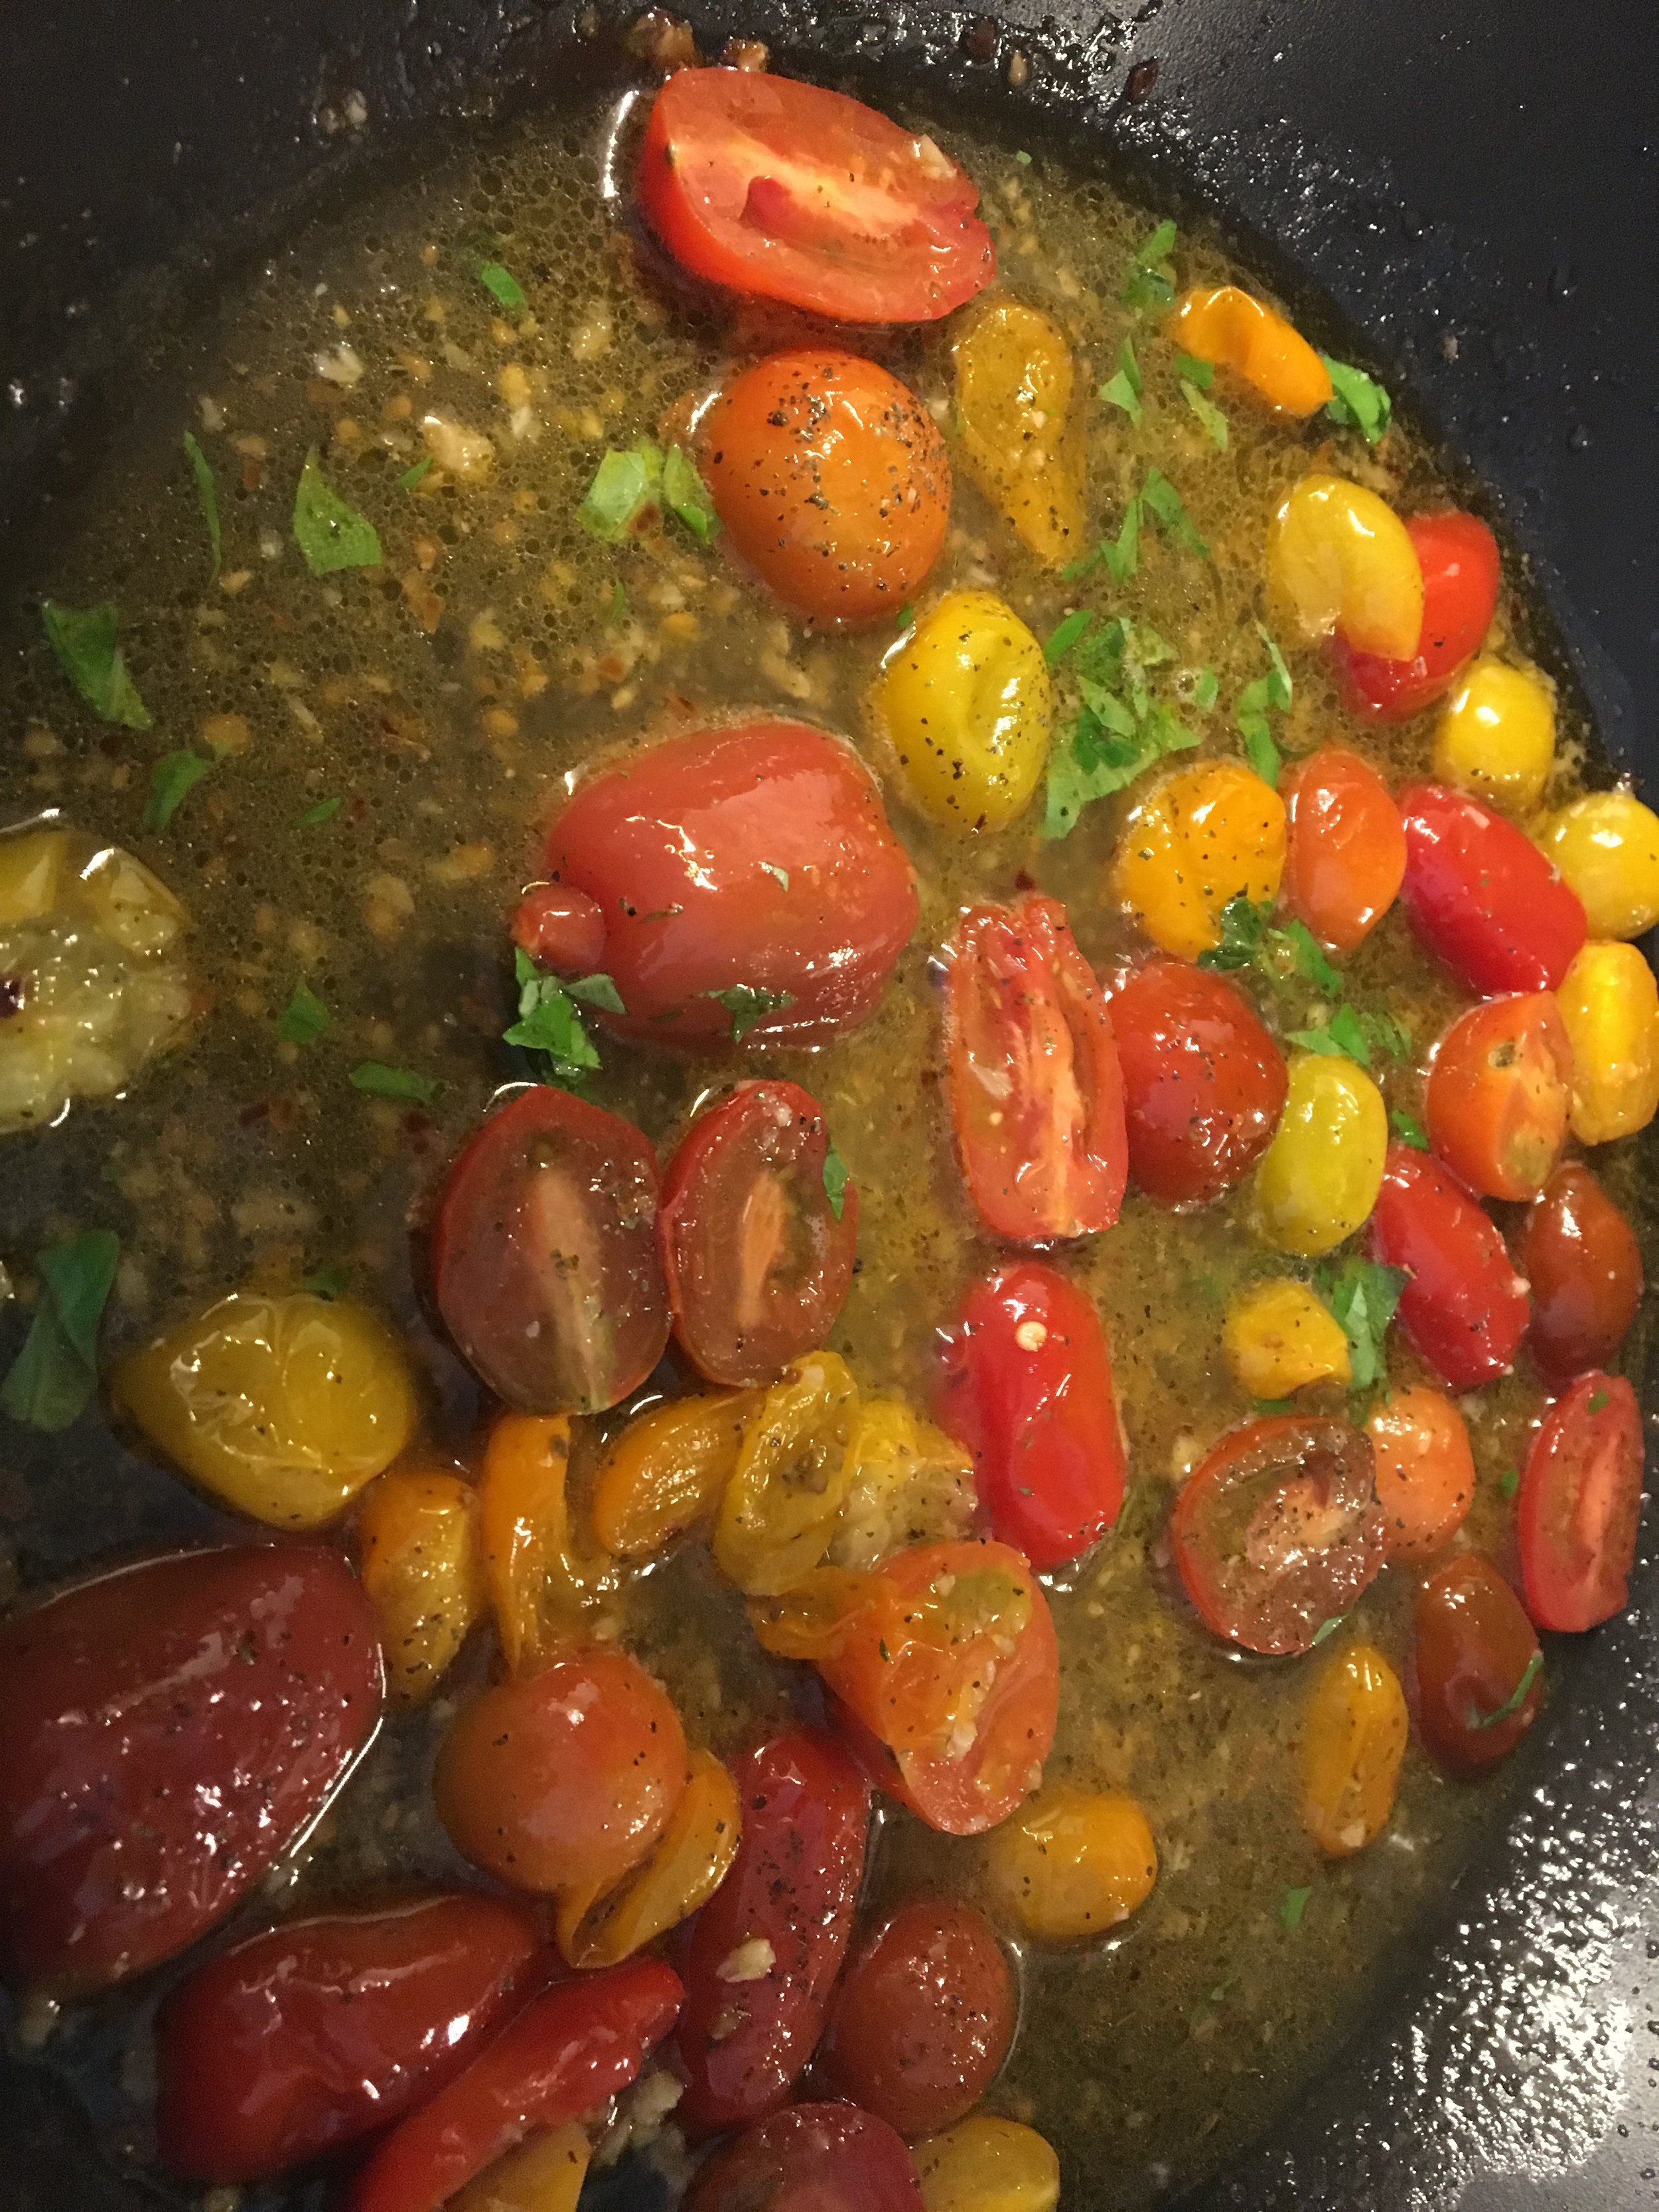
In a large pan, heat oil over medium heat. Add the crushed red pepper flakes and garlic and saute for 1 minute. Add the halved cherry tomatoes and cook, stirring occasionally, for about 9 to 12 minutes. Tomatoes should be soft, but still should retain their shape. Add in the white wine, stir, and allow the mixture to come to a simmer. Stir in Cherchies® Basil Pizzazz, lemon juice, lemon zest, and butter, and cook for 2 minutes. Transfer the sauce and tomatoes into a bowl and set aside temporarily.
For the Fish:
Using the same pan, heat the oil over medium heat. Season both sides of cod with Cherchies® Garlic Seasoning and pepper. Place cod in the oil and cook until golden brown, about 5 minutes. Carefully turn the cod over and continue cooking for another 5 minutes, or until it's cooked through. Add in the tomatoes and the sauce to the pan and heat for a minute with the cod.
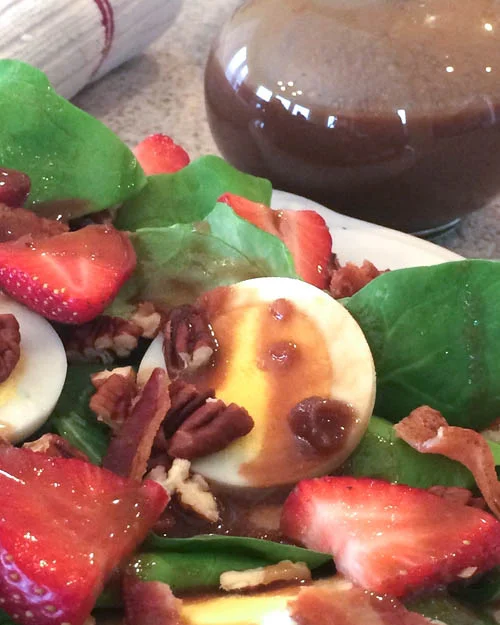
Serve the cod immediately and pour the sauce over the fish. Garnish with chopped basil and lemon wedges for a beautiful presentation. Serve this recipe with our Strawberry Spinach Salad and sop up the sauce with The Best Darn Garlic Bread Recipe.
Enjoy!