Cherchies Blog

Cooking Tip: How To Make a Gameday Snack Stadium

cooking tipsSheri SpalloneComment
Cooking Tip: How To Make a Gameday Snack Stadium

Cooking Tip: How To Make a Gameday Snack Stadium

Super Bowl Sunday is this Sunday, and our beloved Eagles (It's a "Philly Thing") are going to the Super Bowl! We couldn't be more excited! What better way to celebrate the Super Bowl than to score a touchdown with your guests with this easy peasy "snack stadium"; game day food at its most creative!

I have always had a weakness for themed celebrations, and game day is no exception, especially when our hometown NFL team is in the Super Bowl. Our family loves the decorations, the fun food, etc., of themed parties, so when I learned about "snack stadiums" five years ago (the last time the Eagles were in the Super Bowl), we were all on board to create a "snack stadium."

I was amazed on the internet at the lengths football fans went to build elaborate snack stadiums. Creating a "snack stadium" does not need to be complicated or expensive, as most containers can be found in your home (plastic containers, aluminum take-out trays, empty soda boxes, magazine holders, etc.). I purposely recycle those containers just for my snack stadium. The idea is to surround the field with stadium-like seating (containers) where you will host a variety of snacks.

Here’s how we did it:

Assemble your stadium

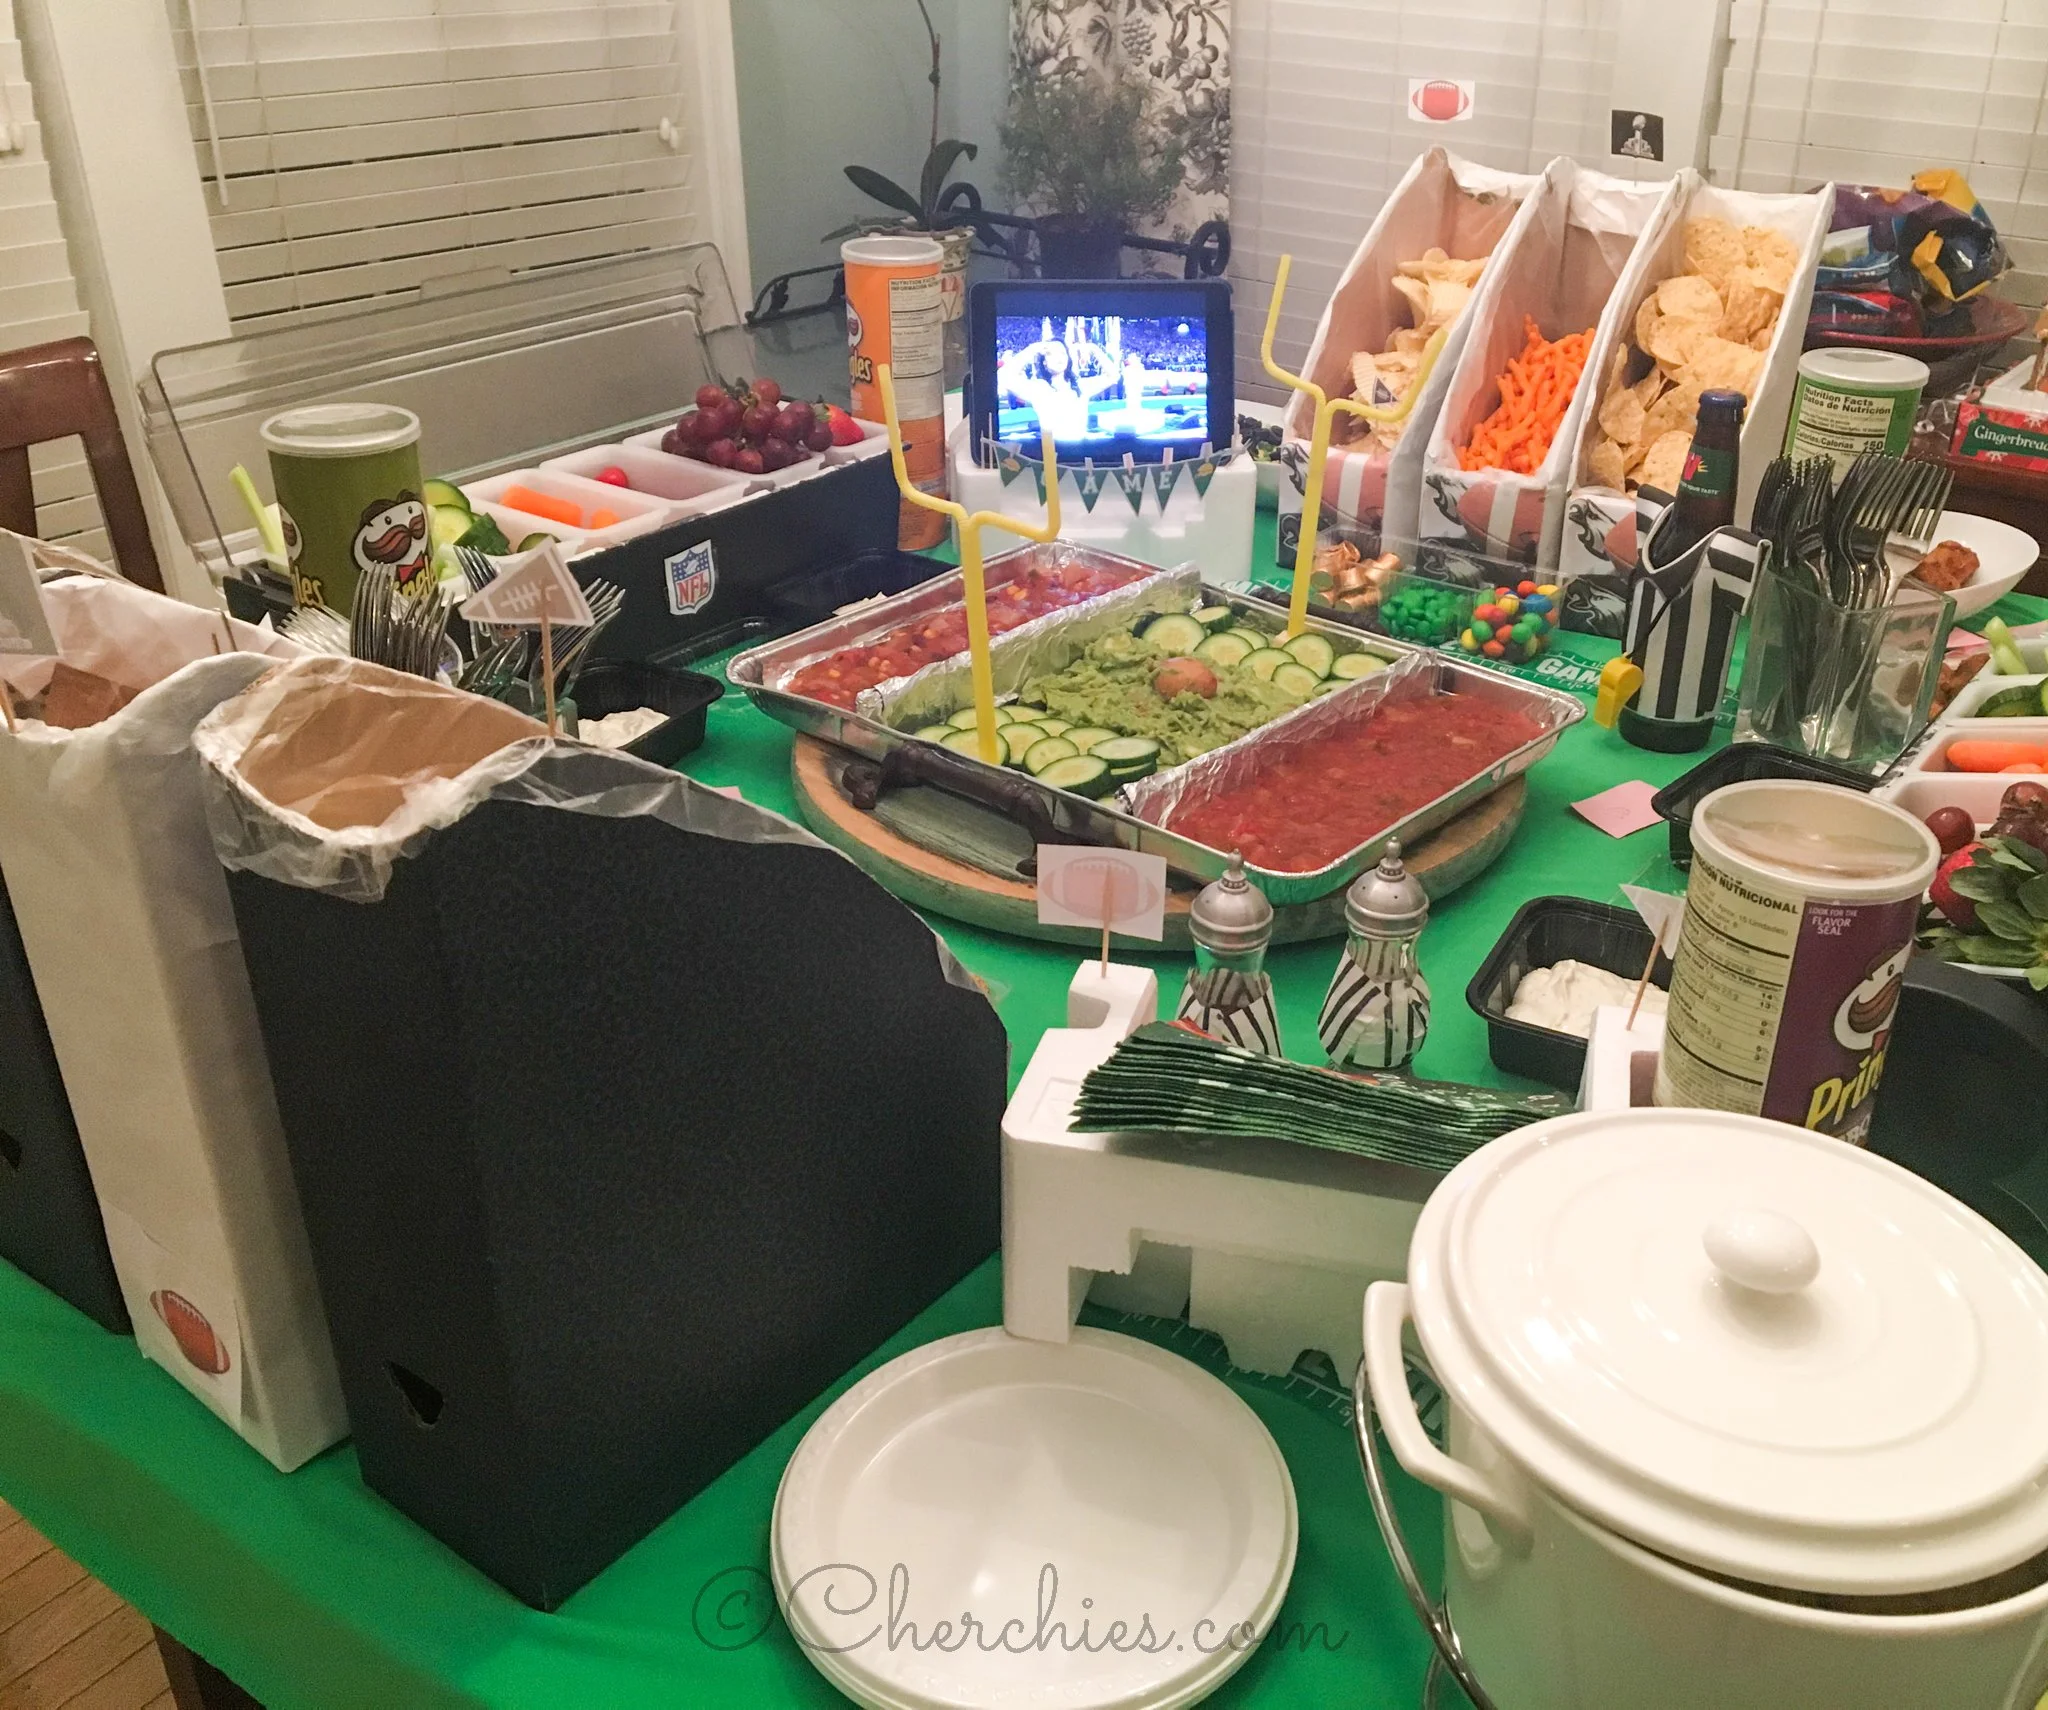
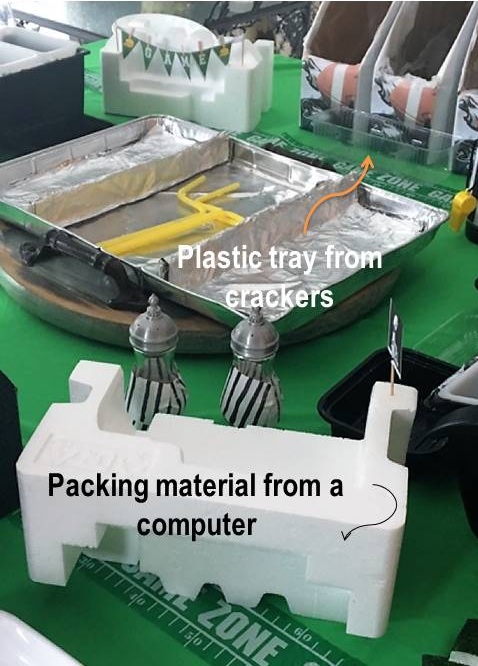
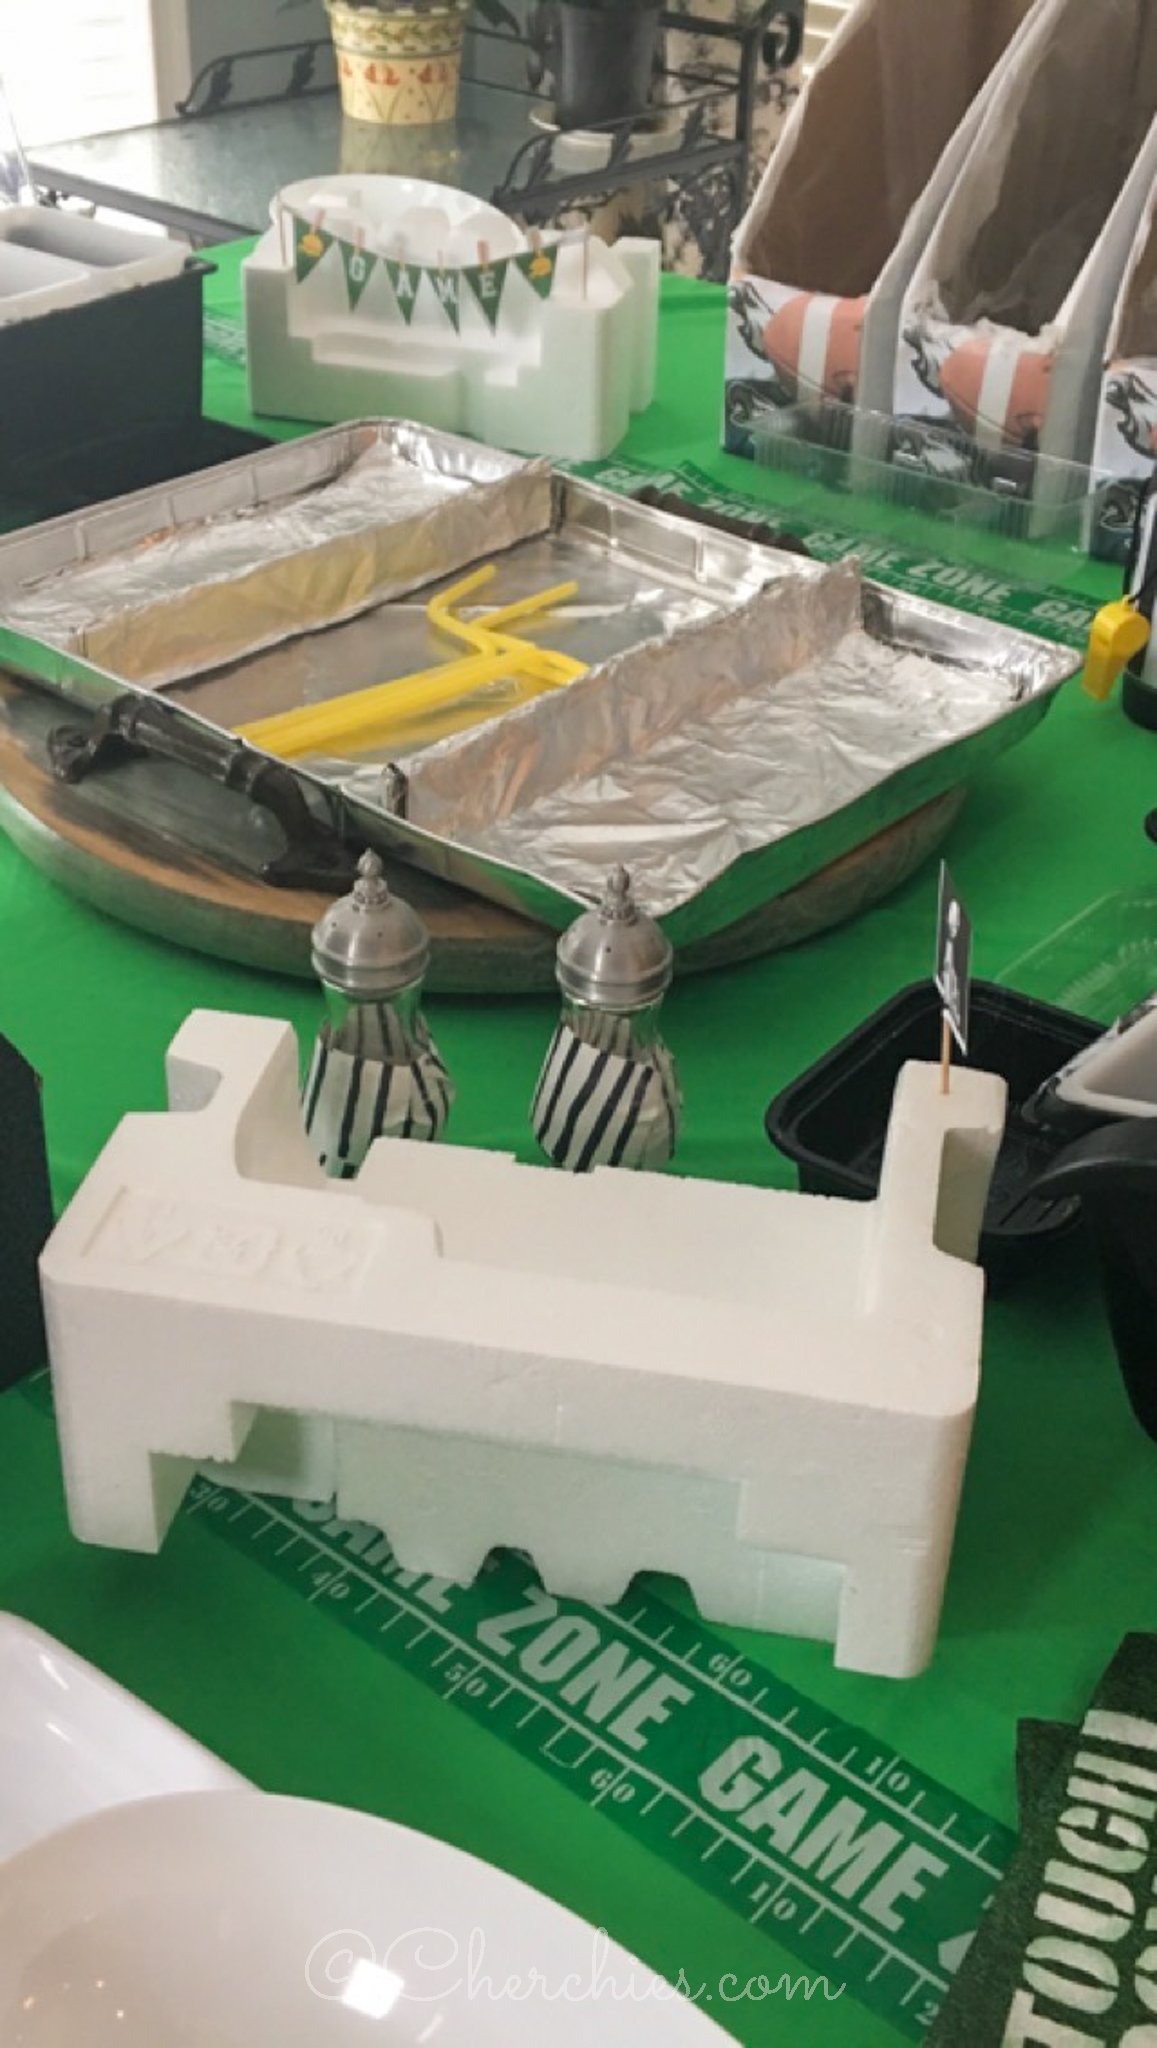
Every stadium centers around the obvious, the playing field, so start with that. I used a green plastic tablecloth I purchased at our local party store for the background. For the actual football field, we used a rectangular foil tray saved from a previous party and sectioned off two end zones with cardboard and aluminum foil. (This will eventually house the guacamole and dip playing field).

Then place the foil tray on a lazy Susan for easy access from all angles. (*This step is not necessary, We used what we had at home).

For the goal posts, we used flexible straws and tape, which can be anchored with olives, grapes, cheese, or whatever your heart desires (make sure to slice off the bottom so it doesn’t roll over).

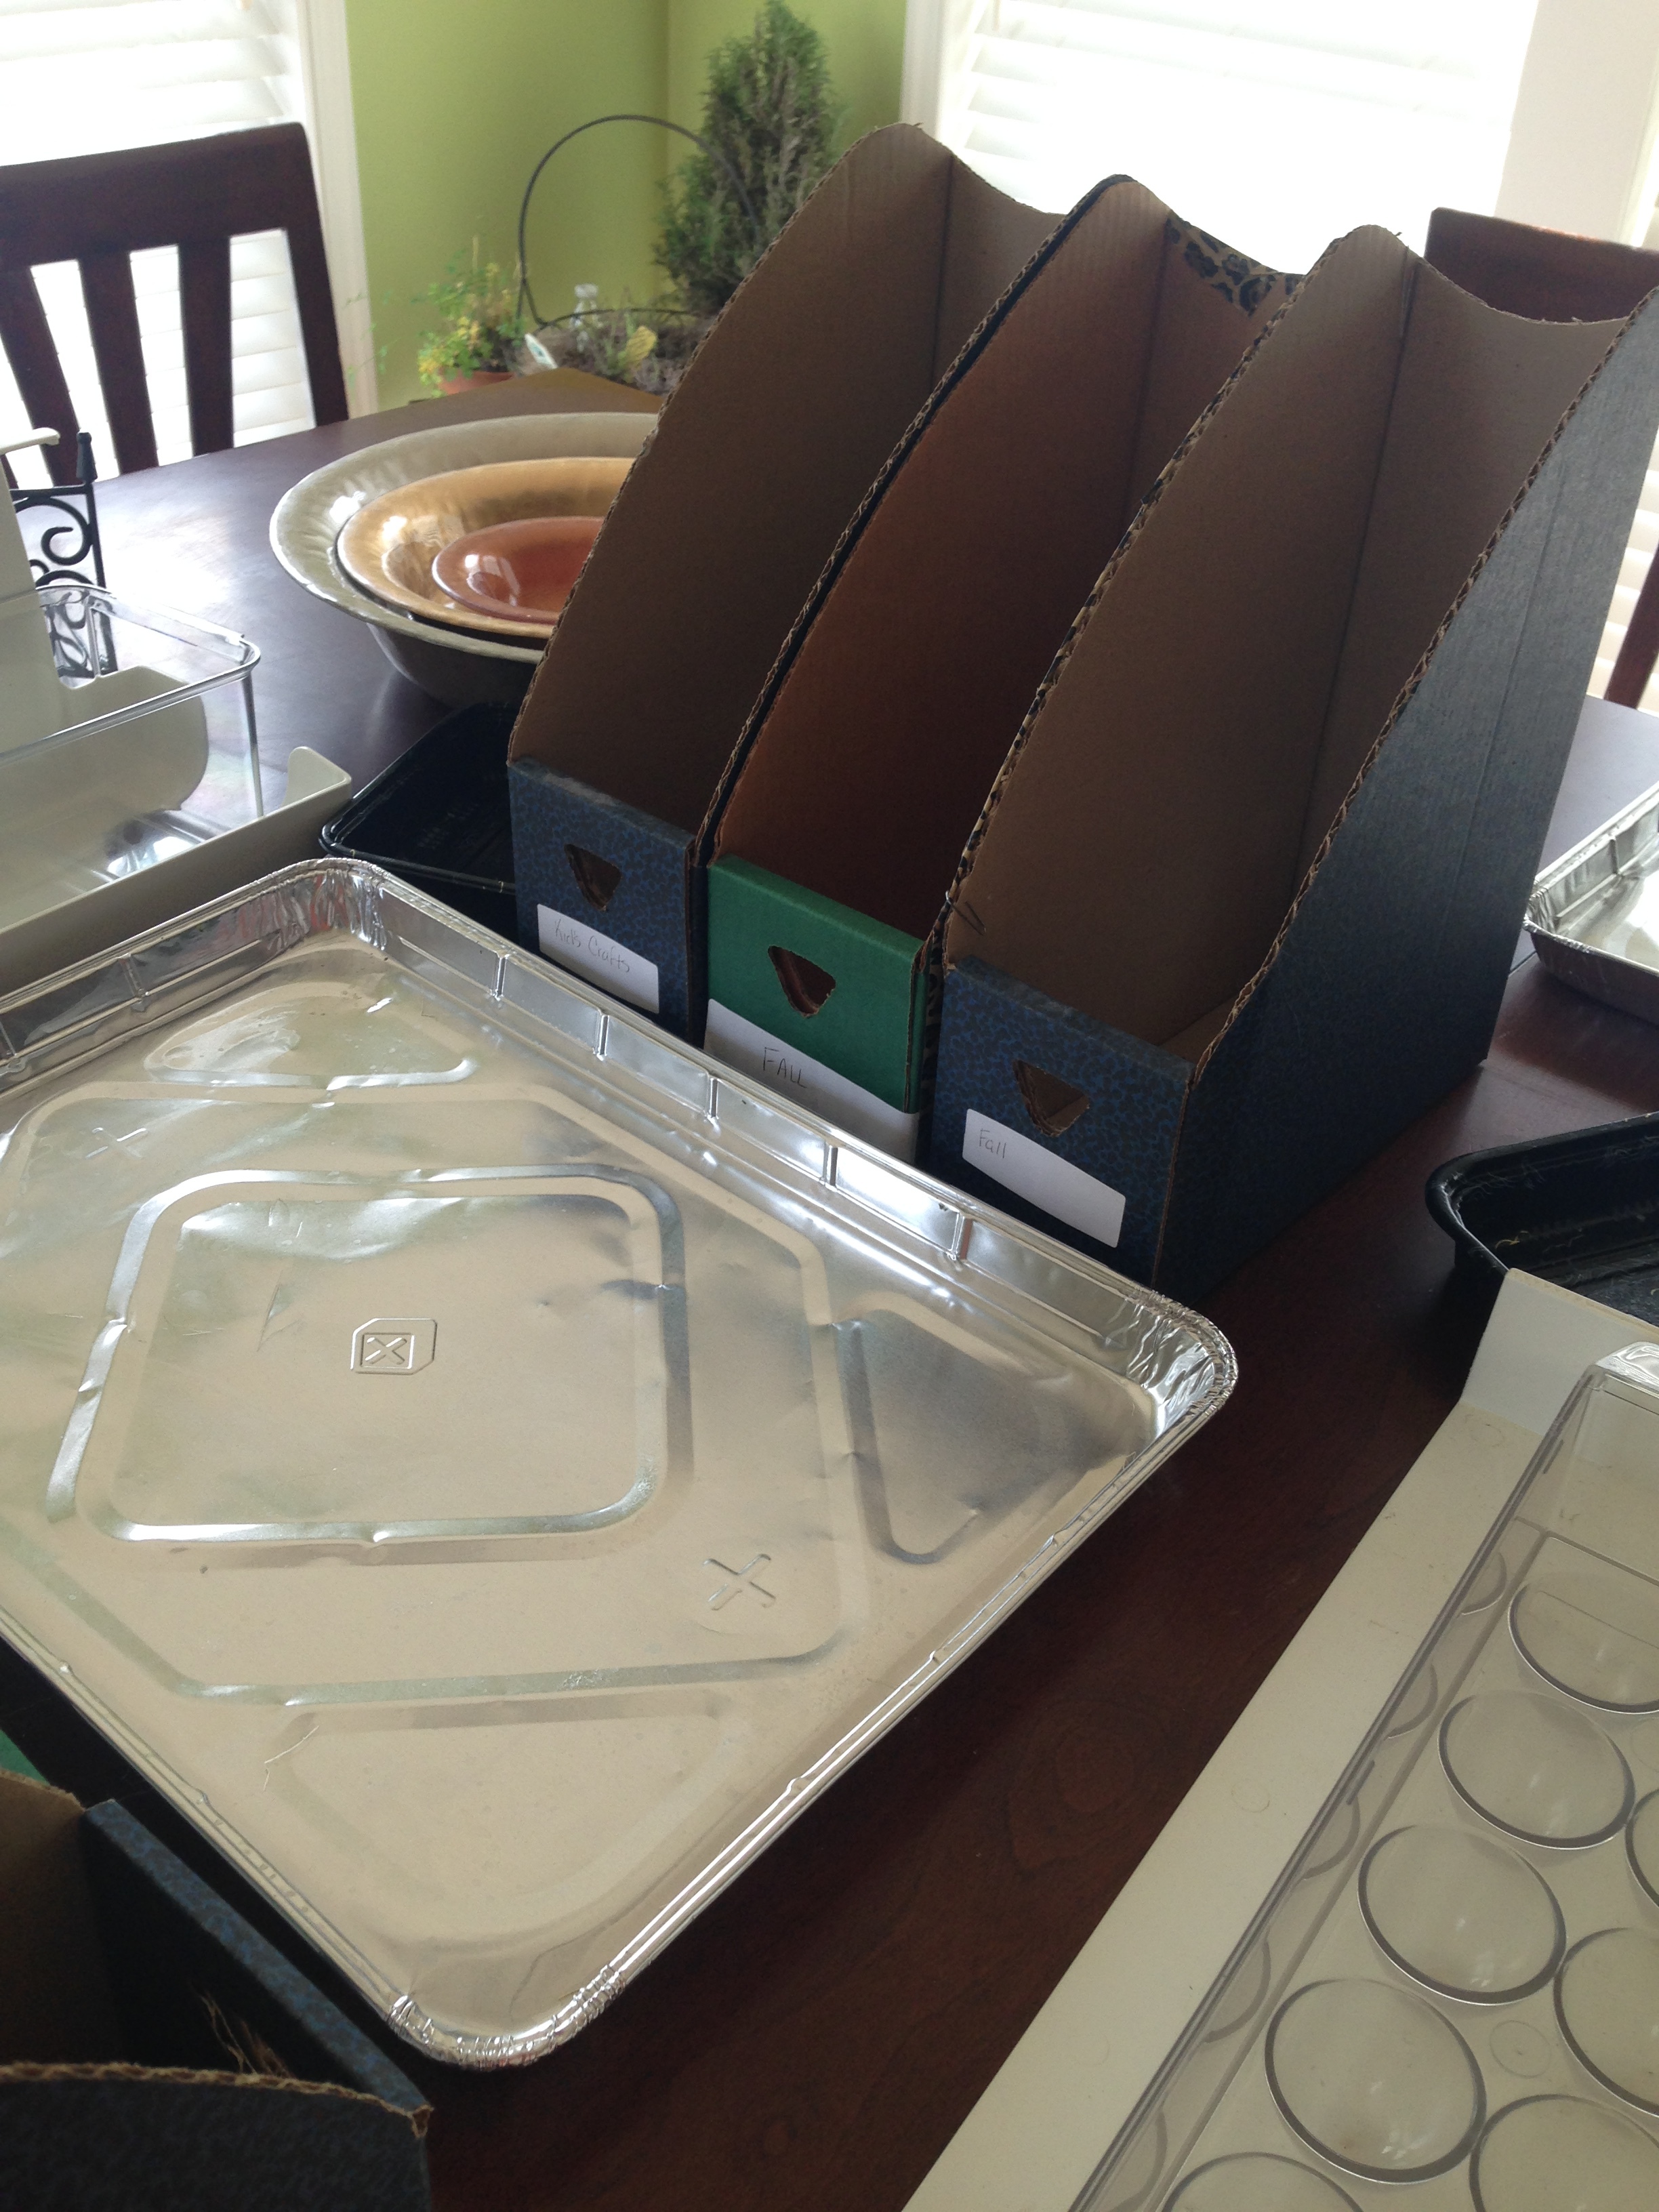
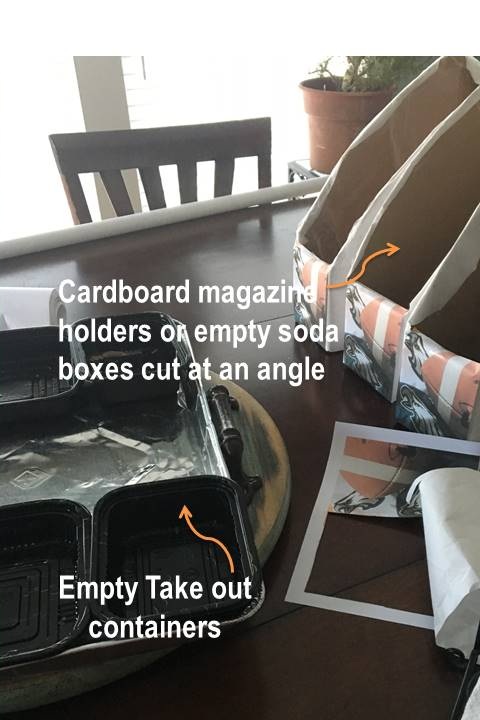
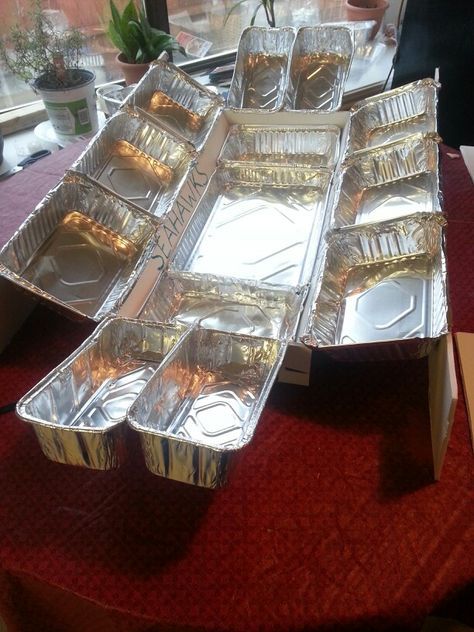
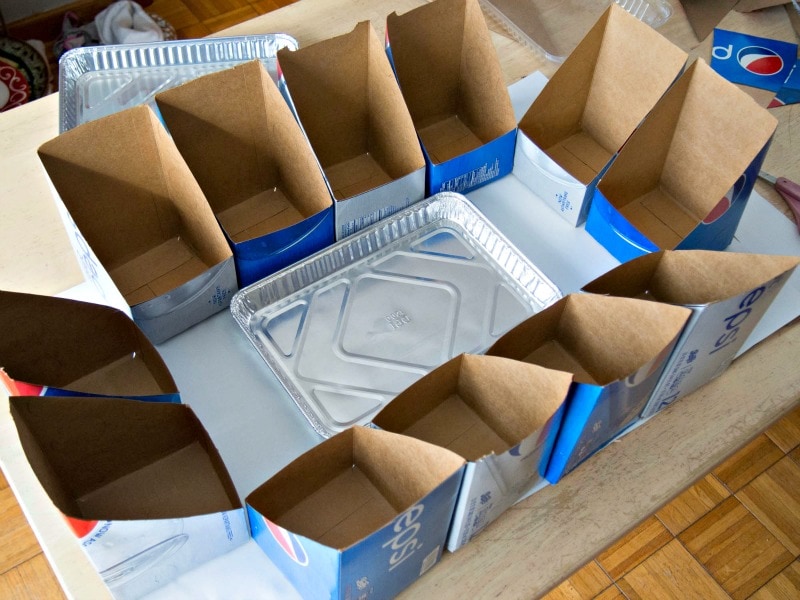
Arrange the stands. Plan what snacks you want in your snack stadium, as it might dictate the types of containers you use. Recycle and upcycle! We covered magazine holders with white craft paper, take-out containers we saved, plastic cracker tray inserts, etc. Pinterest has many ideas for the stands (cut-up soda boxes, plastic containers, ice cube trays from your refrigerator...use whatever you have!) Once again, it should be easy and stress-free. Plus, if you have your children helping you, it makes for the perfect teaching moment about our environment and recycling.

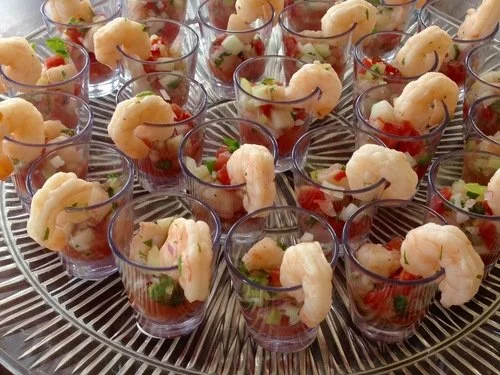
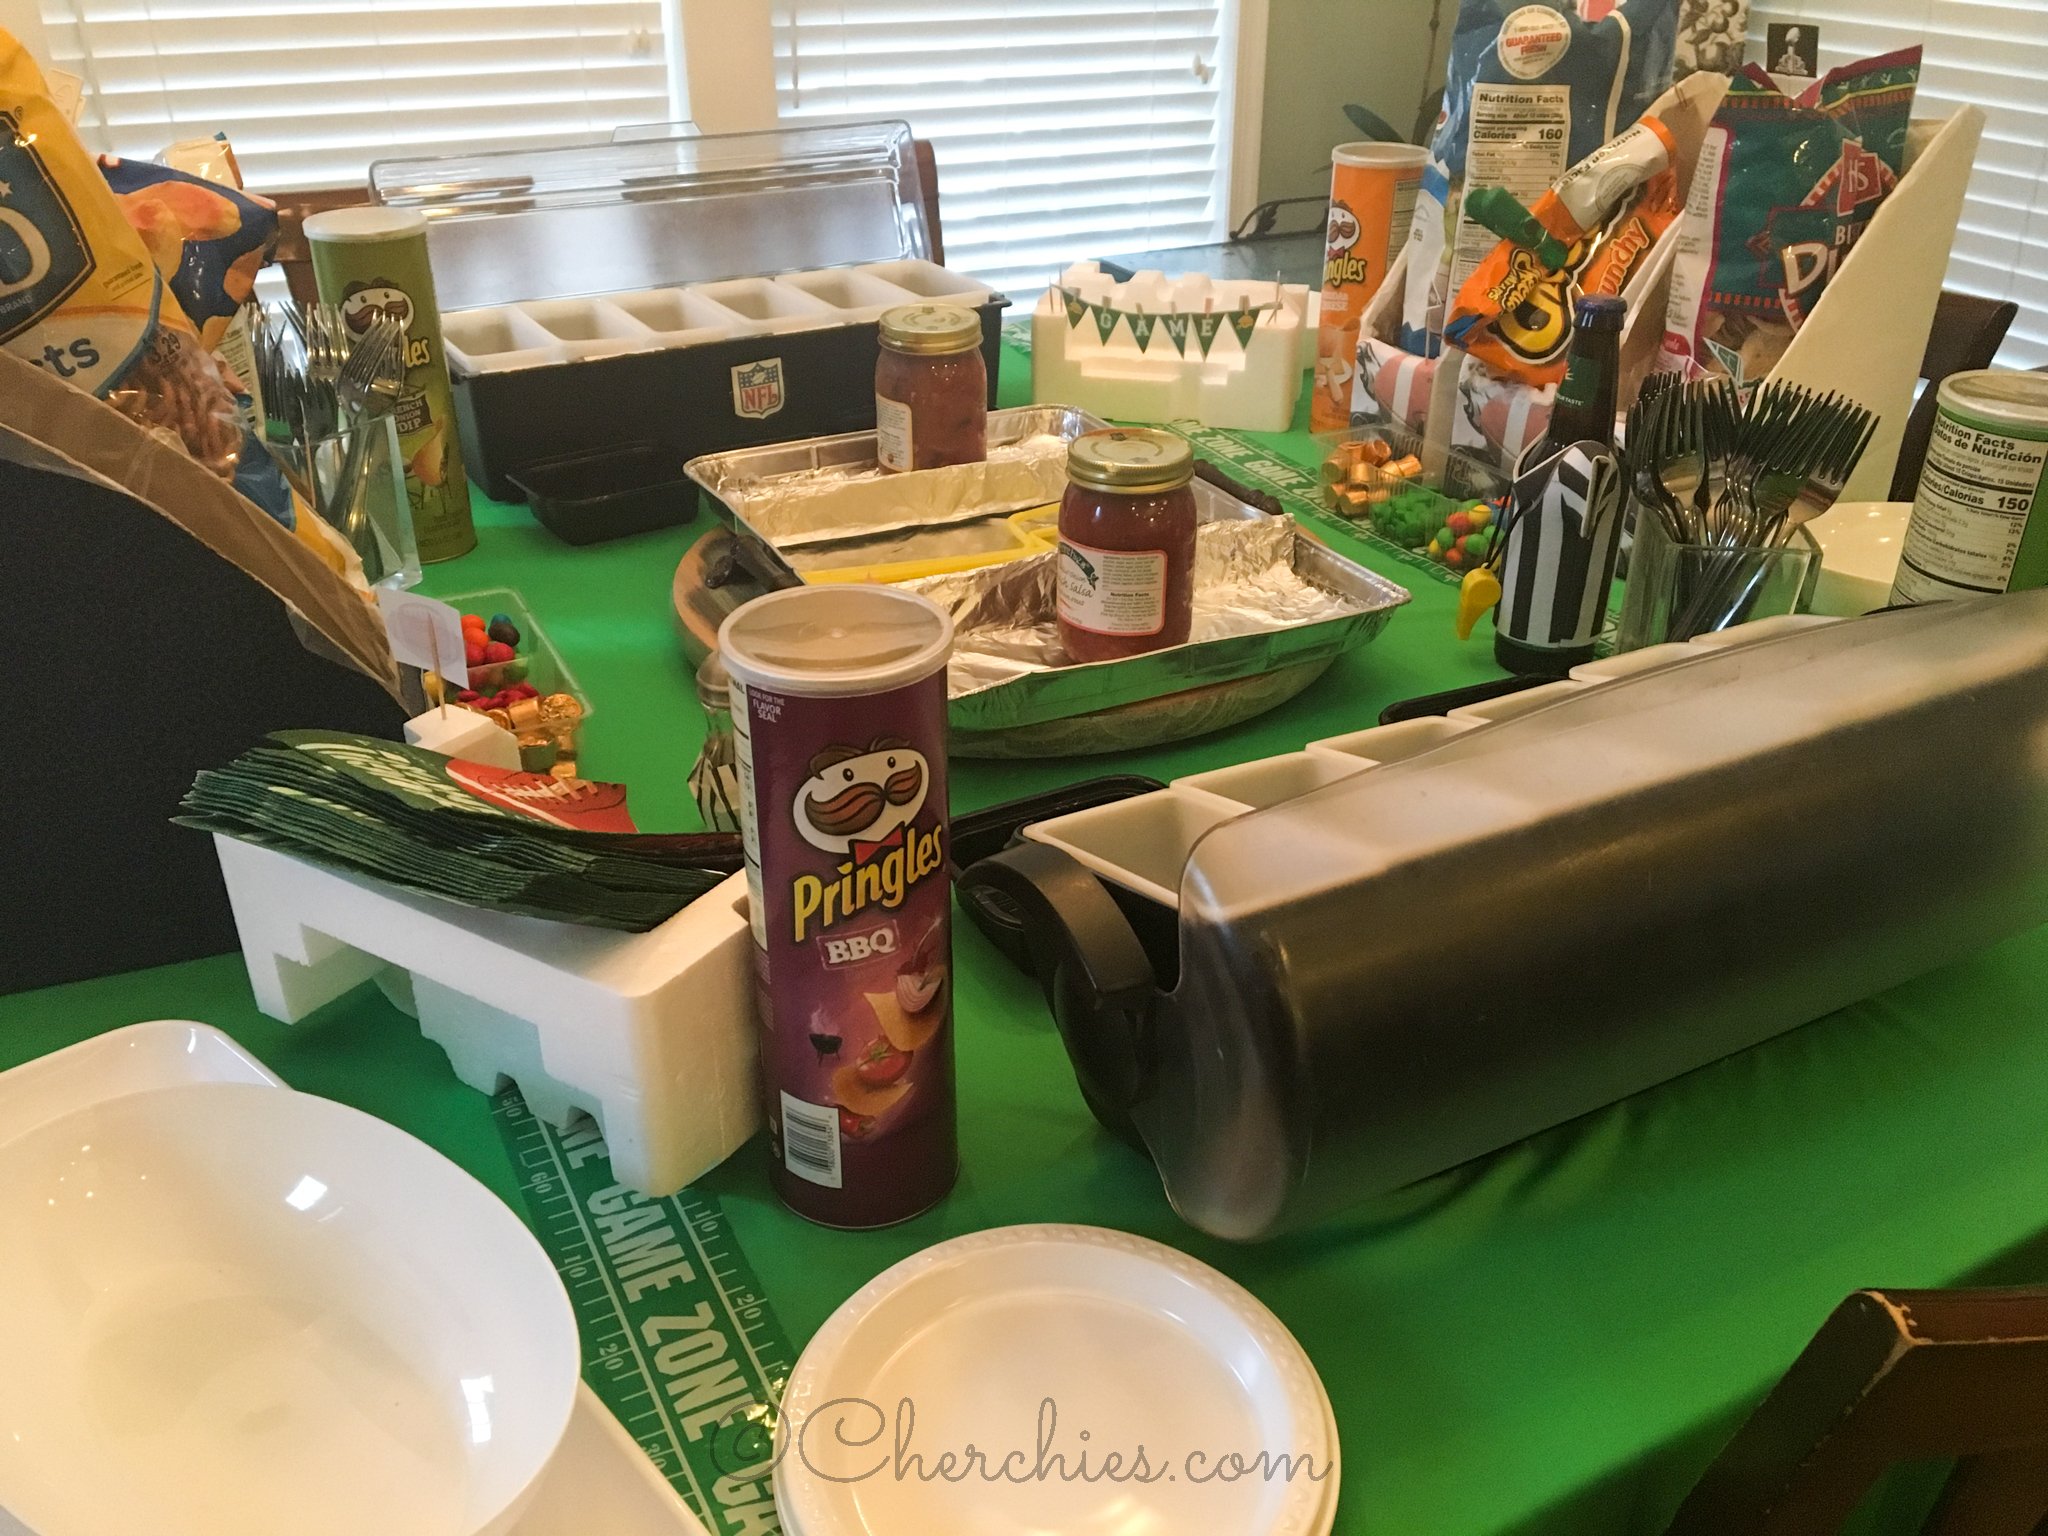
In the first picture, we used dip containers (from our local restaurant supply store) for tasting at Cherchies® food shows. The other pictures I got from Pinterest show different containers you could use.

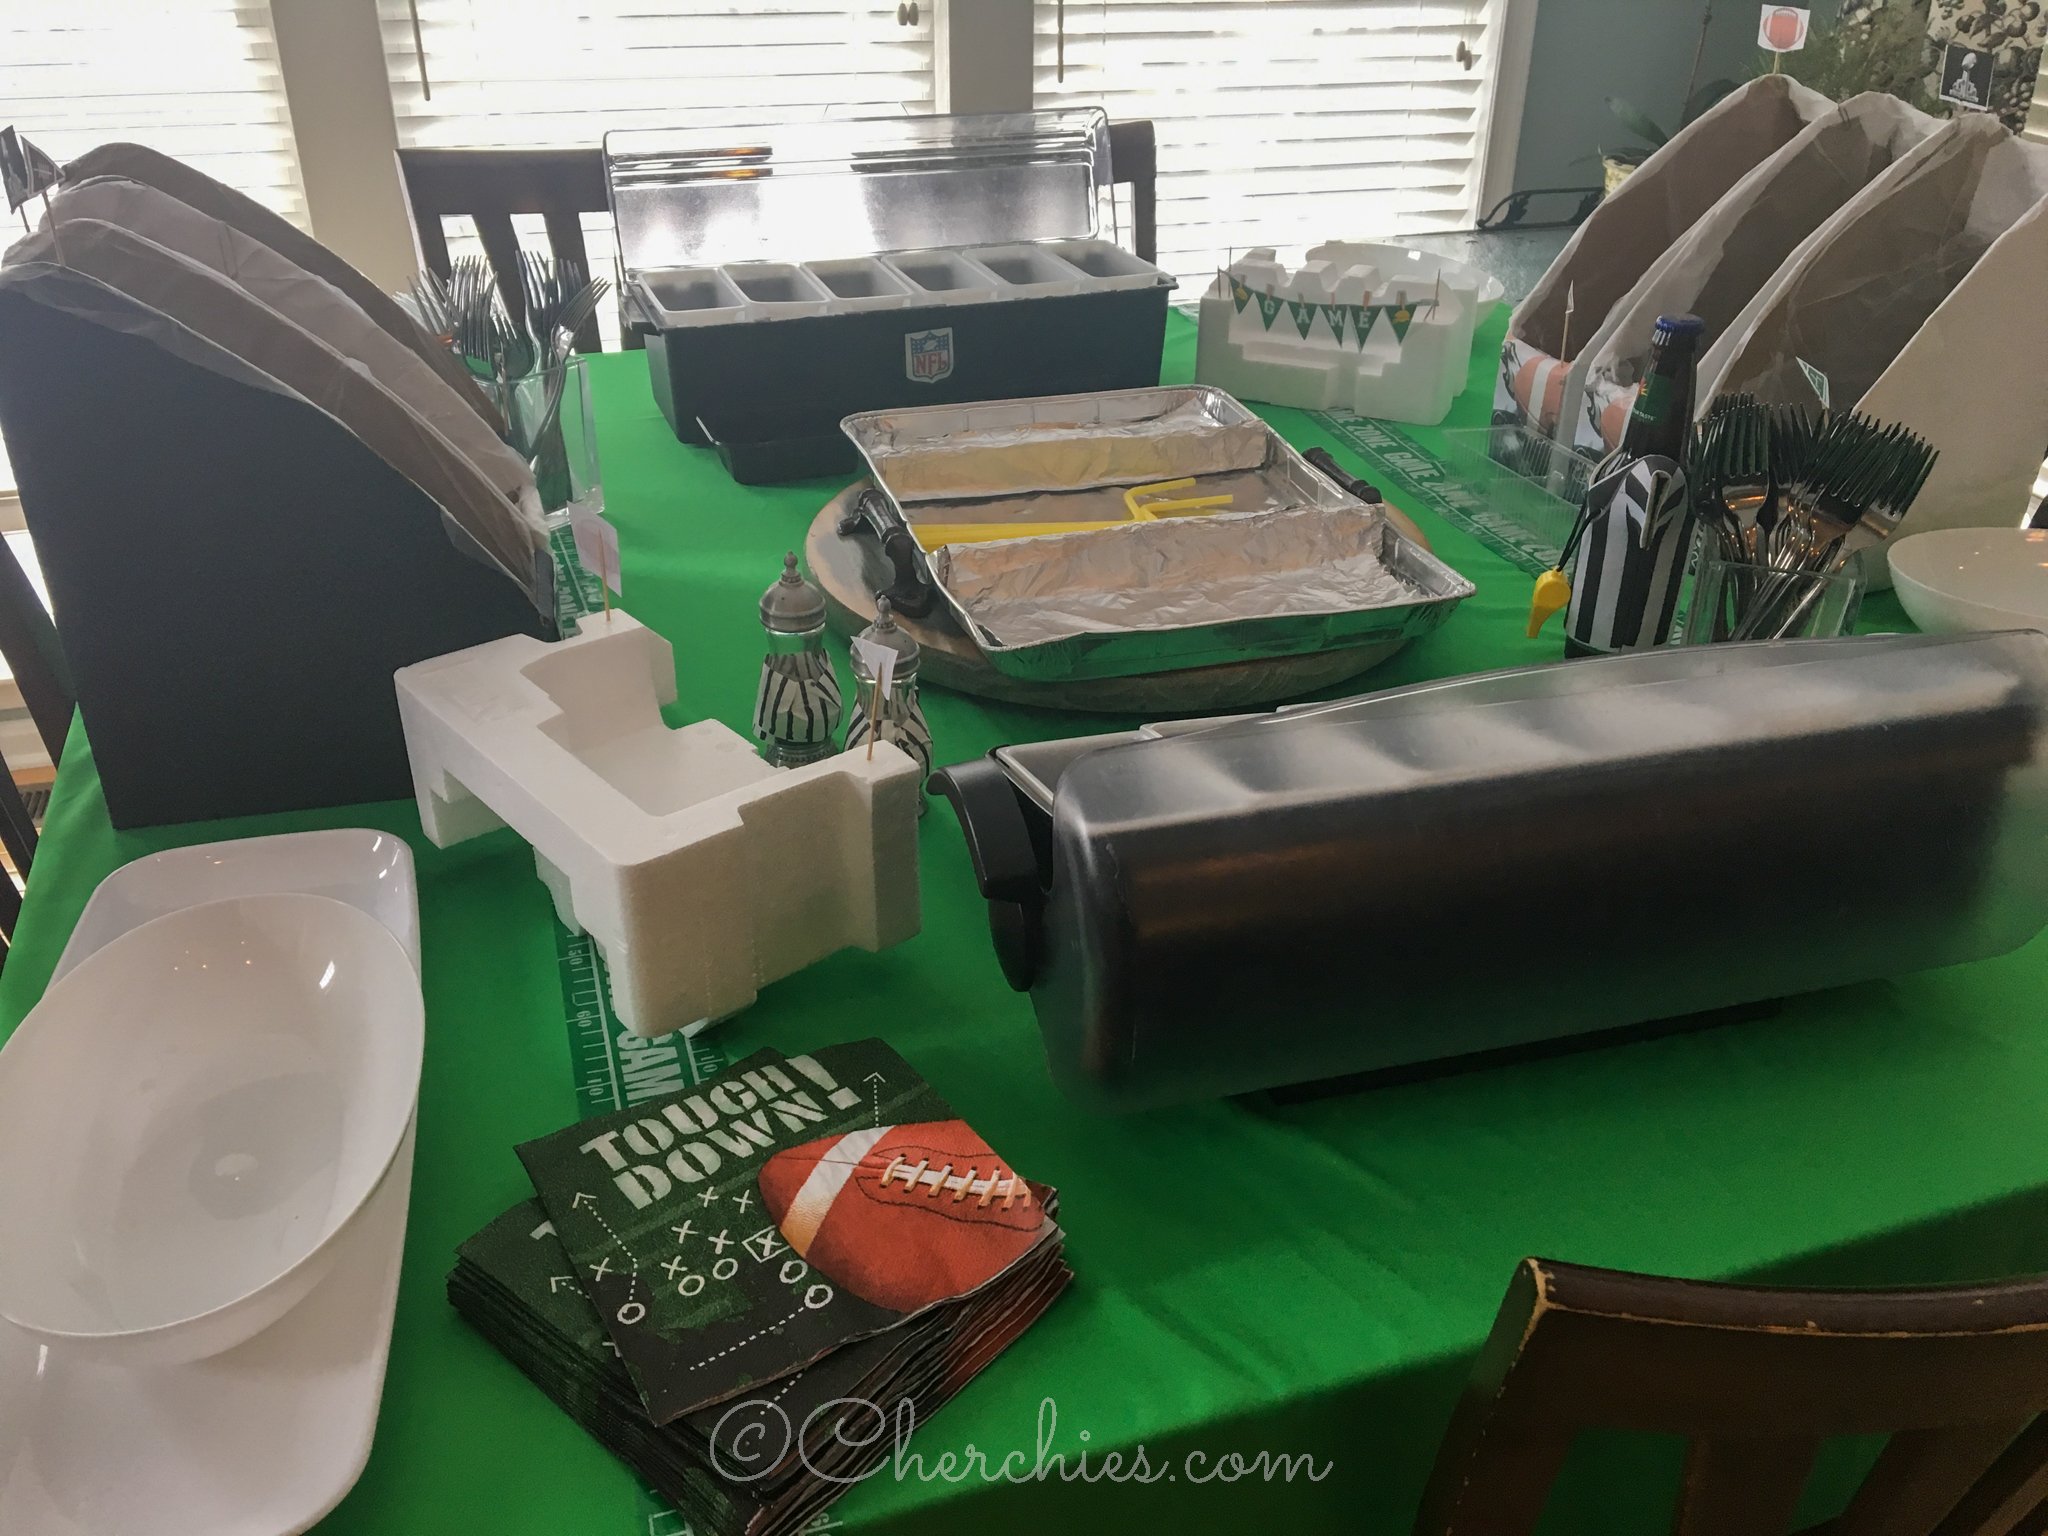
Our children had a lot of fun decorating everything, including our salt and pepper shakers that they turned into referees, covering them in white craft paper with Sharpie stripes. Once you have your plan in place, the fun begins, filling your stadium!


Here are some of our favorite stand ideas from those creative internet people…and you know who you are!

Filling your Snack Stadium

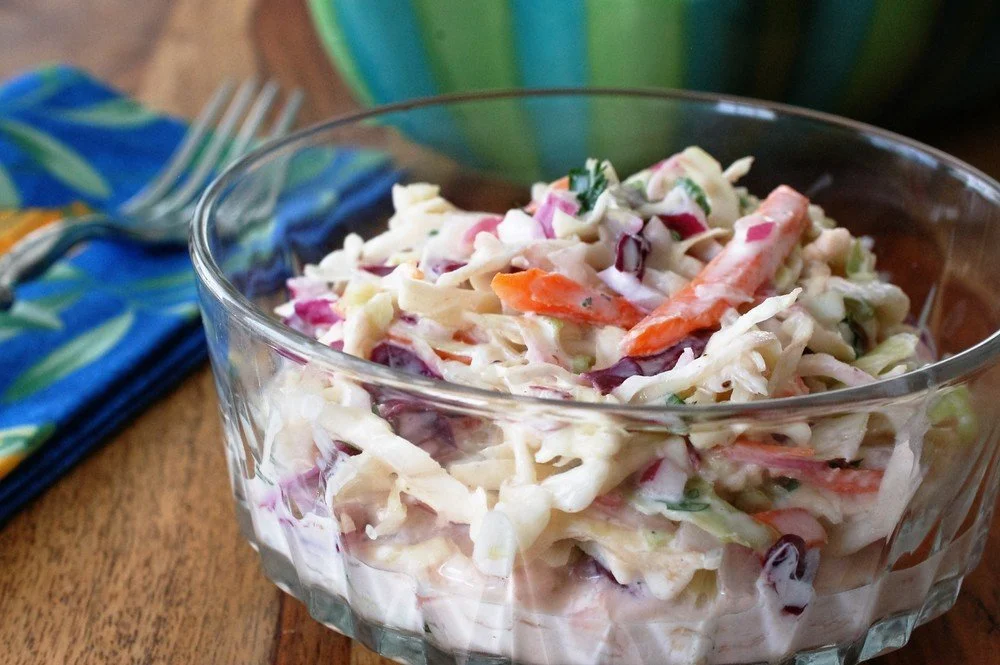
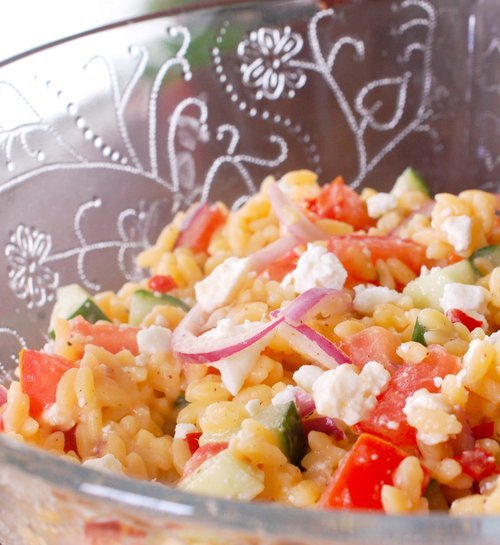
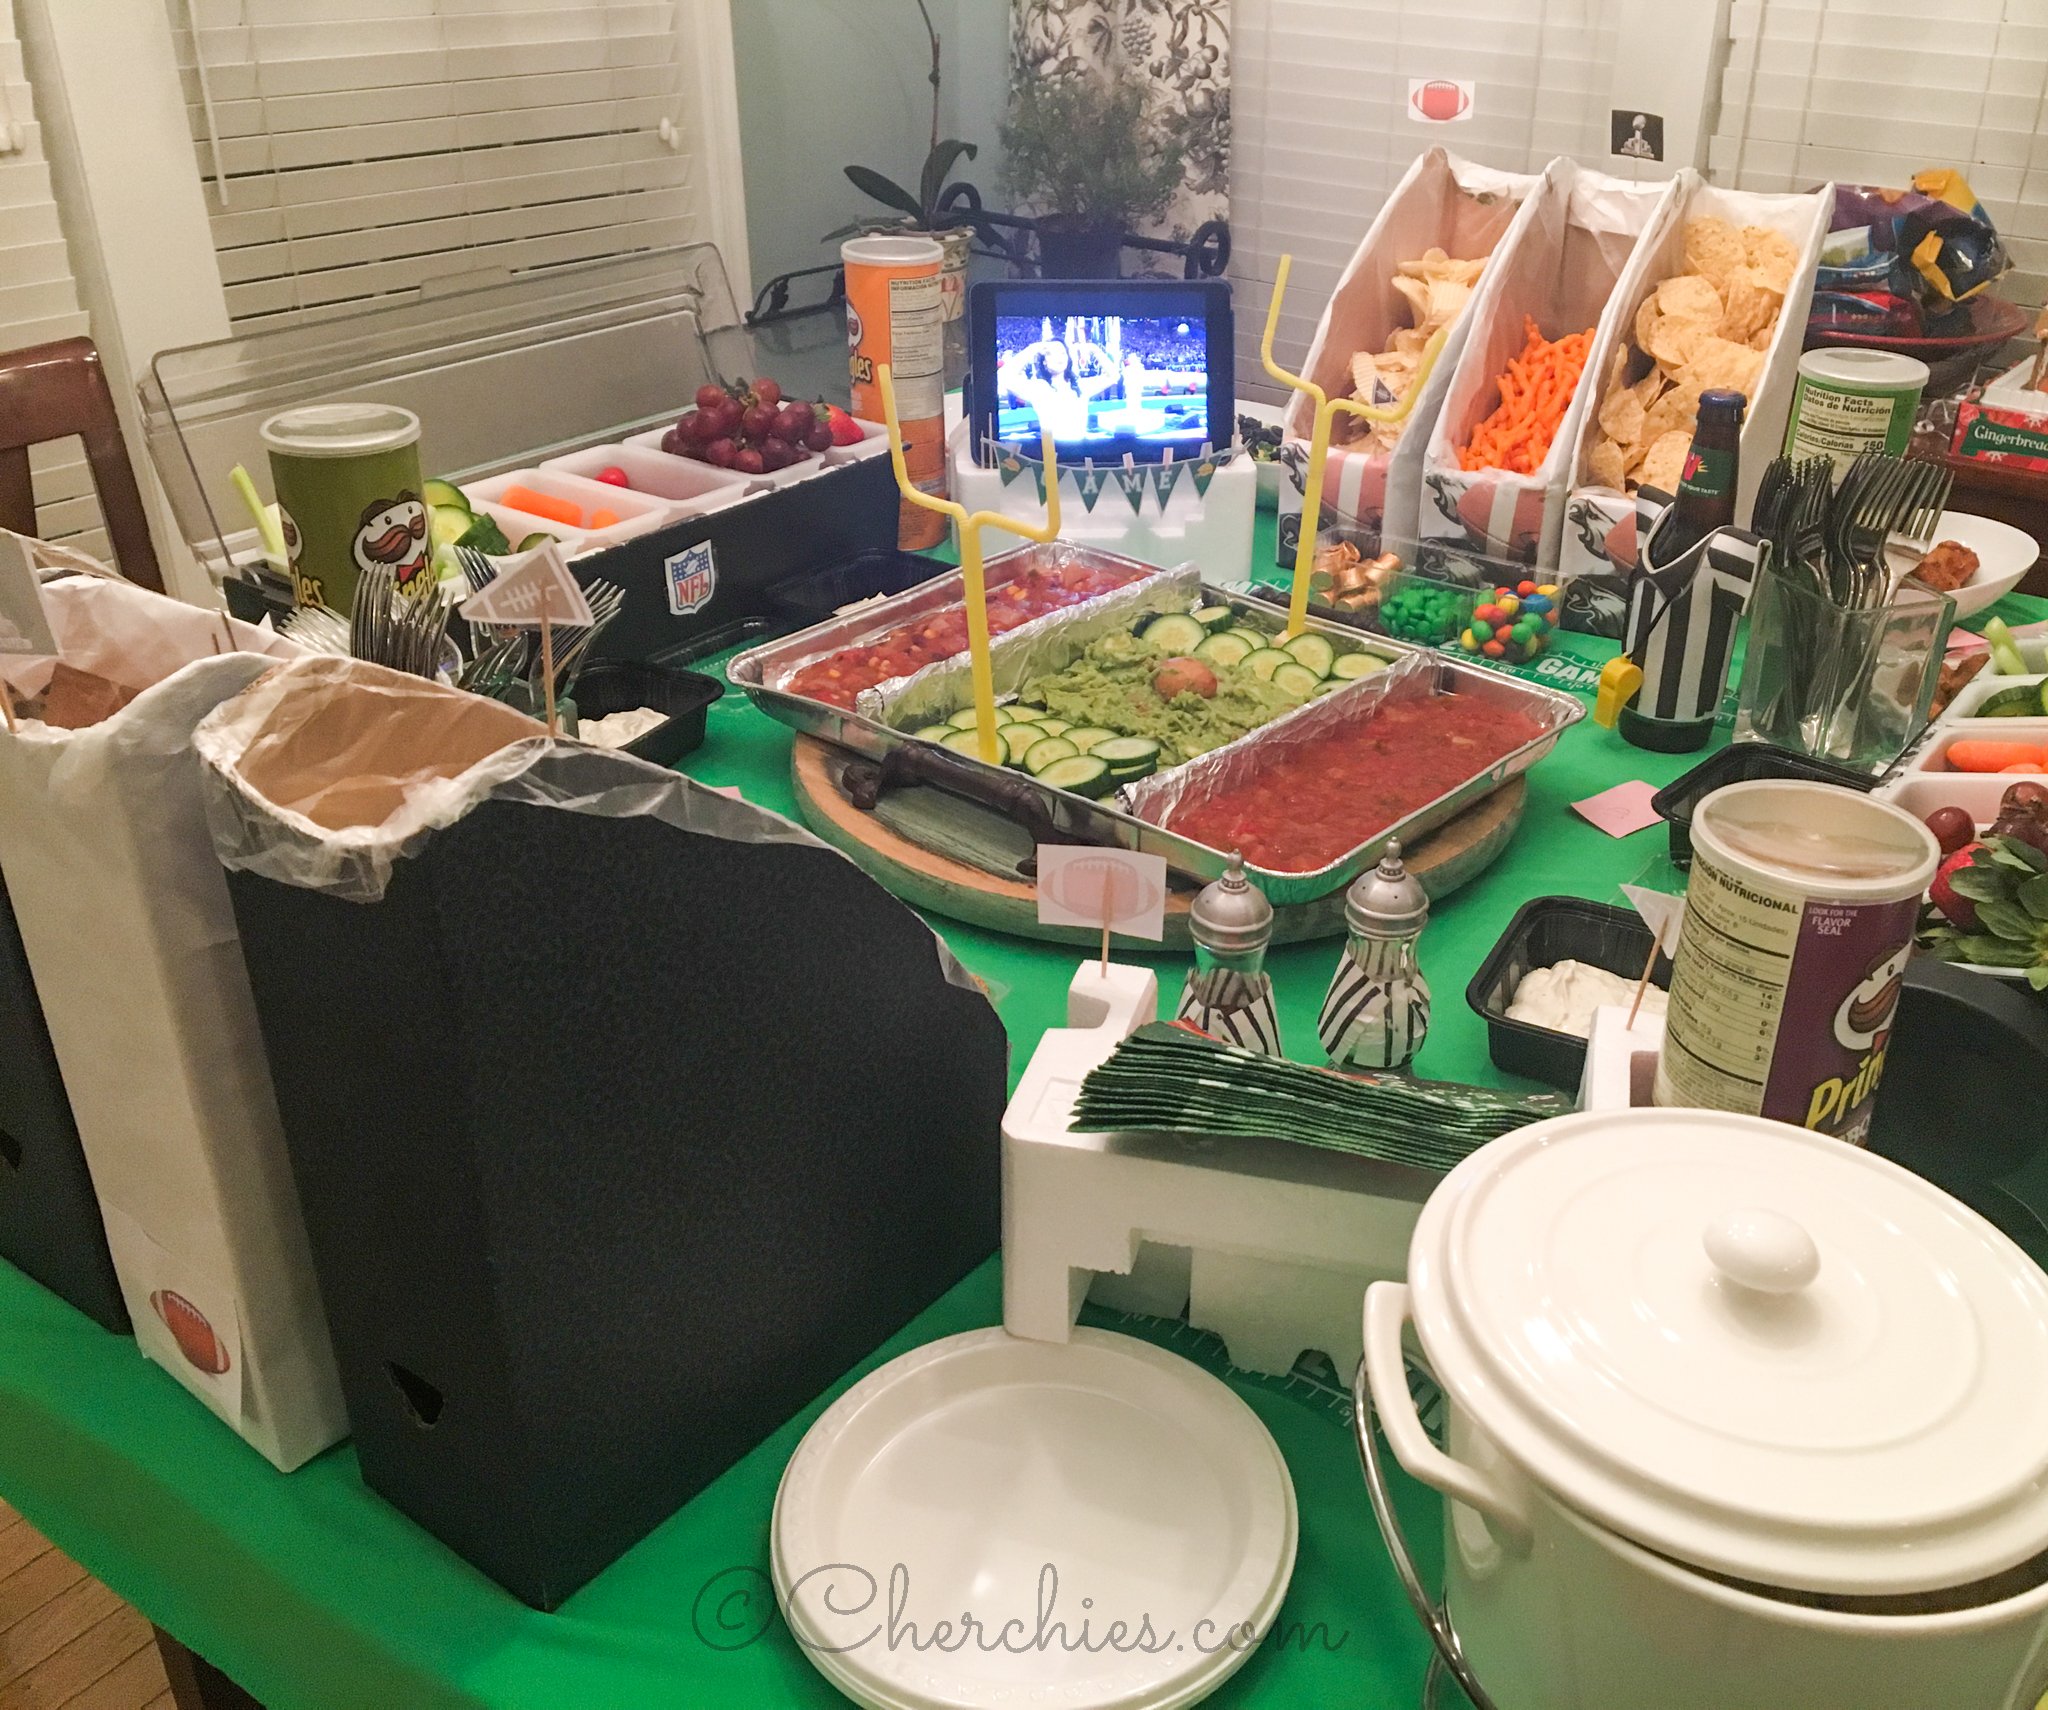
This is the best part! Most Gameday celebrations are about the food, and we went further with some fun, creative ideas. The guacamole was in the middle, flanked by two different salsas in the end zones.

On opposite sides, the magazine box “stands” and dip containers by the end zones were filled with our favorite snacks, fruits, and veggies, with dips and candies on the “sidelines.”

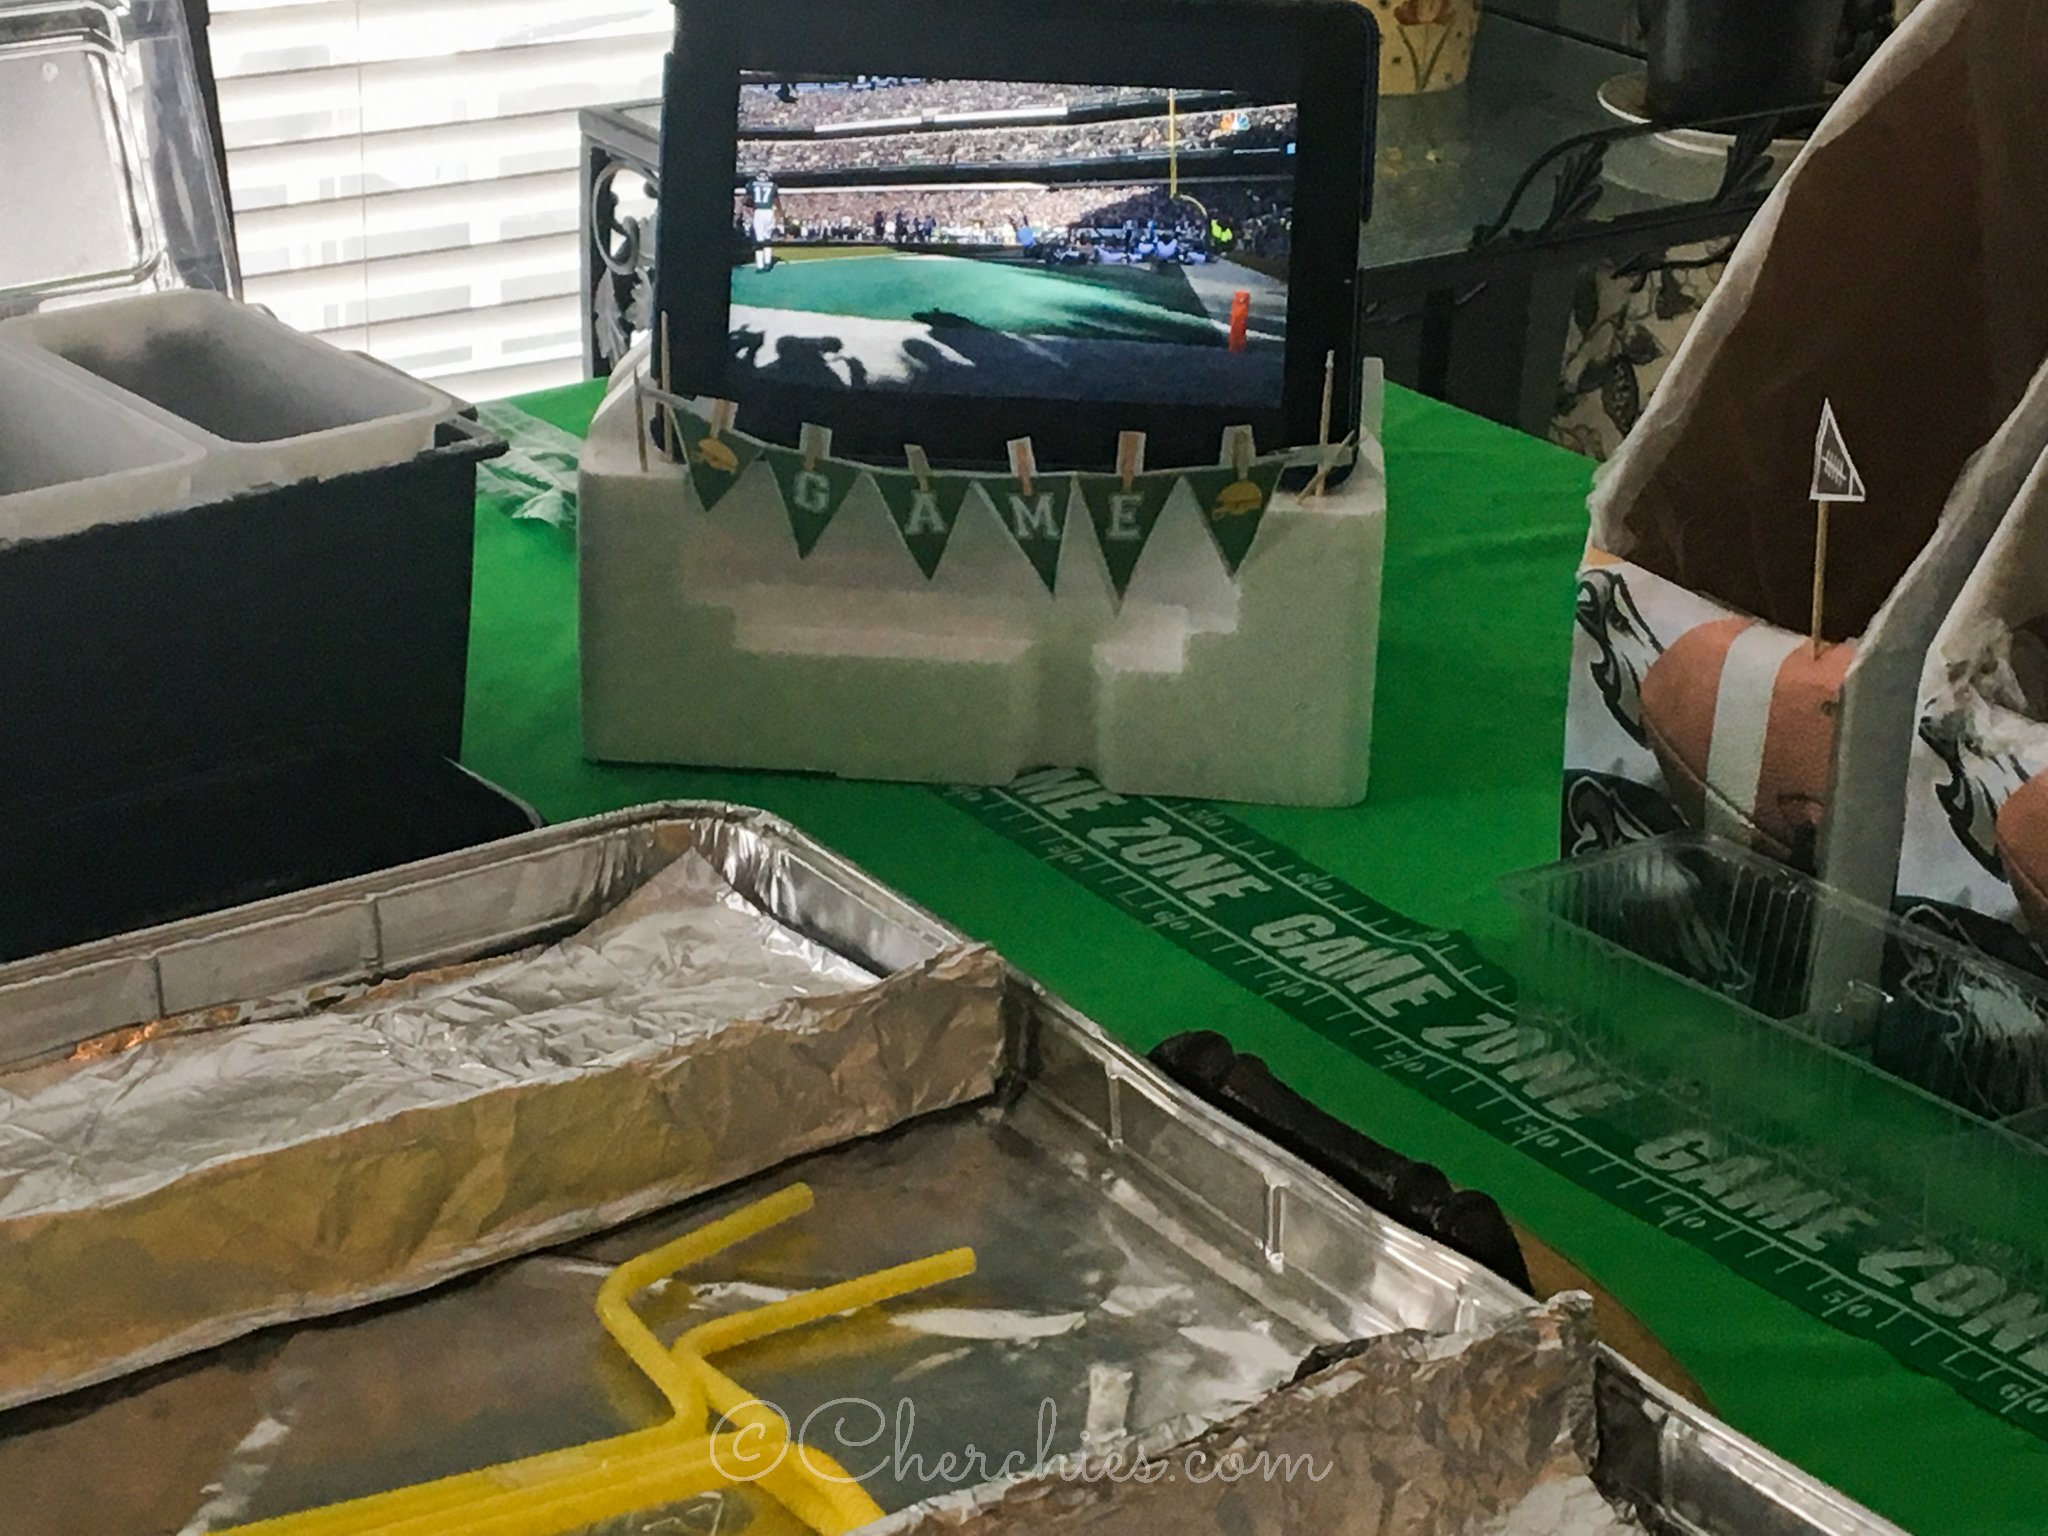
The last touch was a stadium monitor. We propped our iPad on some styrofoam inserts from something we had purchased. I have to say, this was my contribution, and I was very proud of myself:) We streamed the game on the iPad for the ultimate “snack stadium.”

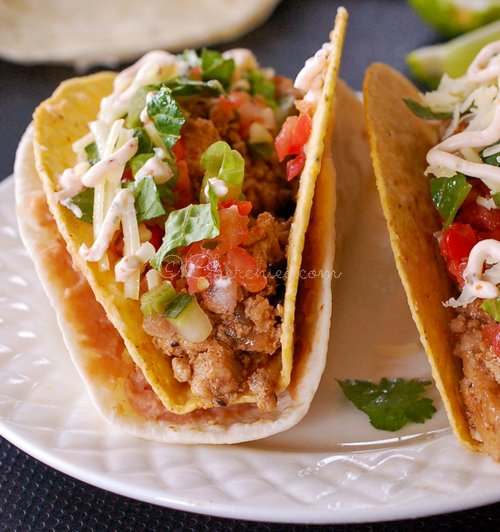
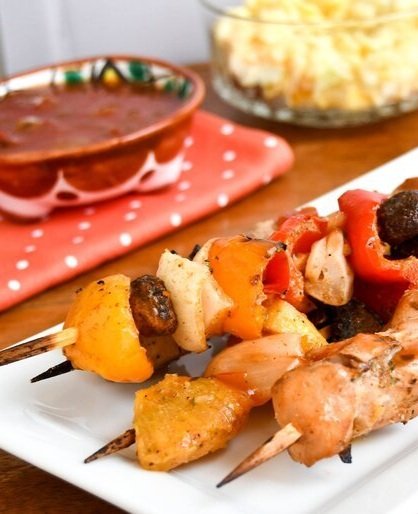
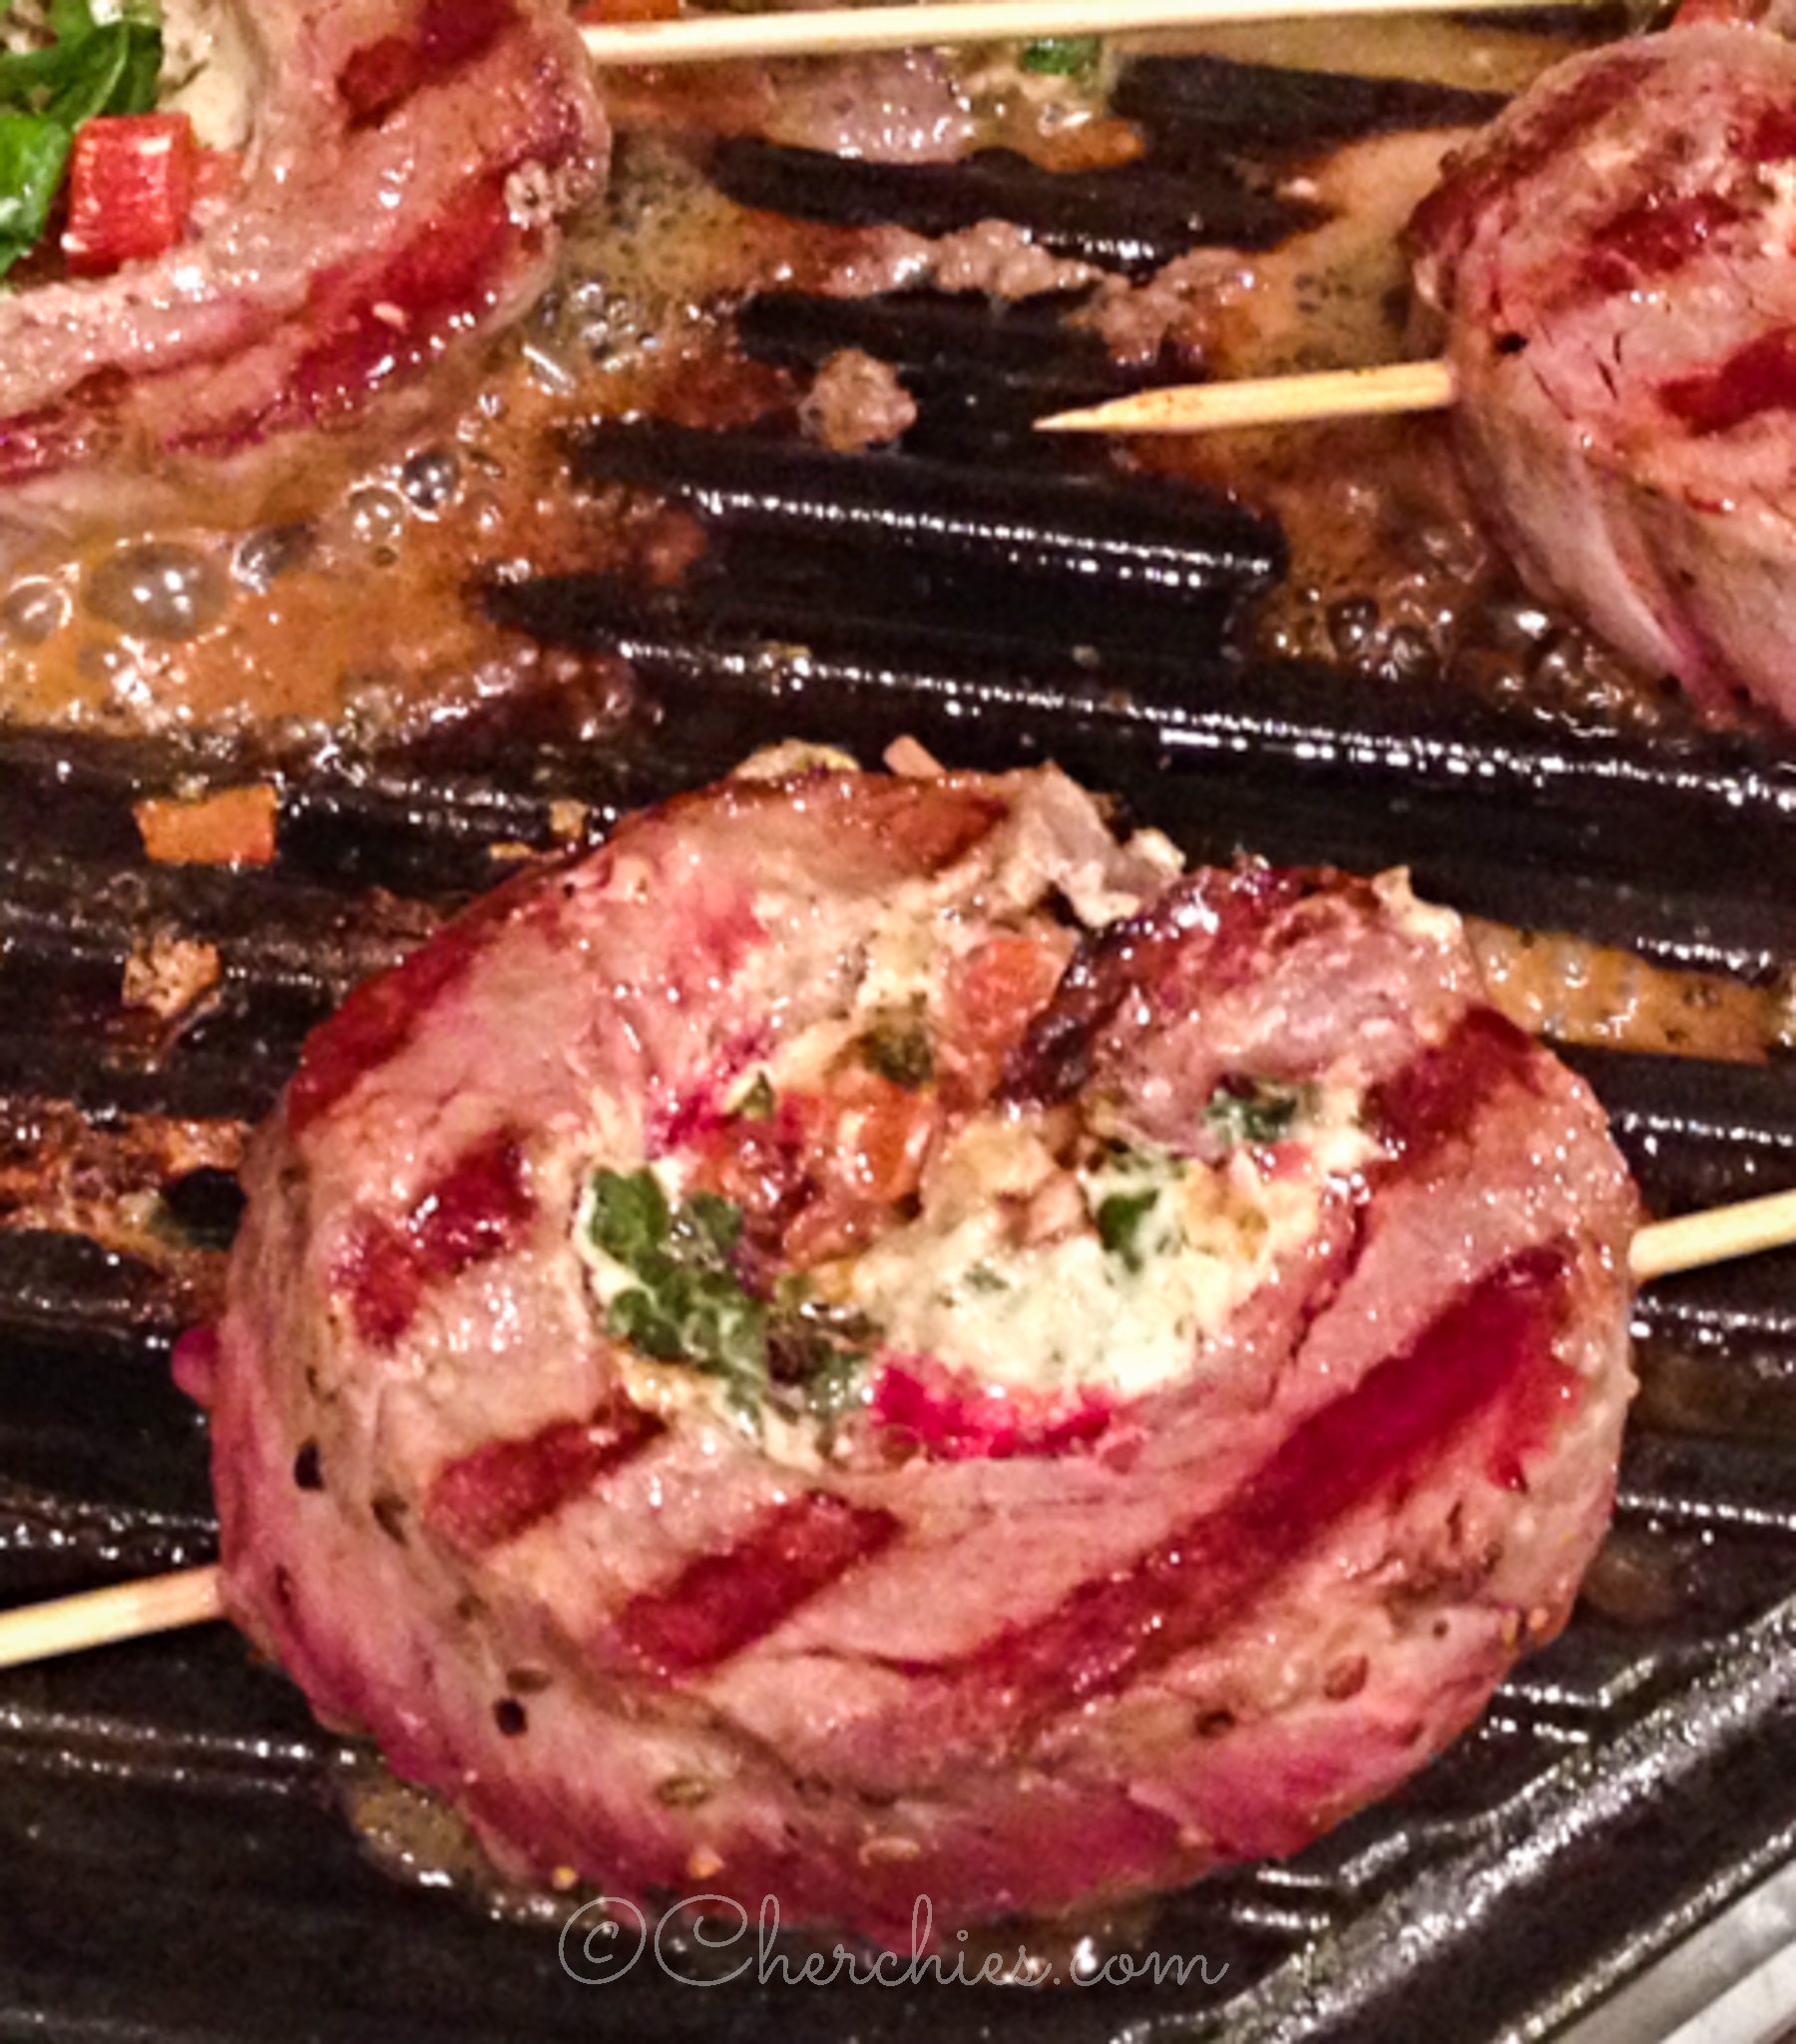
And, if you are looking for tasty game-day recipes featuring Cherchies® Specialty Foods, check out these recipes.

So, score a touchdown with your guests this Super Bowl Sunday with your creativity and create your own “snack stadium” using household items. Comment below and send us your photos. Thank you for stopping by!
GO EAGLES!!

Yum

Lemon Dill Smoked Salmon Spread

appetizers, snacksSheri SpalloneComment

Lemon Dill Smoked Salmon Spread Recipe

Entertain in style at your next cocktail party, brunch, or game day gathering with this easy to make, festive, homemade smoked salmon dip/spread. This “fancy pants” crowd-pleaser recipe can be served as an appetizer with crackers and cocktails, or it is versatile enough to be set out on a brunch buffet with bagels and all the fixings.

The cream cheese makes this more of a spread than a dip because it is thicker, but adding a little sour cream to your desired consistency, will do the trick if you want to thin it out.

Aside from the smoked salmon being the star of this dish, the freshness of the lemon and Cherchies® Lem’n Dill Seasoning puts this delicate hors d’oeuvre recipe over the top for your fish-loving friends. I would recommend making this dip a day ahead to allow the flavors to intensify and marry together.

So if you are looking for an easy and elegant appetizer, brunch spread for the holidays, or game day party dip, look no further. You have got to try this fabulous dip/spread. Your crowd will go wild over this Lem’n Dill Smoked Salmon Recipe, but make sure you grab some for yourself because it will disappear before your eyes.

Thanks for stopping by:) Comment below if you have made this delicious recipe. Come back again for more family-tested recipes, entertaining ideas, and cooking tips using all our favorite Cherchies® gourmet products.

Follow us on social media: Facebook, Instagram, and Pinterest.

Ingredients

  • 8 oz. cream cheese, softened

  • 1/4 cup sour cream

  • 4 to 6 oz. of smoked salmon, setting aside a couple of strips for garnishing

  • 2 Tablespoons (Tbsp.) Cherchies® Lem'n Dill Seasoning

  • Juice of 1 lemon

  • Dash of hot pepper sauce (We used Sriracha)

  • Dash of Worcestershire sauce

  • Salt and pepper to taste

  • 2 Tablespoons (Tbsp.) chopped scallions (reserve 1 teaspoon (tsp.) for garnish

Preparation
Add cream cheese, sour cream, salmon, lemon juice, sauces, and seasonings to a food processor or stand mixer.

If using a food processor, pulse the ingredients (depending on desired consistency) to combine. * If you prefer larger chunks of smoked salmon, only pulse until combined. If using a stand mixer, add ingredients to the mixing bowl, and using the paddle attachment, mix until desired consistency.

Transfer the cheese mixture to a bowl, and stir in chopped scallions. Cover and refrigerate. We have found that the flavors intensify if made the day before your gathering. Serve with your favorite crackers, vegetables, or bread, or a combination of both. Garnish with reserved smoked salmon and a few green onions for an easy and tasty appetizer, and the perfect fancy treat for a crowd.

Enjoy!


Yum

Salted Caramel Apple Cupcake Recipe

dessertsSheri SpalloneComment

Salted Caramel Apple Cupcake Recipe

Prep Time: 15 minutes

Cook Time: 1 hour 35 minutes
Difficulty: Easy

Servings: 14 cupcakes

Happy Fall!  

Here in Pennsylvania, the leaves are beginning to turn brilliant shades of crimson, orange, and gold, the air is getting crisper, and cozy spices like allspice, cinnamon, and cloves are starting to waft through kitchens across the country. What better way to celebrate the season than with a Fall-inspired recipe? It is the perfect nod to the season to introduce our newest recipe, Salted Caramel Apple Cupcakes, featuring Cherchies® Apple Butter Spread

If you are a cupcake fan or a salted caramel fan, you will love these moist, flavorful, rich cupcakes. However, do not let the “salty” scare you away because these cupcakes are emersed in a depth of sweet flavor from the spices and the apple butter. The salted caramel frosting is decadently creamy and buttery and perfectly accompanies this tasty cupcake.

So, in honor of Fall, indulge your palate and treat yourself to the season's flavors with a salty-sweet sensation featuring Cherchies® Apple Butter Spread! You will not be disappointed, and your kitchen will smell amazing!

Happy baking!

Thanks for stopping by:) Comment below if you have made this delicious recipe. Come back again for more family-tested recipes, entertaining ideas, and cooking tips using all our favorite Cherchies® gourmet products.

Follow us on social media: Facebook, Instagram, and Pinterest.


Cupcake ingredients (adapted from thefirstyearblog.com)

  • 2 cups all-purpose flour (we have made this recipe gluten-free by switching out King Arthur’s Measure for Measure Gluten-Free flour, using the same measurements).

  • 1 ½ teaspoon (tsp) baking powder

  • 1 teaspoon (tsp) baking soda

  • ½ teaspoon (tsp) salt

  • ½ teaspoon (tsp) cloves

  • ½ teaspoon (tsp) allspice

  • 1 stick butter (1/2 cup), room temperature

  • 1 cup brown sugar

  • 2 large eggs, room temperature

1 jar (9.5 oz.) Cherchies® Apple Butter Spread


Salted Caramel Icing Ingredients (adapted from thefirstyearblog.com)

  • 2 sticks butter (1 cup), room temperature

  • ⅓ cup Homemade Caramel sauce (or your favorite jarred caramel sauce)

  • ¼ teaspoon (tsp) salt

  • 2 cups powdered sugar

  • A little milk, cream, or half and half if needed to thin out the icing

  • Caramel sauce to drizzle on top (optional)

  • coarse sea salt to sprinkle on top (optional)


Cupcake Preparations (adapted from thefirstyearblog.com)

Preheat the oven to 350ºF.

Line a 12-cup muffin pan with cupcake liners and set the pan aside. Line 1 more cupcake pan with two liners (this recipe makes about 14 cupcakes).

While the oven is preheating, make the homemade caramel sauce. (If using jarred caramel sauce, then skip this step. Homemade caramel sauce is so easy and comes together in minutes). Directions below.

Whisk together the flour, baking powder, baking soda, salt, cloves, and allspice in a medium bowl. Set aside.

In a large mixing bowl, combine the room-temperature butter and brown sugar, and mix with an electric mixer until combined & creamy, about 30-60 seconds. Add in the room temperature eggs one at a time, and combine again with the mixer.

Add in Cherchies® Apple Butter Spread and lightly beat. Gradually add in the dry ingredients (flour mixture), mixing by hand with a spatula until it’s just incorporated. The batter will be thick. Fill each muffin cup 3/4 full with batter. Bake for 19-21 minutes (rotating cupcake pan halfway through cooking) or until a toothpick inserted in the center comes clean. Ovens vary, so start checking for doneness around 17-18 minutes.

Allow the cupcakes to cool in the pan for 5-10 minutes, then move them onto a cooling rack to cool completely.

Salted Caramel Icing Preparation

Place the room-temperature butter, cooled caramel sauce (if homemade), and salt in a mixing bowl. Turn an electric mixer on medium and beat the butter for 1 minute until it is whipped and fluffy.

Add in the powdered sugar, and beat again on low for 1-2 minutes, scraping down the sides of the bowl with a rubber spatula or until everything is incorporated. Add a tablespoon of milk, cream, or half-and-half if the icing is too thick, and beat until creamy.

In a plastic piping bag (or ziplock bag with the corner snipped off), fit with a piping tip (I used a Wilton 1M tip) and add the frosting. Push the frosting down into the bag. Twist the top of the bag closed and pipe the frosting onto the cupcakes in a circular motion. Drizzle with caramel sauce and sprinkle with coarse sea salt (optional).

Enjoy!

Note** The cupcakes and frosting can be made one day in advance. Make sure to cover tightly and store them in the refrigerator. Unfrosted cupcakes can be frozen for 2-3 months but thaw overnight in the refrigerator when ready to use.- A cooking tip from Sally's Baking addiction.

How to Make Homemade Caramel Sauce

Ingredients

  • 1 cup of brown sugar

  • 6 Tablespoons (Tbsp.) unsalted butter, cut into small pieces

  • 1/2 teaspoon (tsp) sea salt (if you want salted caramel, add up to 1 tsp. salt- Kosher salt is acceptable too)

  • 1/2 teaspoon vanilla (you could substitute your favorite liquor for an extra special adult treat, we won’t tell, but make sure to keep away from the kiddos).

  • 1/2 cup heavy cream or half and half, room temperature

There seems to be some debate on the internet about making homemade caramel sauce. Some suggest melting the sugar with the butter first, whereas others swear by heating it until it dissolves and adding the butter and the rest of the ingredients at the end. I have tried both ways, with the result being the same. The caramelization process happens quickly, so you do not want to walk away, and you need to ensure all your ingredients are measured and in place before you begin.

Start with a medium-sized stainless steel saucepan (ceramic would work fine too). Add the butter chunks to the pan, turn the heat on low, and gently stir the butter with a wooden spoon (you can use a whisk, too) until it melts. Once the butter has melted, add the sugar and continue to stir until the sugar has dissolved. (Sugar will be HOT! Keep a small bowl of cold water nearby in case of splattering sugar). Continue stirring and scrape the sugar that forms on the side with the spoon or a rubber spatula and incorporate it into the mix.

Continue constantly stirring on low until all the sugar has dissolved and you have achieved this rich caramel color and a nutty aroma. Some of the butter may remain on the top. It is okay. It will incorporate once the half-and-half or cream is added. As the caramel comes to a rolling boil on low, continue rapidly stirring. Add salt and vanilla (or liquor) at this time. If you want salted caramel, add 1/2 teaspoon (tsp) of salt.

For the full directions with pictures, follow this link. http://blog.cherchies.com/home/2018/10/27/cooking-tip-how-to-make-homemade-caramel-dip

Yum

30 Favorite Labor Day Recipes

parties, recipe round upSheri SpalloneComment

30 Easy Labor Day, Memorial Day, or July 4th Recipes

Updated 8/31/2023.

Labor Day, the first Monday of September, typically means that white clothes are out, sales are in, summer holidays are over, and football season and classes begin. For many of us, "it's a welcome day off from work or school, ahead of what is likely to be a busier month than the last ".-Time Magazine. Especially now, since we have seen a return to normalcy, a day off to spend time with family or friends sounds dreamy.

Labor Day started as a part of the labor union movement to recognize the contributions of men and women in the US workforce but modernly is seen as a chance to celebrate the last weekend of summer. -www.dosomething.org.  

In honor of Labor Day, celebrate your day off and the "unofficial" end to summer with our 30 favorite easy recipes. These recipes would be perfect for Memorial Day, July 4th, and Labor Day!

Comment below and let us know if you made any of these recipes. As always, thanks for stopping by:) Please come back again for more tasty recipes, entertaining ideas, and cooking tips.

Happy Labor Day!

Breakfast

Yum