Cherchies Blog

10 Kitchen Hacks That Will Make Your Life Easier

Sheri SpalloneComment

10 Kitchen Hacks That Will Make Your Life Easier

It's time to take your kitchen tools to the next level and ultimately save you time and money in the kitchen.

There are so many gadgets these days designed to make your life easier, but did you know those same gadgets have a multitude of uses? (I love those "aha" moments). These are known as "hacks".

"A kitchen hack is an unusual, easier, and/or better way of performing a task that often saves money and time or improves the quality of the outcome" (Cook's Illustrated Magazine).

Who doesn't love to save time and money?

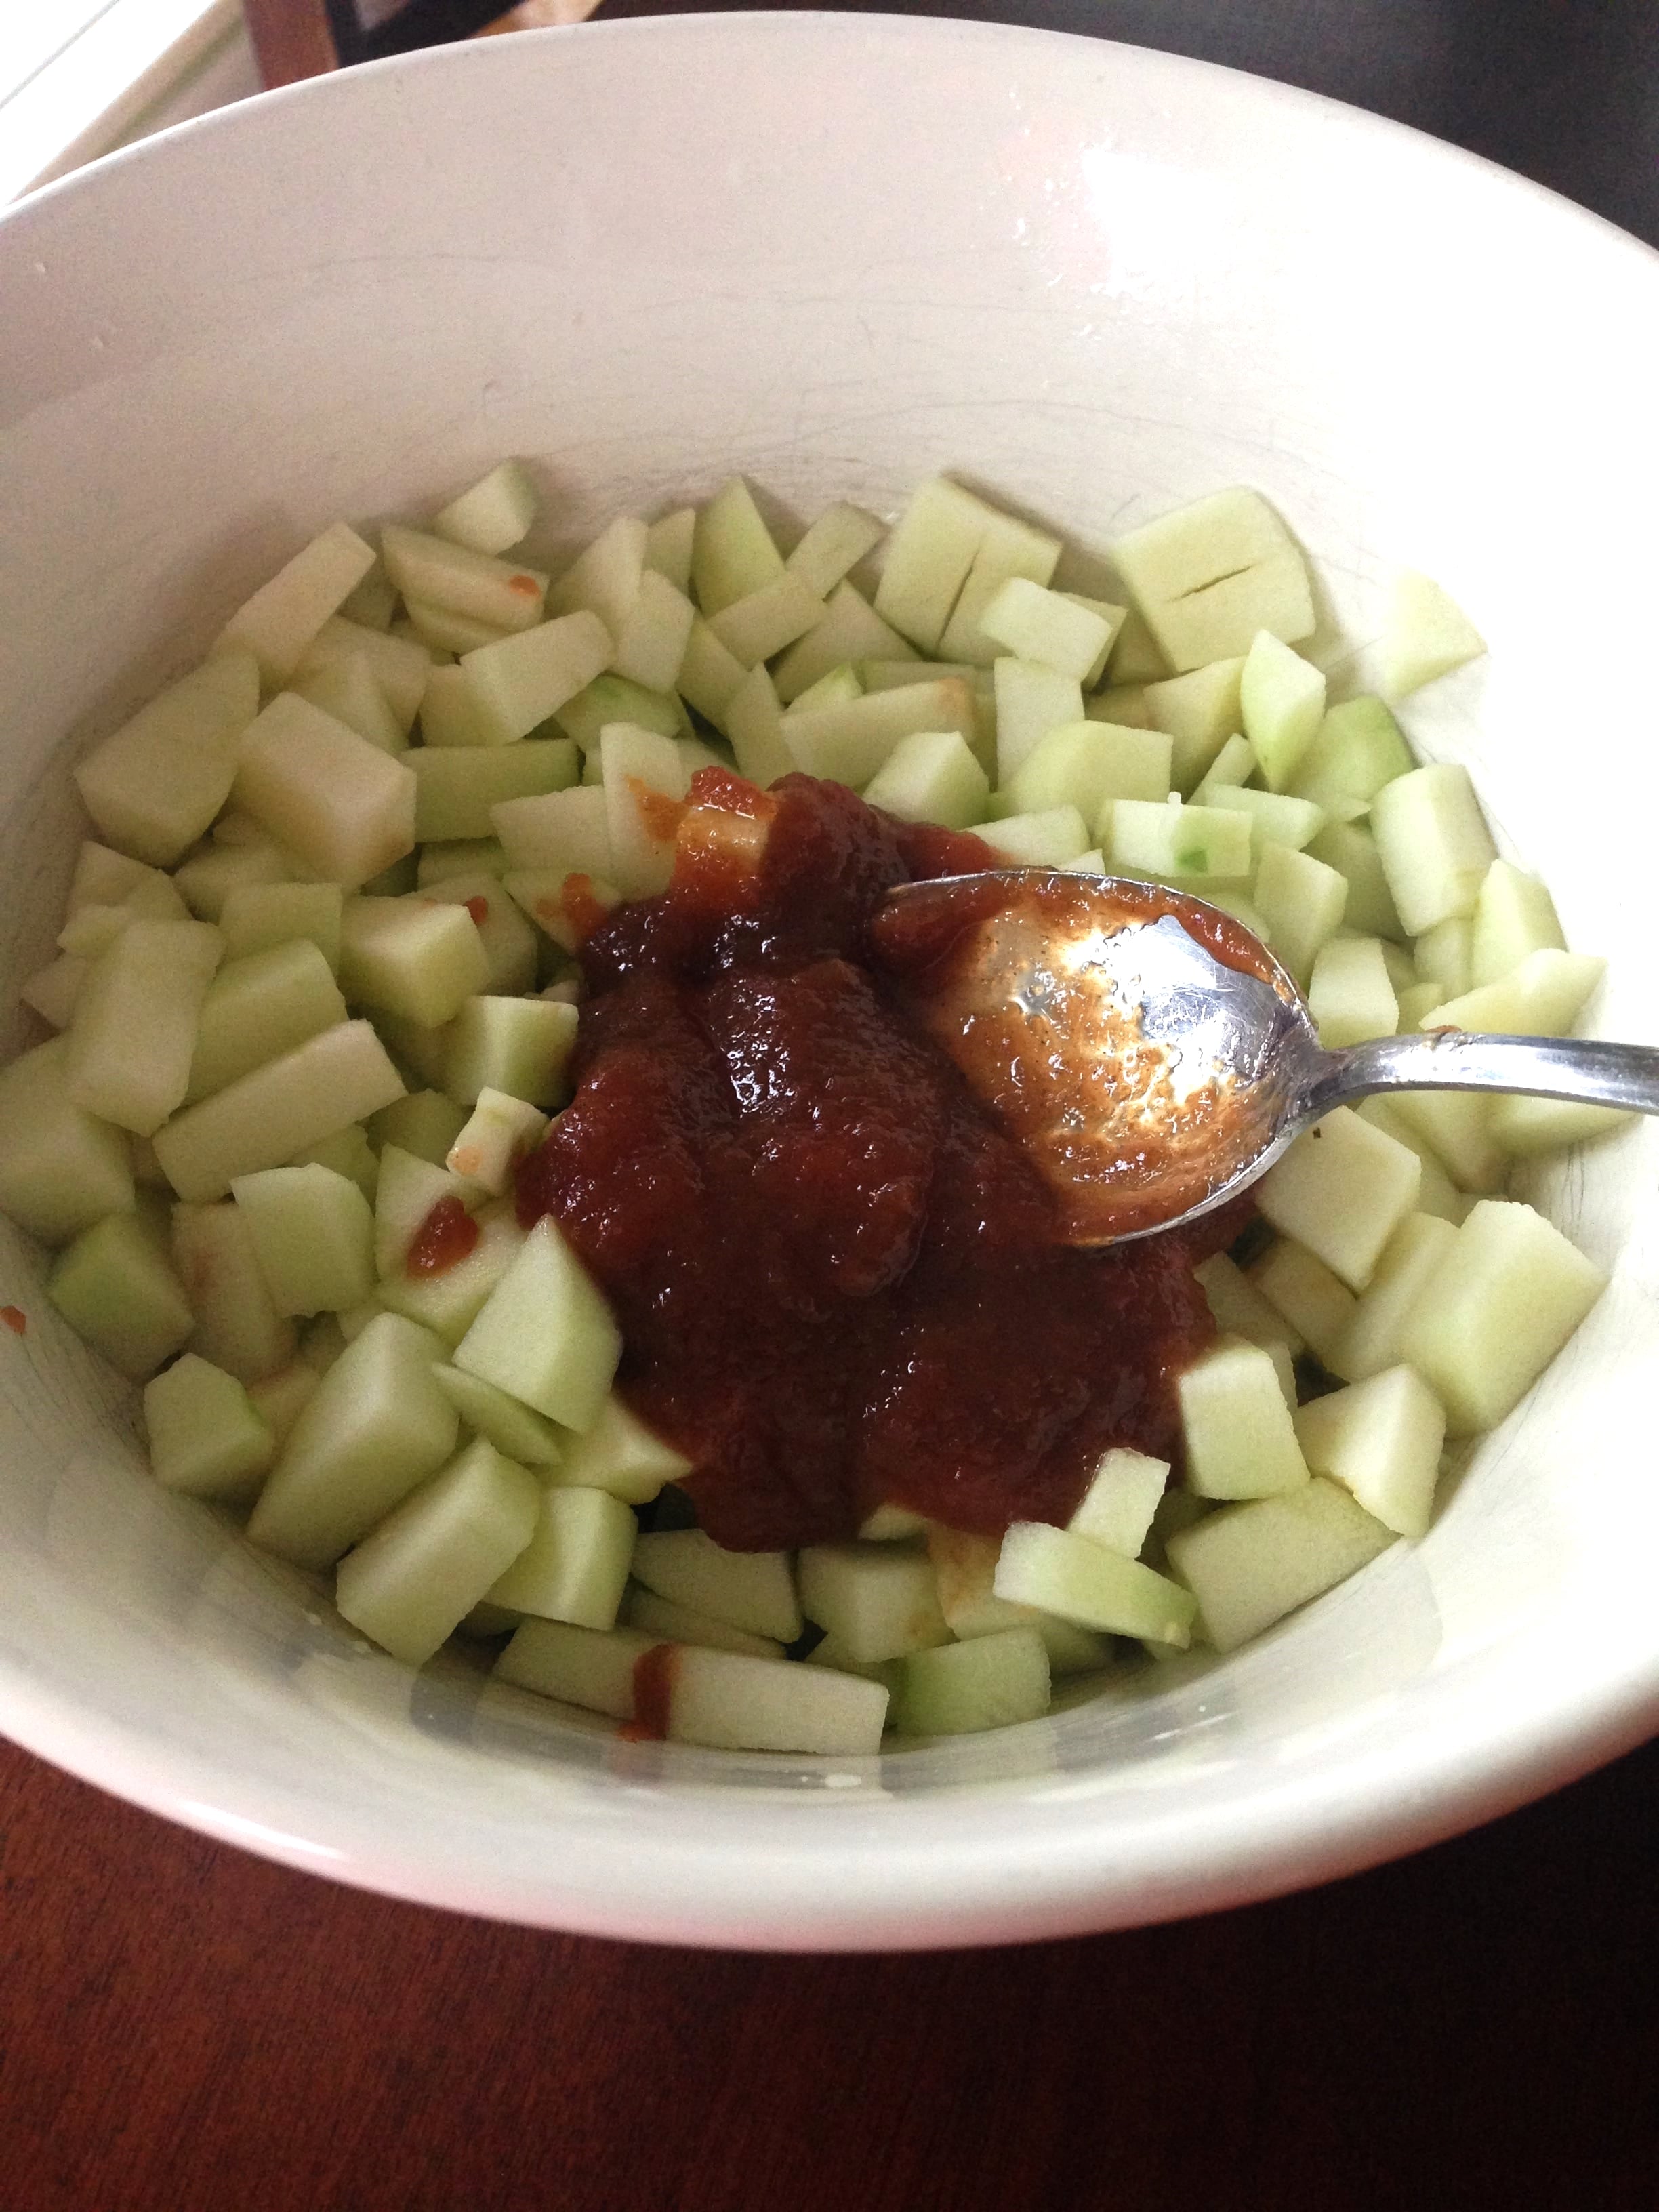
I found this book in my stocking this year (how ever did it get there?) from Cook's Illustrated Magazine, Kitchen Hacks:  How Clever Cooks Get Things Done,  Here are a few of my favorite hacks I thought you'd enjoy and perhaps have your own "aha" moment:)

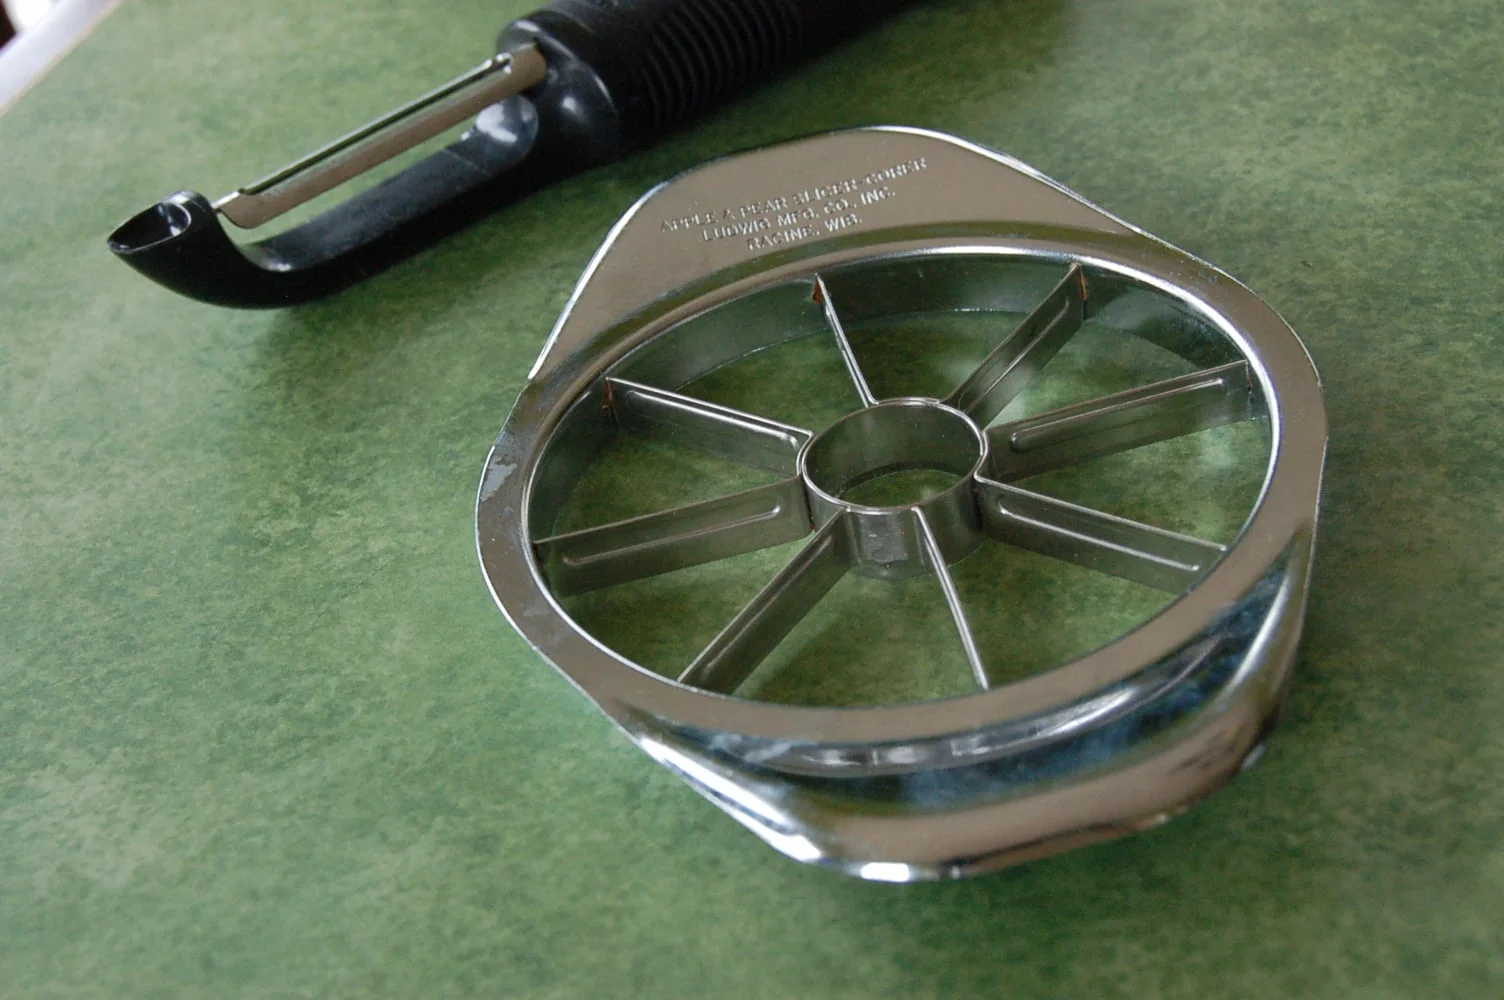
1.  Apple Slicer- In addition to apples, use your apple slicer on potatoes to make quick steak fries or to chop nuts.

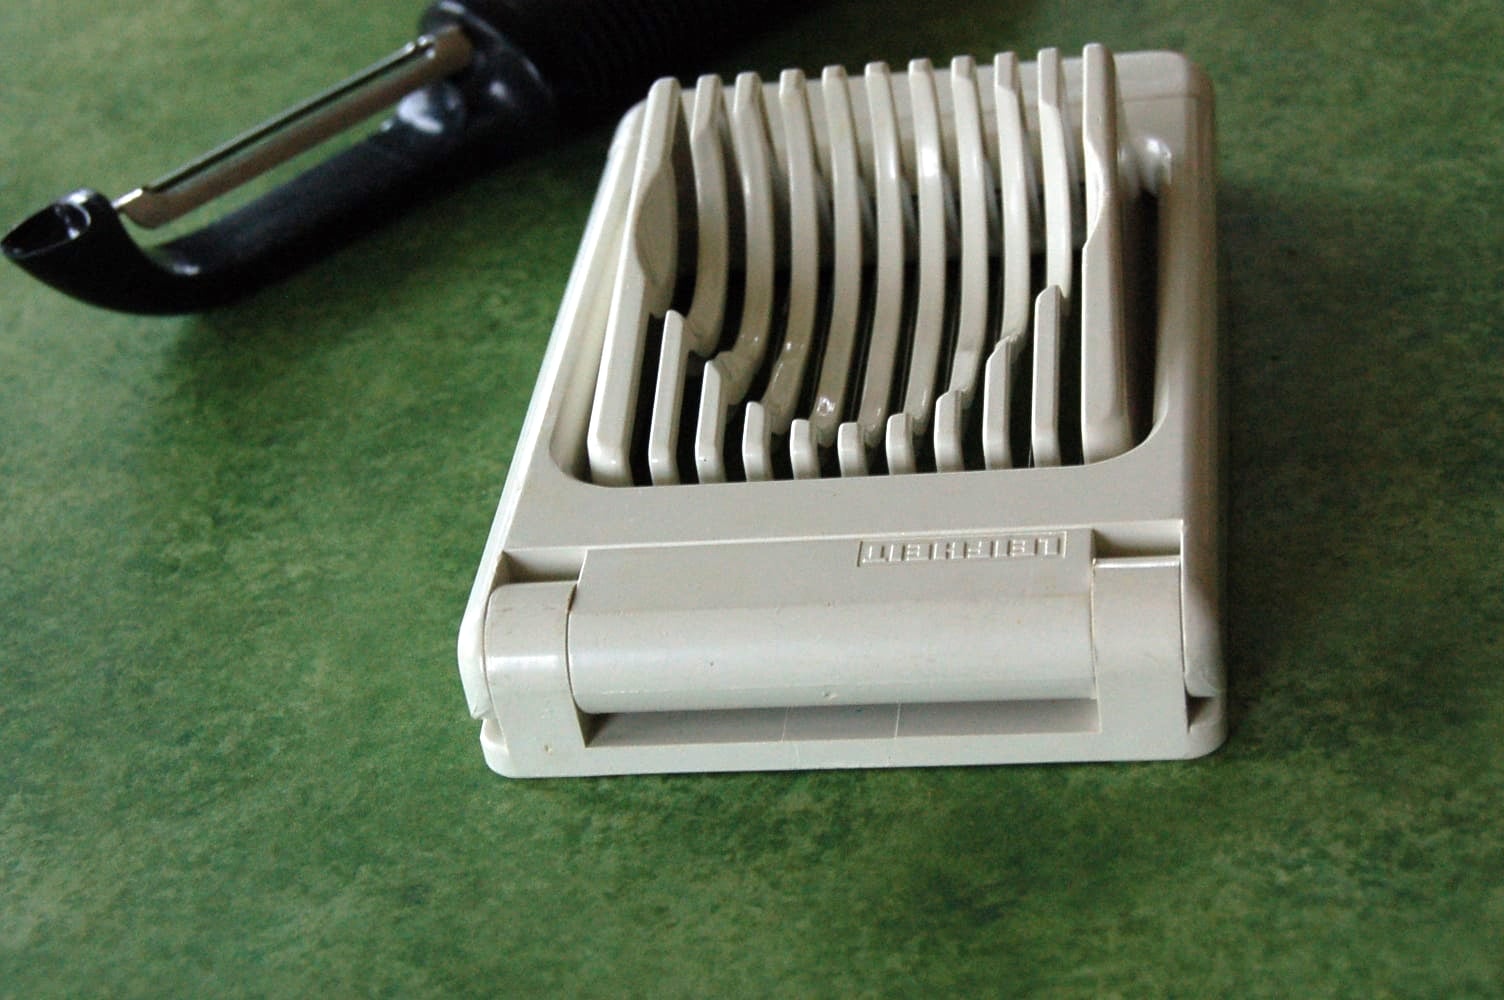
2.  Egg Slicer- Use an egg slicer to slice mushrooms, strawberries, olives, etc.

3.  Salad Spinner- Use a salad spinner to dry fresh herbs

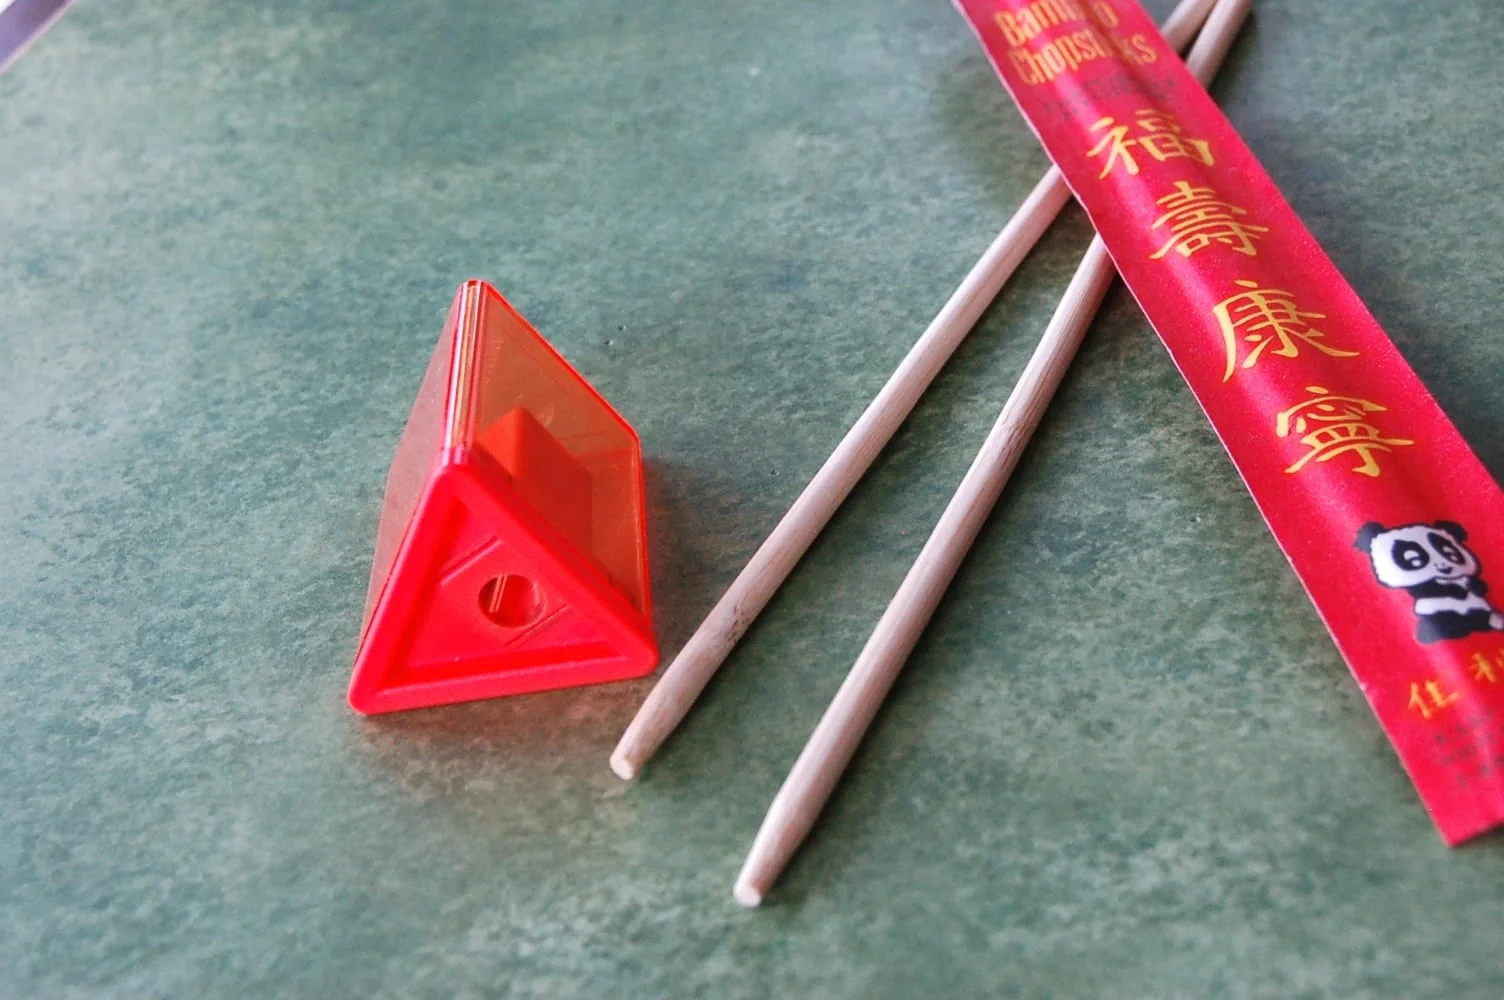
4.  Pencil Sharpener-  Short on skewers? Turn take-out chopsticks into skewers by using a pencil sharpener.

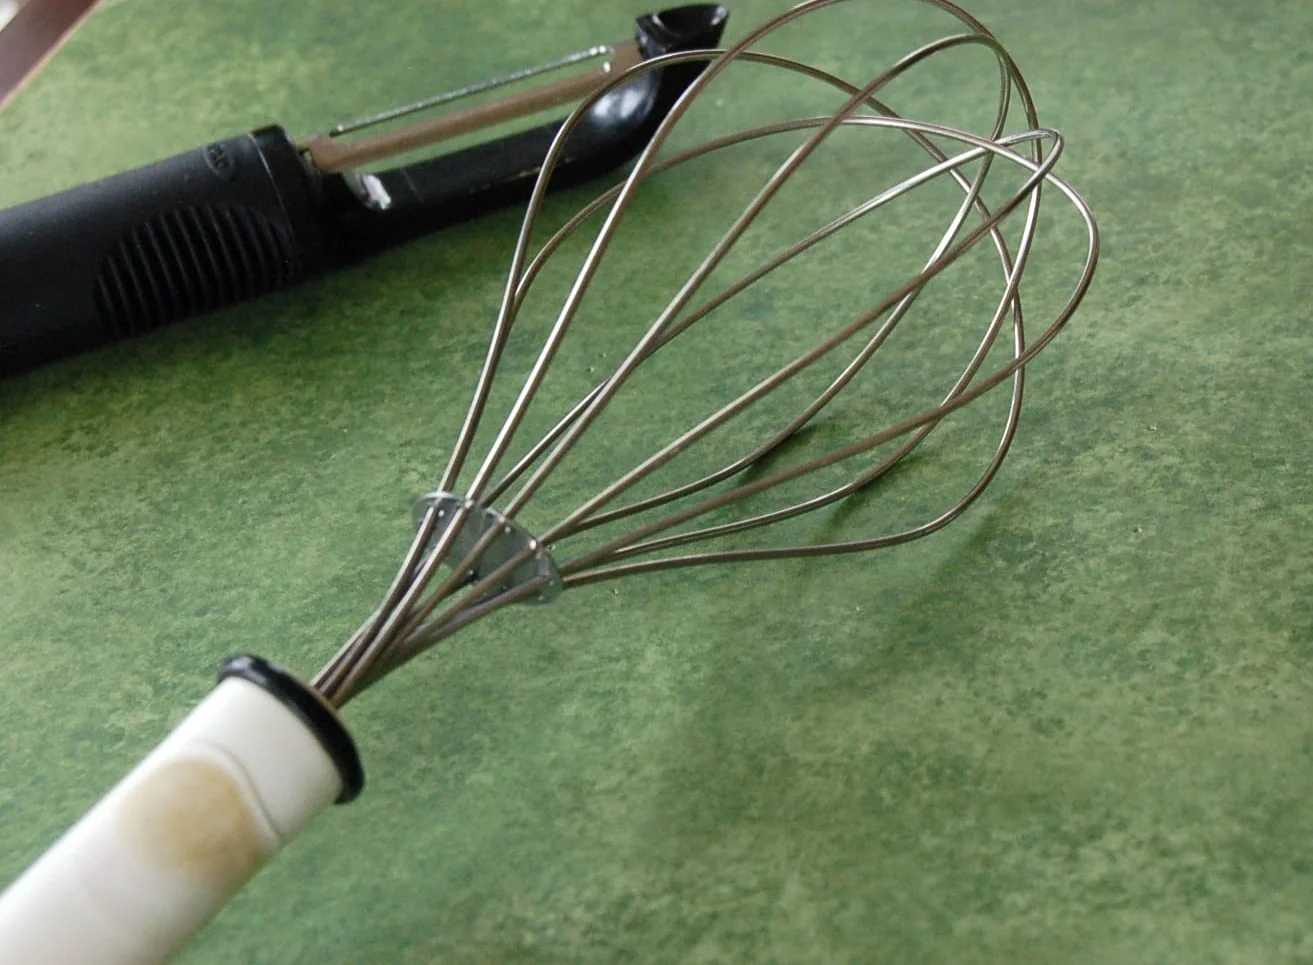
5.  Wire Wisk - Use a sturdy wire whisk in place of a pastry cutter.

6.  Coffee Filters- No parchment paper for a cake pan?  Use an 8 inch coffee filter (8-10 cup filter), flattened to line an 8 inch cake pan.

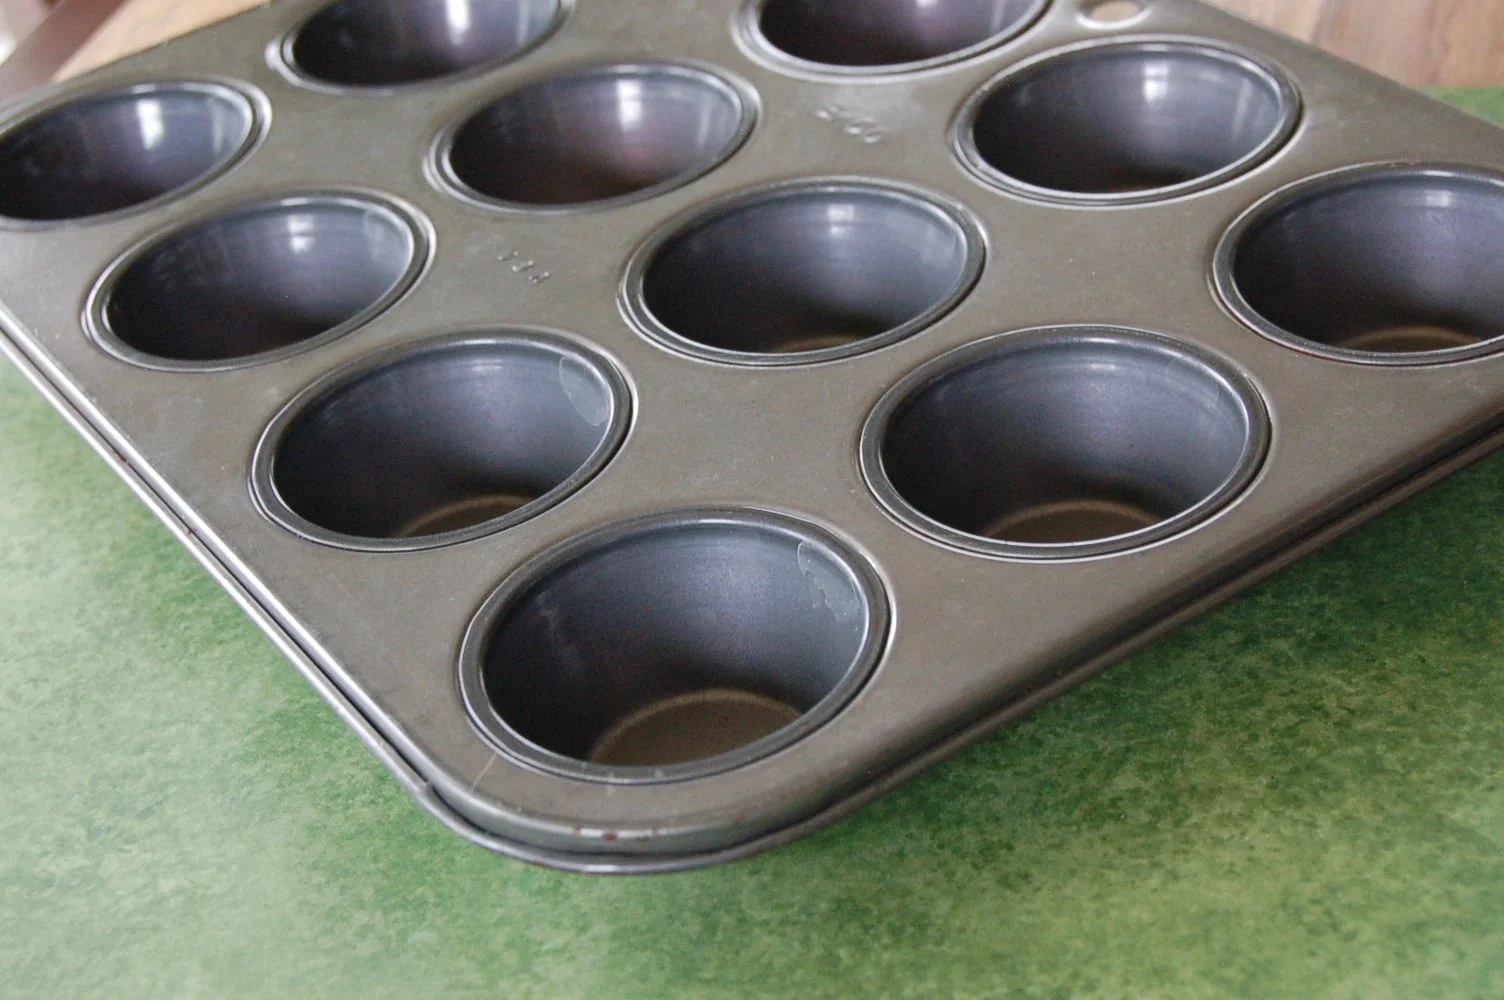
7.  Muffin Tins- Use a muffin tin with liners to store ingredients while you cook (Aka "Mise en Place"  (Having all your ingredients prepared and ready to use).  No more small bowls to clean (there are so many uses for muffin tins...that will have to be another blog).

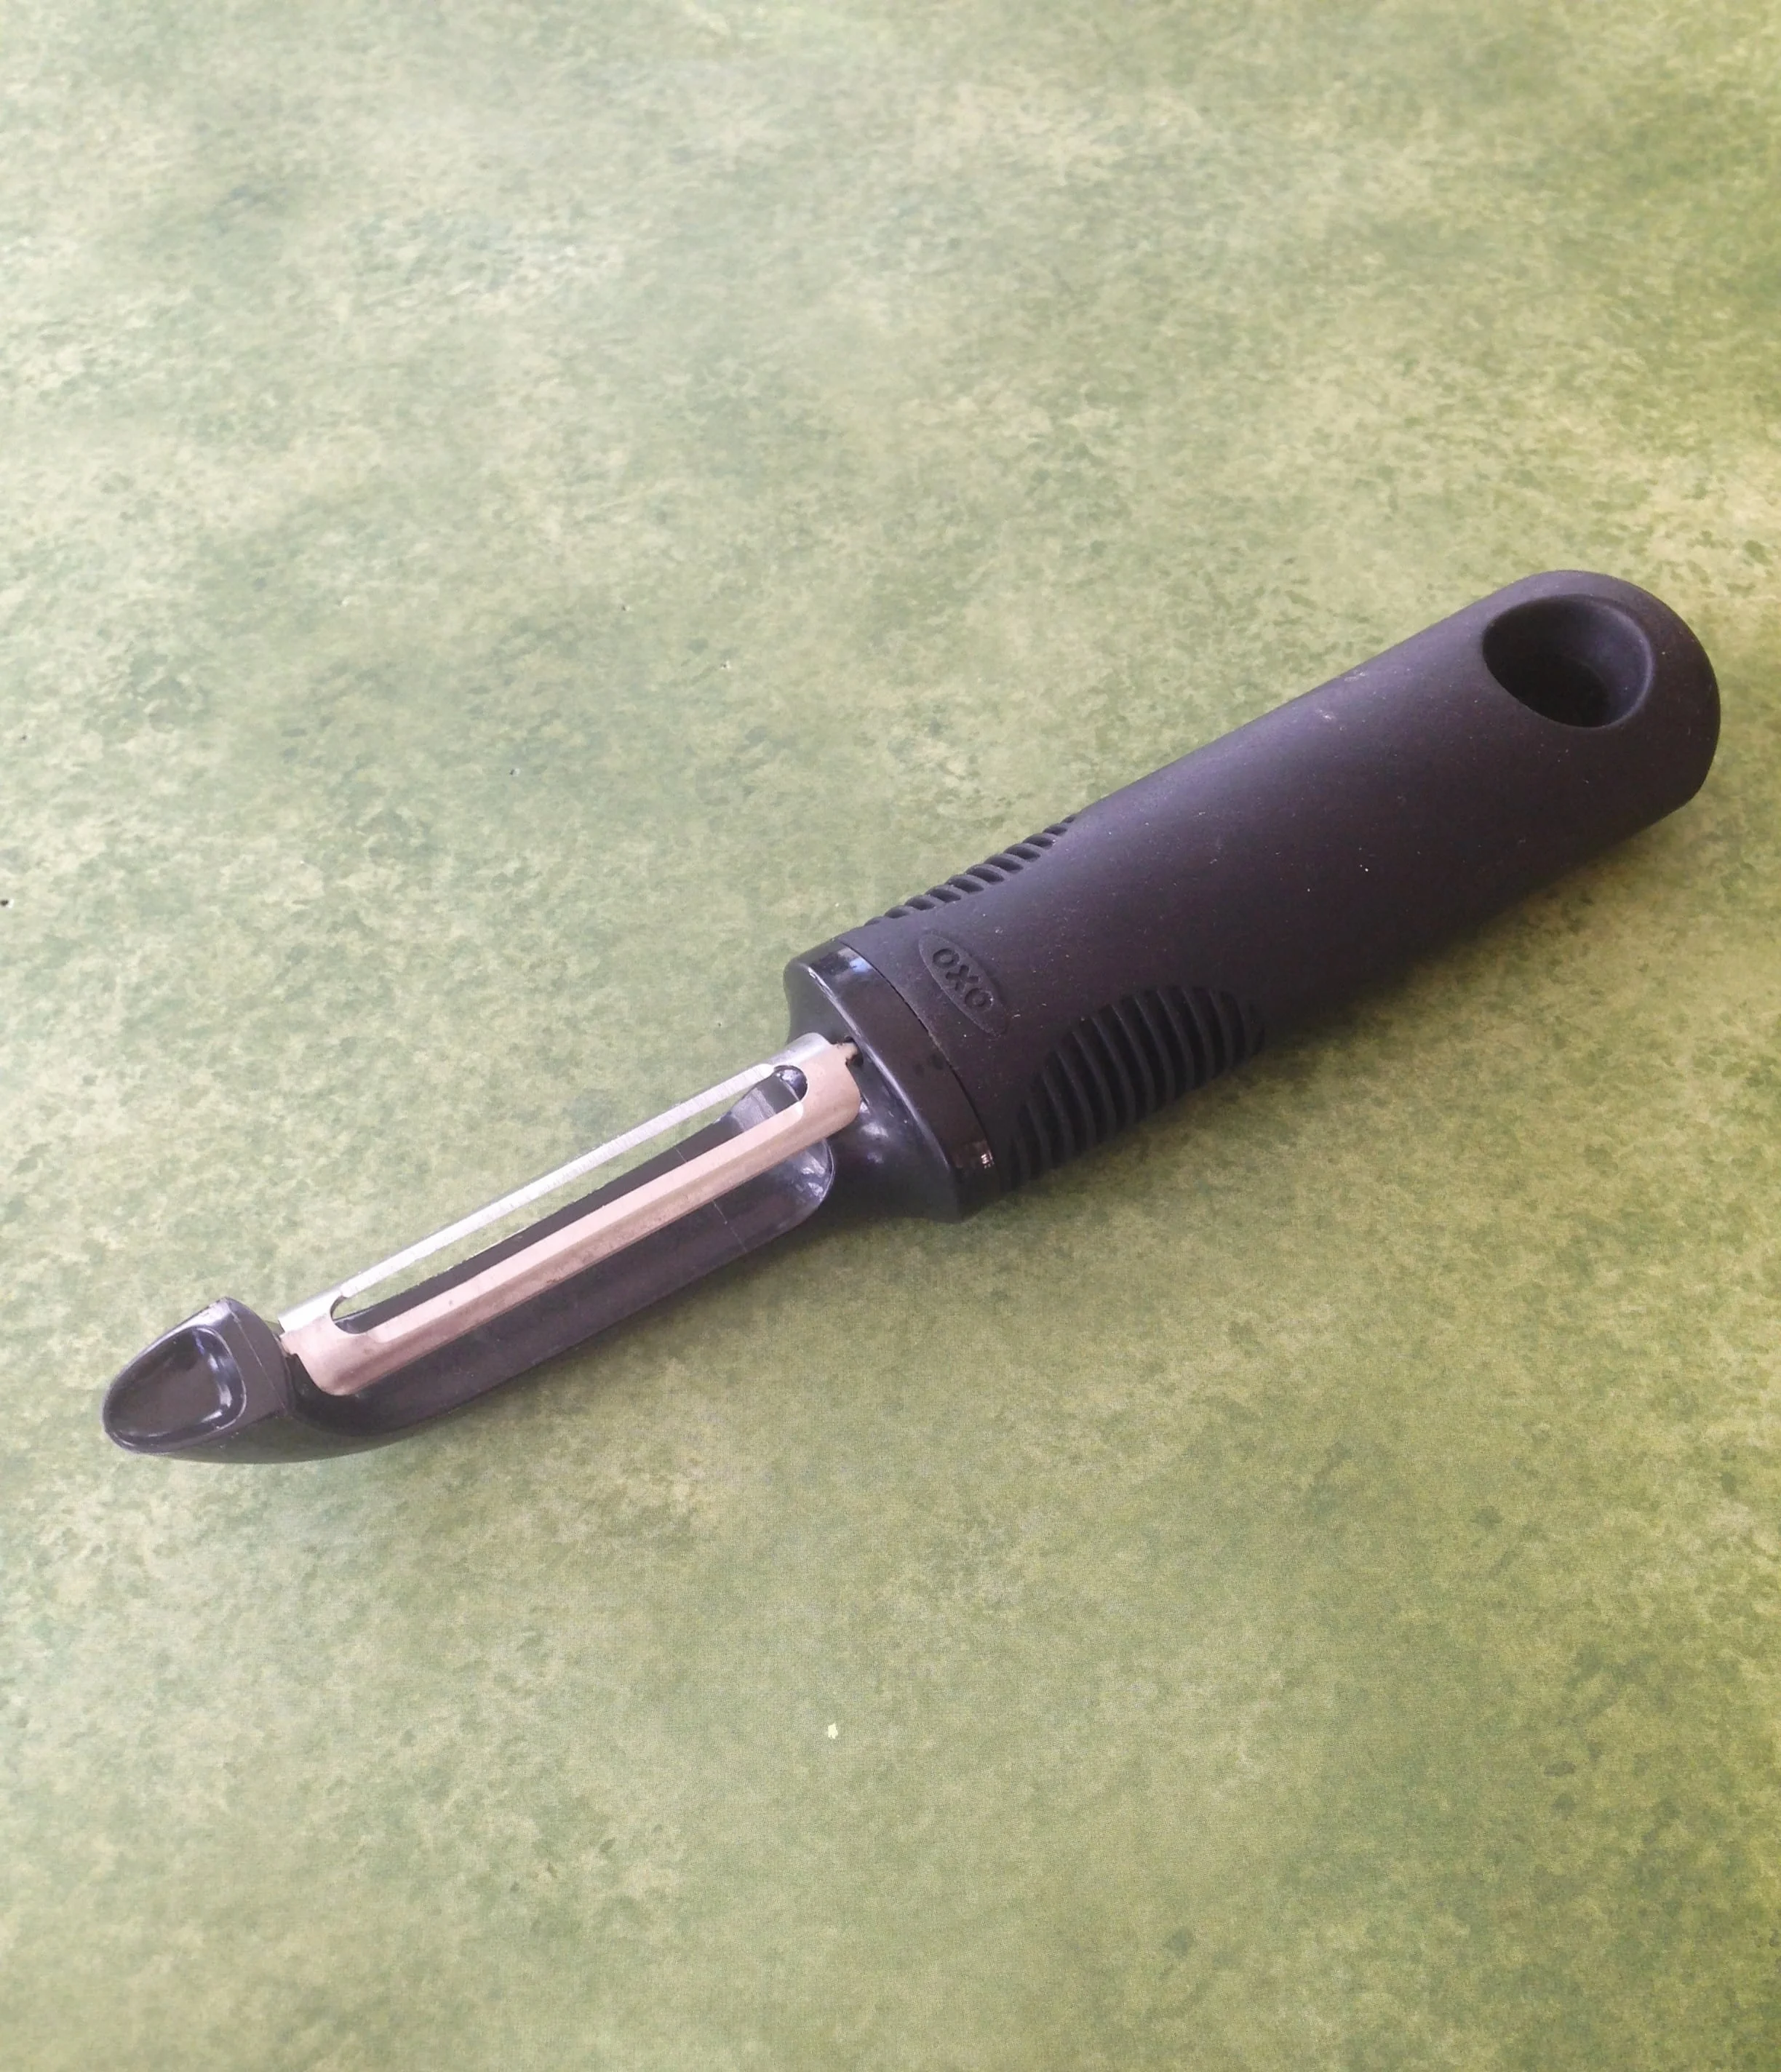
8.  Vegetable Peeler- Use a vegetable peeler to finely peel an onion

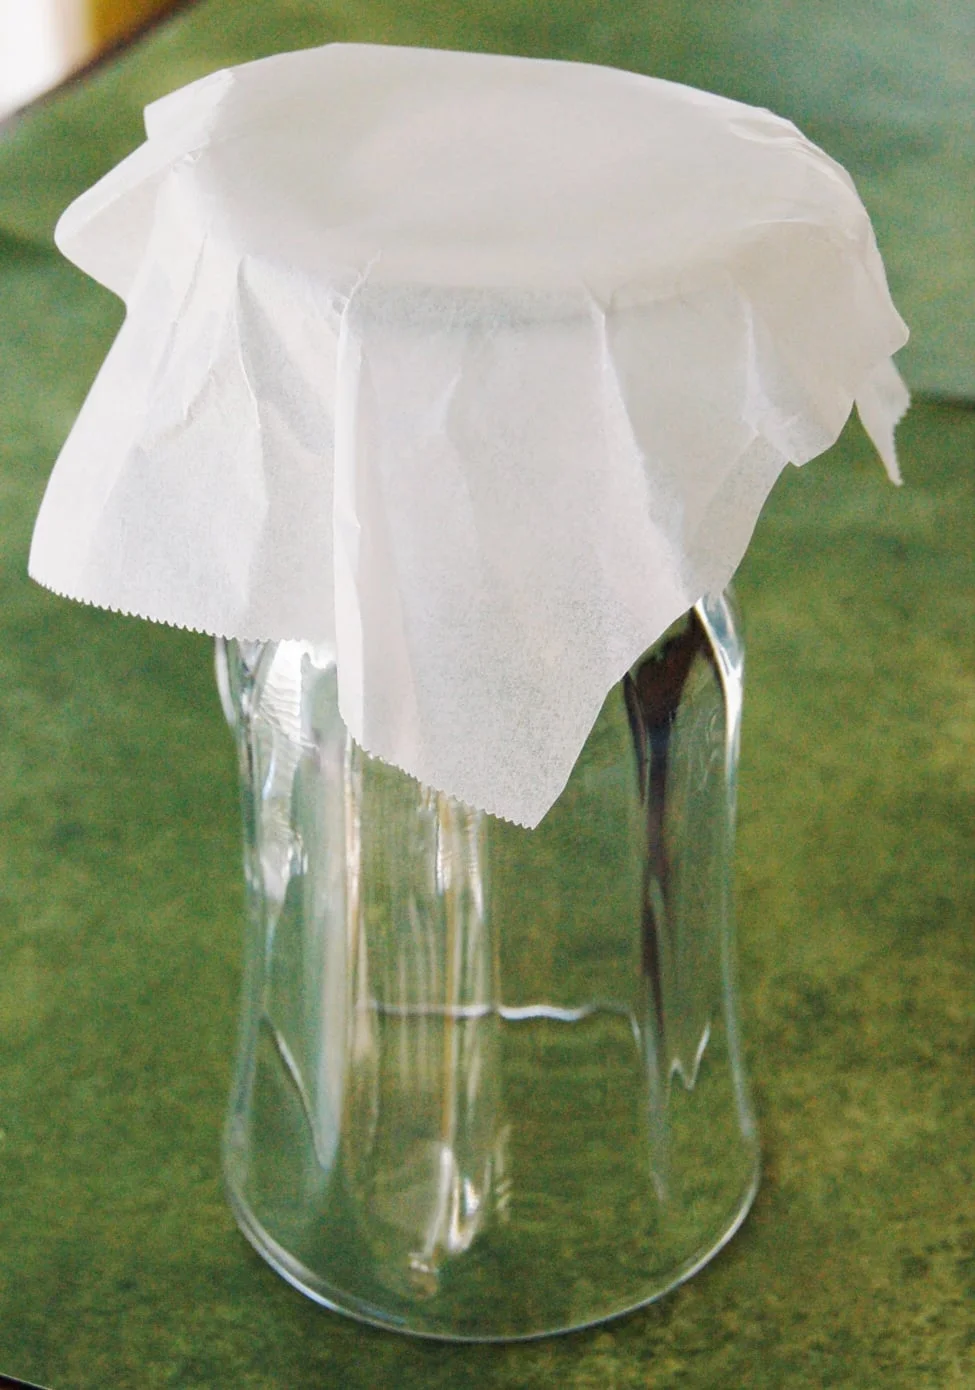
9.  Parchment Paper- Run out of muffin liners?  Use parchment paper.  Cut squares of parchment paper and mold over a glass.

10.  Grater- Cookies get a little brown?  Use a grater to gently grate off browned or burnt edges.

You ready to save time and money?  


Yum

Cherry Apple Tart Recipe

desserts, breakfast, snacksSheri Spallone2 Comments
Cherry Apple Tart Recipe

Cherry Apple Tart Recipe

Cook Time:  30 minutes  

Difficulty:  Easy

We have updated this post from a few years ago with fresh pictures and content.

Cook Time:  30 minutes 

Difficulty:  Easy

We have updated this post from a few years ago with fresh pictures and content.

We all need to unplug occasionally and spend quality time together as a family. Aside from game night, movie night, and puzzle night, cooking and baking together is another perfect family-enriching activity for all ages. Cooking and baking are easy, as they allow kids and parents to unplug and connect, and they are fantastic learning tools (they build math and reading skills, teach scientific concepts, enrich oral vocabulary, and so much more). We used these cooking moments to keep our children away from videos and television when they were younger.  

These rustic, tasty mini apple tarts are a fun way to get kids cooking in the kitchen and a great way to spend quality time together as a family. This recipe is forgiving and lends itself to any fruit on hand, including frozen fruit. (We have not tried this recipe with frozen fruit, but by all means, go for it and let us know how it worked out). We had apples that we needed to use, which were the fruit of choice, but instead of one pie, we made several mini tarts so everyone could take pride in their creations. 

I usually make this apple pie recipe with our Cherchies® Apple Butter Spread instead of sugar. Considering we had half-full jars of our butter spreads (AppleCherry, and Strawberry), we decided to use the ones we had on hand, and we created several different tarts with the chopped apples. The icing and the lemon zest at the end finished off this dessert nicely.  

So, if you're looking for a creative family activity, unplug the electronics and consider making these delectable Cherry Apple Pie Tarts with your loved ones to create some beautiful memories together. They are perfect as a tasty dessert, a delicious breakfast treat, or an after-school snack. 

Thanks for stopping by! Please comment below on your creations. We'd love to hear your ideas:). Come back again for more family-tested recipes, entertaining ideas, and cooking tips using all our favorite Cherchies® gourmet products.

Follow us on social media: Facebook, Instagram, and Pinterest.

* Note- I forgot to add the lemon zest when photographing these little tarts.  

Ingredients

Preparation

Chop apples into small chunks.  Place chopped apples into a large bowl and add half of the lemon juice. Mix apples to coat with lemon juice.  Add Cherchies® Cherry Butter Spread (I divided the chopped apples into three bowls and added a different butter spread to each bowl) and mix together.  Set aside.

Preheat oven to 400 degrees.  Line a large baking sheet with parchment paper. Remove pie dough from package and "smoosh" (ha!) the dough together until you have one ball of dough.  Separate dough into 6 equal portions (I was going to trace dough with a small bowl and cut out circles, but figured I'd have to reroll the scraps anyway).

Roll out individual dough balls into circles approximately 6 inch circles (it does not have to be perfect...this adds to the rustic factor).  Place rolled dough onto baking sheet.

Leaving about 1 inch around the edge of the dough, spoon apple mixture into center of dough.  Crimp edges around tart. Sprinkle tarts with cinnamon.  Bake tarts in the oven for about 30 minutes, or until crust is golden and apples are soft.

As tarts are cooking, prepare the glaze and the icing.   In one bowl, combine the Apricot Preserves and the remaining lemon juice.  In another bowl, combine the powdered sugar and water.  

Remove the cooked tarts from the oven and while the tarts are warm, brush them with the Apricot Preserves and the lemon juice mixture.  The final step is the icing and completely optional, as the tarts are delicious on their own, but I wanted to make them extras pretty for their "glamour shots".  Drizzle the icing when tarts are mostly cooled.

For other uses for apple butter, check out our blog, blog.cherchies.com.  Enjoy!

Yum

Our Top 20 Mustard Recipes

Sheri SpalloneComment

Cooking With Mustard- Our Top 20 Mustard Recipes

Mustard...it's not just for hot dogs anymore.   

The uses for mustard are endless. Mustard can be a flavor enhancer to many dishes, a thickener to stews and casseroles, an emulsifier for vinaigrettes, a base for sauces, a glue to adhere bread crumbs in lieu of eggs, a secret ingredient for bbq sauces, and so many more uses.

Our company began with an amazing jar of gourmet mustard, Cherchies® Champagne Mustard.  Since 1978, our award-winning mustards have been spicing up kitchens around the world. Our signature mustard is our Cherchies® Champagne Mustard, but we also have two newer mustards, our Cherchies® Hot Banana Pepper Mustard and our Cherchies® Cranberry Mustard.  

Here's why we love our gourmet mustards and of course, why we love you:) "Cherchies Champagne Mustard is a "must have condiment" if you are a cook, (serious or not), as it goes with just about everything, The champagne of Champagne Mustards. Toni C."

We thought you'd enjoy 20 of our favorite mustard recipes.  Like our mustards? Check out our blog or our website for a Cherchies® Retailer near you.  We would love to hear your favorite uses of our mustards.

Sign up for our newsletter on our website www.cherchies.com for weekly specials on our products (Pssst...our Champagne Mustard is on sale this Friday, January 8, 2016).  

Yum

Peachy Sweet and Sour Chicken Recipe

entrees, gluten free, leftoversSheri Spallone2 Comments
Peachy Sweet and Sour Chicken Recipe

Peachy Sweet and Sour Chicken Recipe

Cook Time:  30 minutes

Difficulty:  Easy

As a busy mom of three, weeknights are often hectic with homework, after-school activities, etc., and dinnertime can be challenging. I love when a recipe comes together, sometimes out of necessity. It all started with a jar of Cherchies® Vidalia Onion Peach Salsa

I'm not a fan of wasting food; I'm known for turning yesterday's leftovers (my children are leftover snobs, maybe it's the word "leftovers") into tonight's masterpiece.

I had many peppers (not exactly my children's favorite vegetable) leftover from New Year's and wanted to create something quick, easy, and delicious. I figured if I disguised the peppers in a tasty sauce (my family loves our peach salsa), they'd eat them. It worked (they even ate the peppers!) I added chicken to the peach salsa sauce, served it over rice, and presto, dinner was ready in 30 minutes.

So grab a jar of Cherchies® Vidalia Onion Peach Salsa, a deliciously spiced and perfectly balanced sweet and savory condiment, and turn dinner into a flavor-packed, quick, and easy dish. Your family may even eat their peppers and ask for seconds (gasp! Mine did).

Comment below if you made this delicious recipe. Thank you for visiting. Please come back again.

Ingredients

  • 1 package of chicken breasts, chopped into 1 inch chunks

  • 1 red, yellow, and green pepper, roughly chopped (I had some orange peppers leftover, so I added them)

  • 1 small onion, roughly chopped

  • 1 Tablespoon (Tbsp) Cherchies® Garlic Seasoning (Could substitute Cherchies® No-Salt Garlic and Herbs Seasoning)

  • 1/2 teaspoon (tsp) pepper

  • 2 Tablespoons (Tbsp) Olive oil (Could use coconut oil)

  • 1 Tablespoon butter

  • 1 jar of Cherchies® Vidalia Onion Peach Salsa

  • 1 Tablespoon (Tbsp) soy sauce

  • 1 Tablespoon (Tbsp) cornstarch

  • several drops of hot sauce (to taste)

  • 2 Tablespoons (Tbsp) Orange juice

  • 1/2 teaspoon (tsp) chicken bouillon (we used Minor's Chicken base -Gluten free)

  • 2 cups cooked rice (optional- I snuck in brown rice 2:1 for my family...they didn't even flinch)

Preparation

Roughly chop the peppers and onion.  Set aside.

Dice chicken into 1 inch chunks. Place chicken chunks into a large bowl and season chicken with Cherchies® Garlic Seasoning and pepper, mixing to ensure all the chicken is coated.  Wash the bowl.

Turn stove onto medium, add 1 Tablespoon of olive oil to a large skillet, and cook the chicken until almost cooked through (20 minutes or less depending on size of chicken chunks). Turn off stove and return chicken to bowl.  Set aside.  

In same skillet, turn stove back onto medium and add onions and peppers.  Cook until peppers and onions are soft and onions are translucent.  Add butter to pan.  

Add salsa, soy sauce, hot sauce, bouillon, and orange juice.  Stir to combine.  Return chicken to pan with vegetables.  Sprinkle on cornstarch.  Stir and cook for a couple more minutes.  Mixture will thicken.  

Serve over rice.  (chia̍h hok) - Eat well, enjoy good food!

Peachy Sweet and Sour Chicken Recipe

Yum