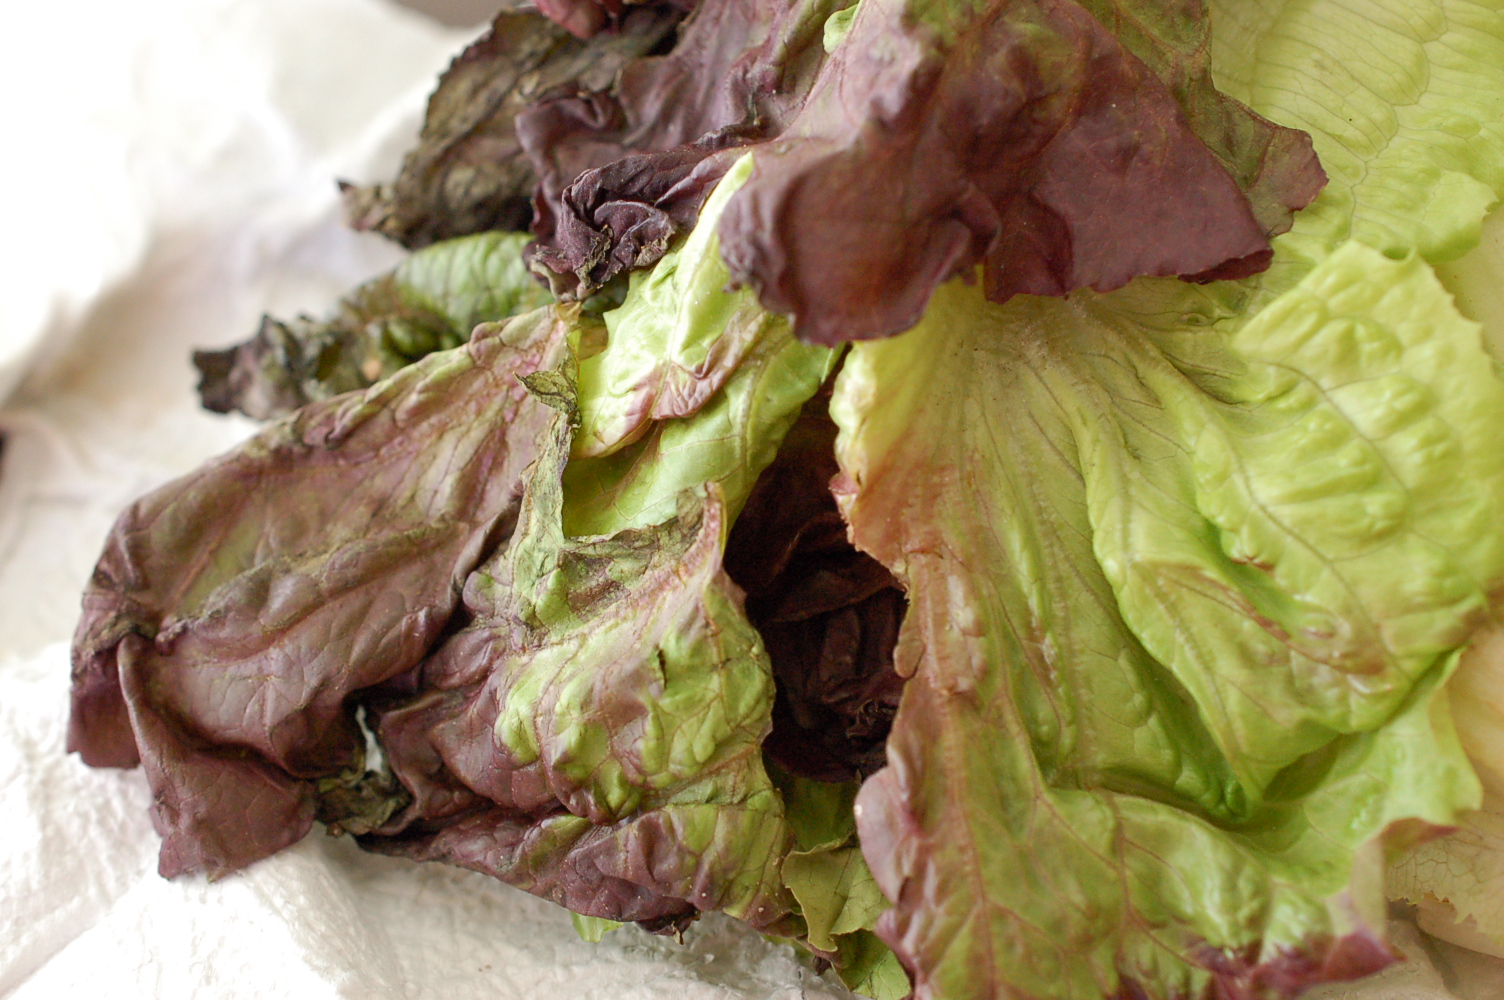
Cooking Tip- How To Revive Wilted Lettuce
Poor sad wilted lettuce, it didn't ask for this! I hate wasting food, don't you? I picked up a glorious head of lettuce two days ago, forgot about it, and when I returned to fulfill my salad quest, the lettuce looked at me and begged, "Please make me pretty again."
My friends, not all is lost (except for the fact my lettuce is talking to me...that's creepy;) There is a simple solution to reviving most greens on a "stalk", such as lettuce, kale, celery, broccoli, swiss chard, etc. Water!
Simply place your wilted greens in a large bowl, add water, ice, and allow the lettuce to chill in the refrigerator for a couple of hours. I've read that some add lemon juice, but I don't feel that is necessary. This system has always worked for me, and "if it's not broke, don't fix it", right?

After a couple of hours, remove your lettuce from the bowl, lay it out on paper towels, and gently roll up the paper towel with the lettuce. Place the lettuce in a resealable bag and place back in the refrigerator. Your lettuce should remain "pretty" for a couple more days. *Note: This method does not work well for those boxed mixed greens.
So now you have the tools to revive your wilted greens when they start talking to you. Ha!